


This tutorial will show how to set up the ExpressVPN app on Windows 10 and Windows 11.
Jump to…
Download the app
Get your activation code
Install the app
Sign in and set up the app
Connect to a server location
Disconnect from the server location
Choose a different server location
Switch to a different protocol
Lightway Turbo
Block ads, trackers, and harmful sites
Speed test
Launch and connect ExpressVPN on startup
Use split tunneling
Use internet kill switch
Set up auto-connect
MCP server
Enable compact mode
Change languages in the ExpressVPN Windows app
Change app appearance
Uninstall the app
Download the app
To download the ExpressVPN app for Windows:
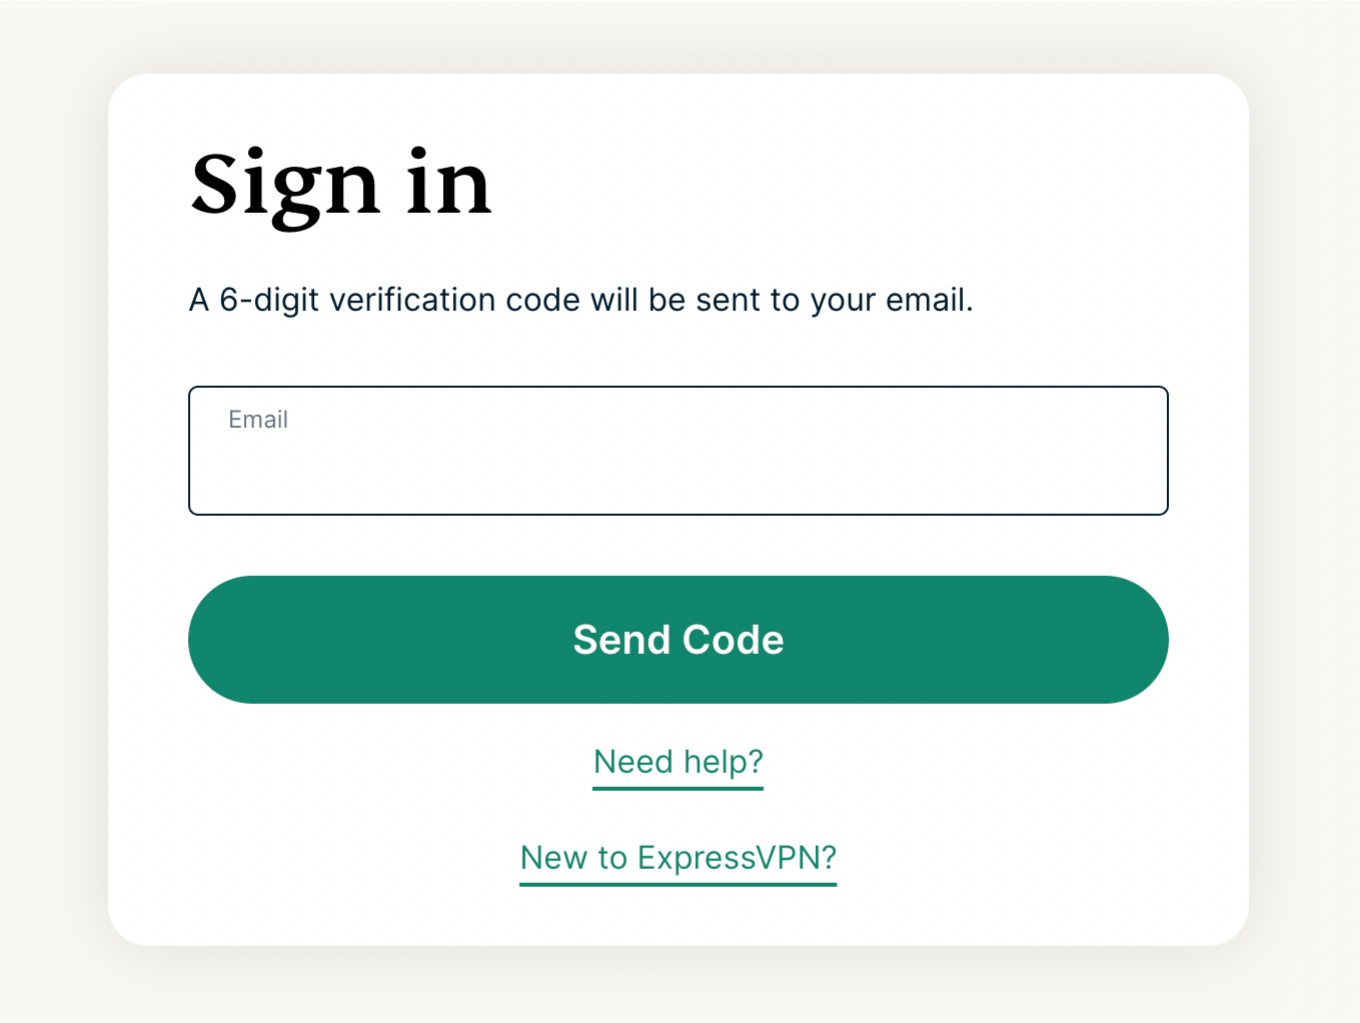
- Go to the ExpressVPN+ setup page. If prompted, enter your ExpressVPN email and select Send Code. Enter the verification code sent to your email, then select Continue.


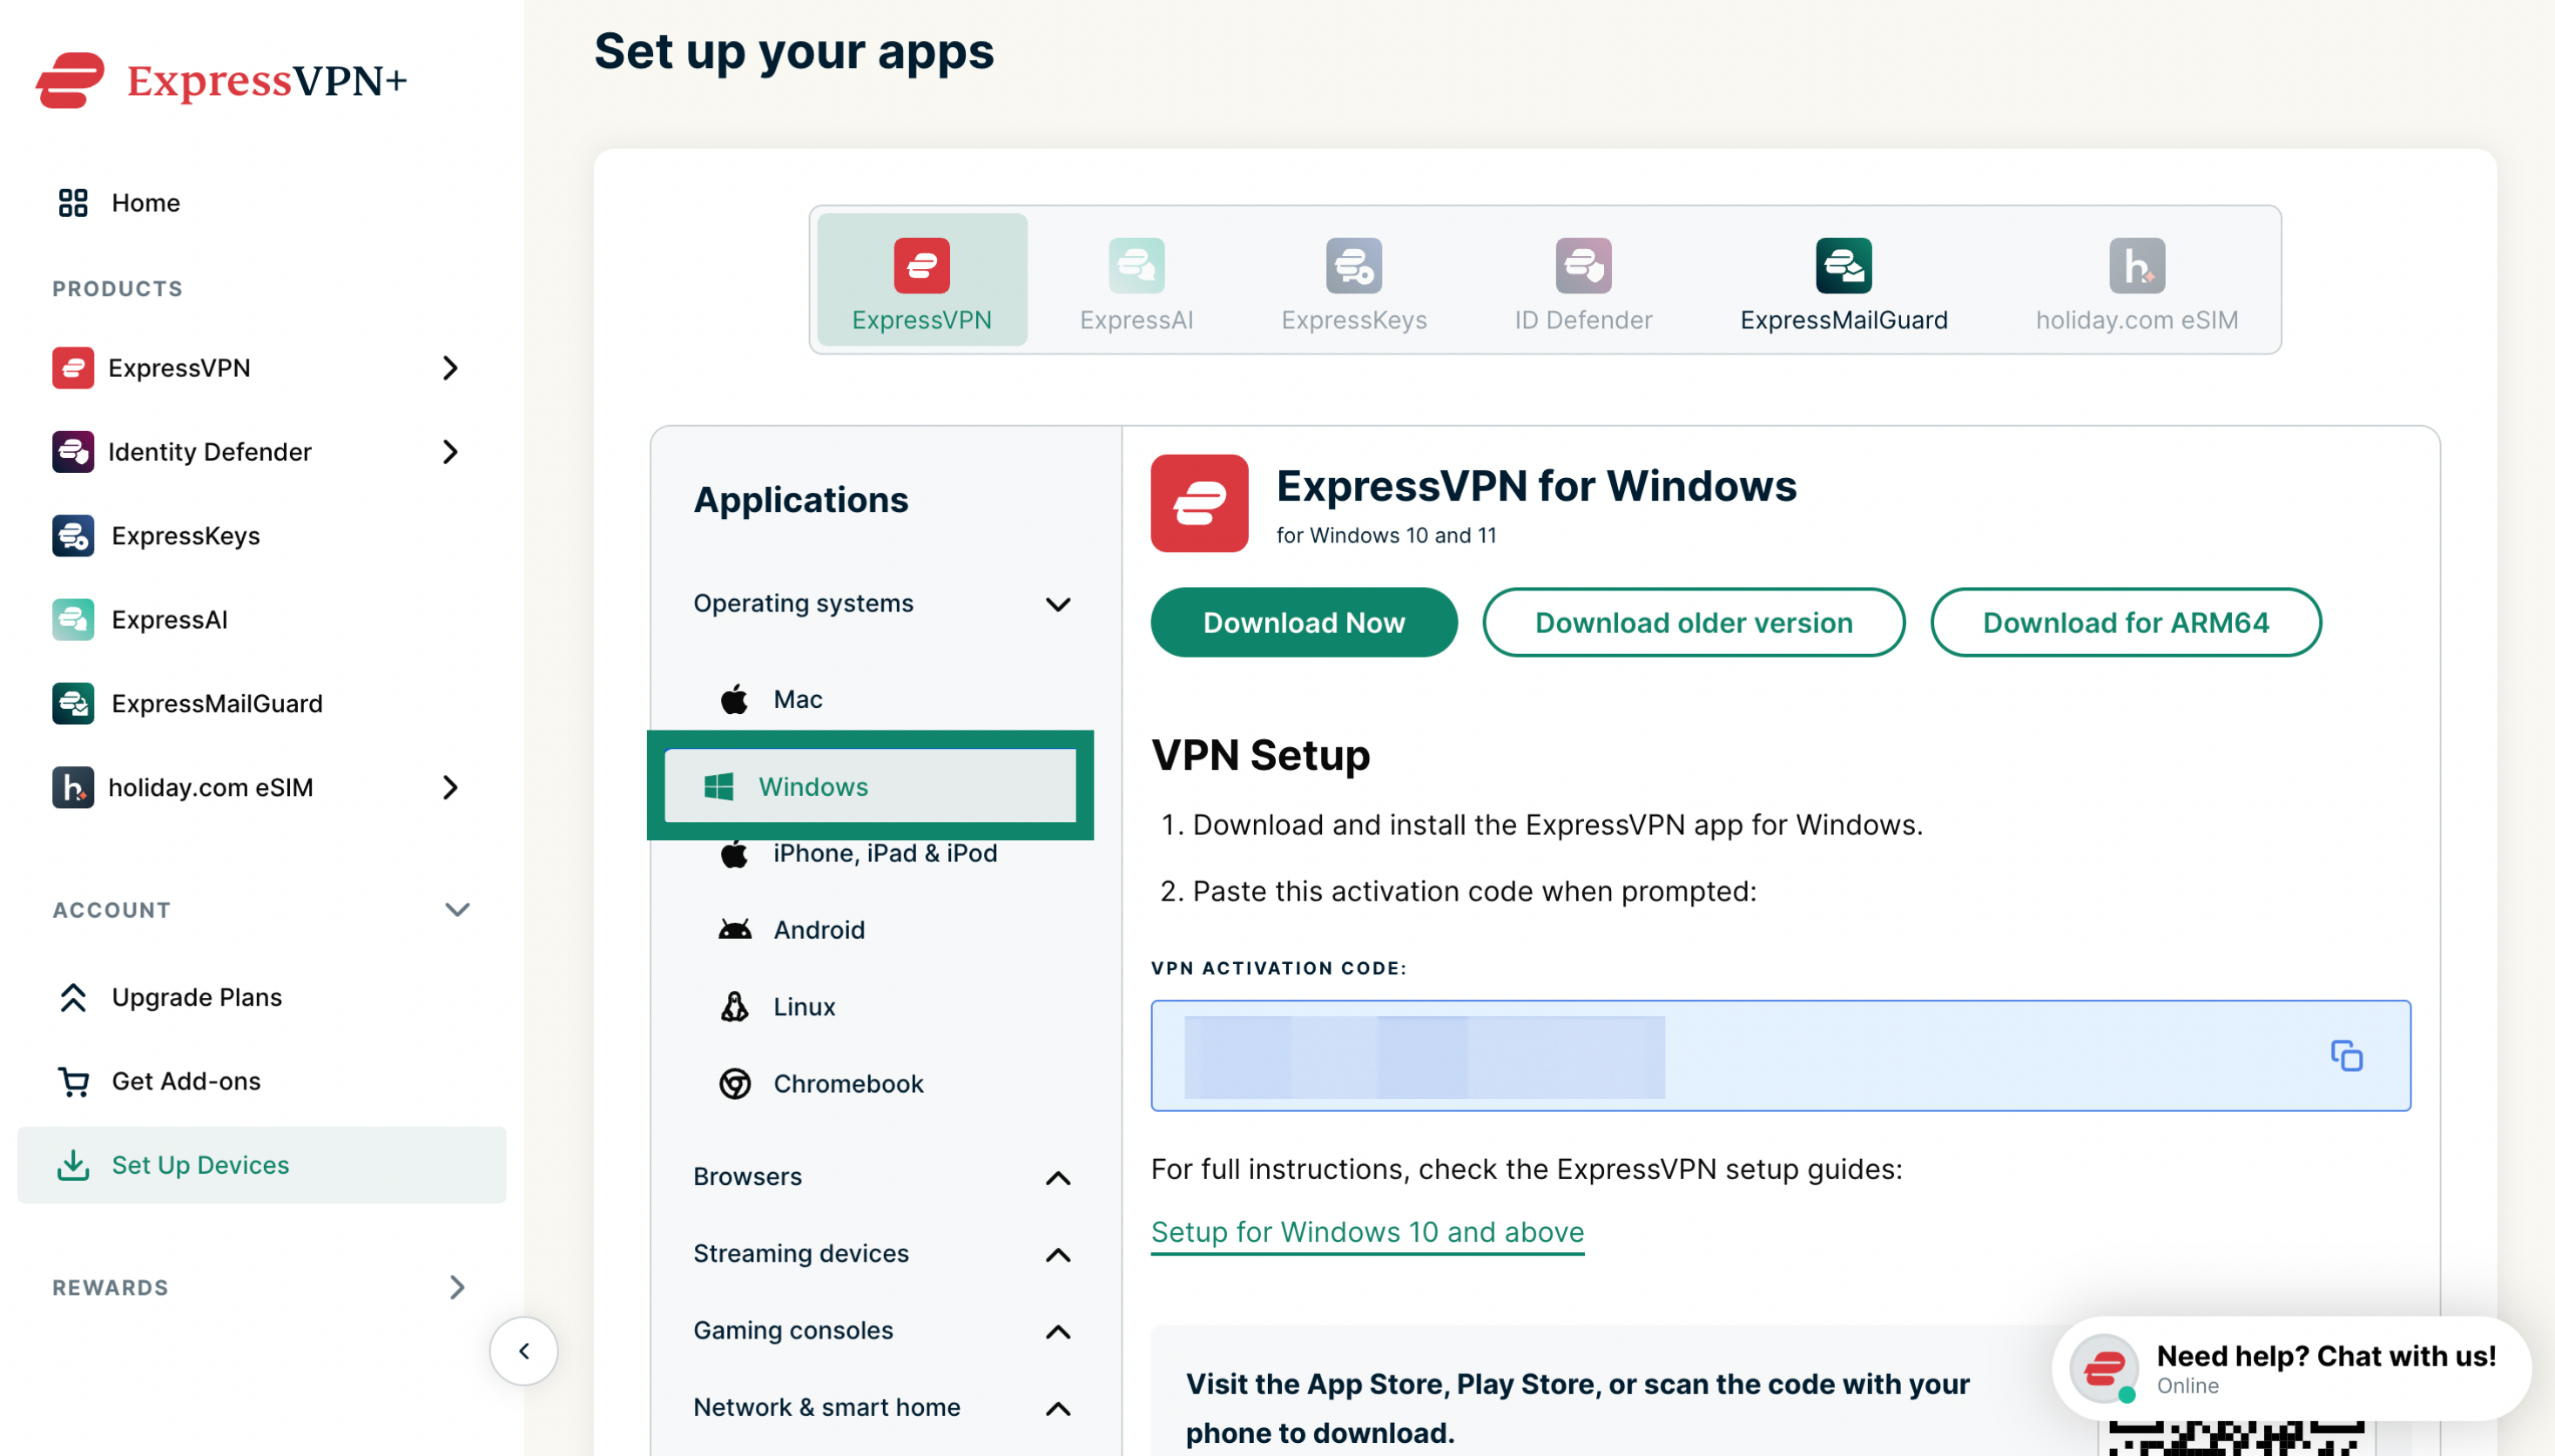
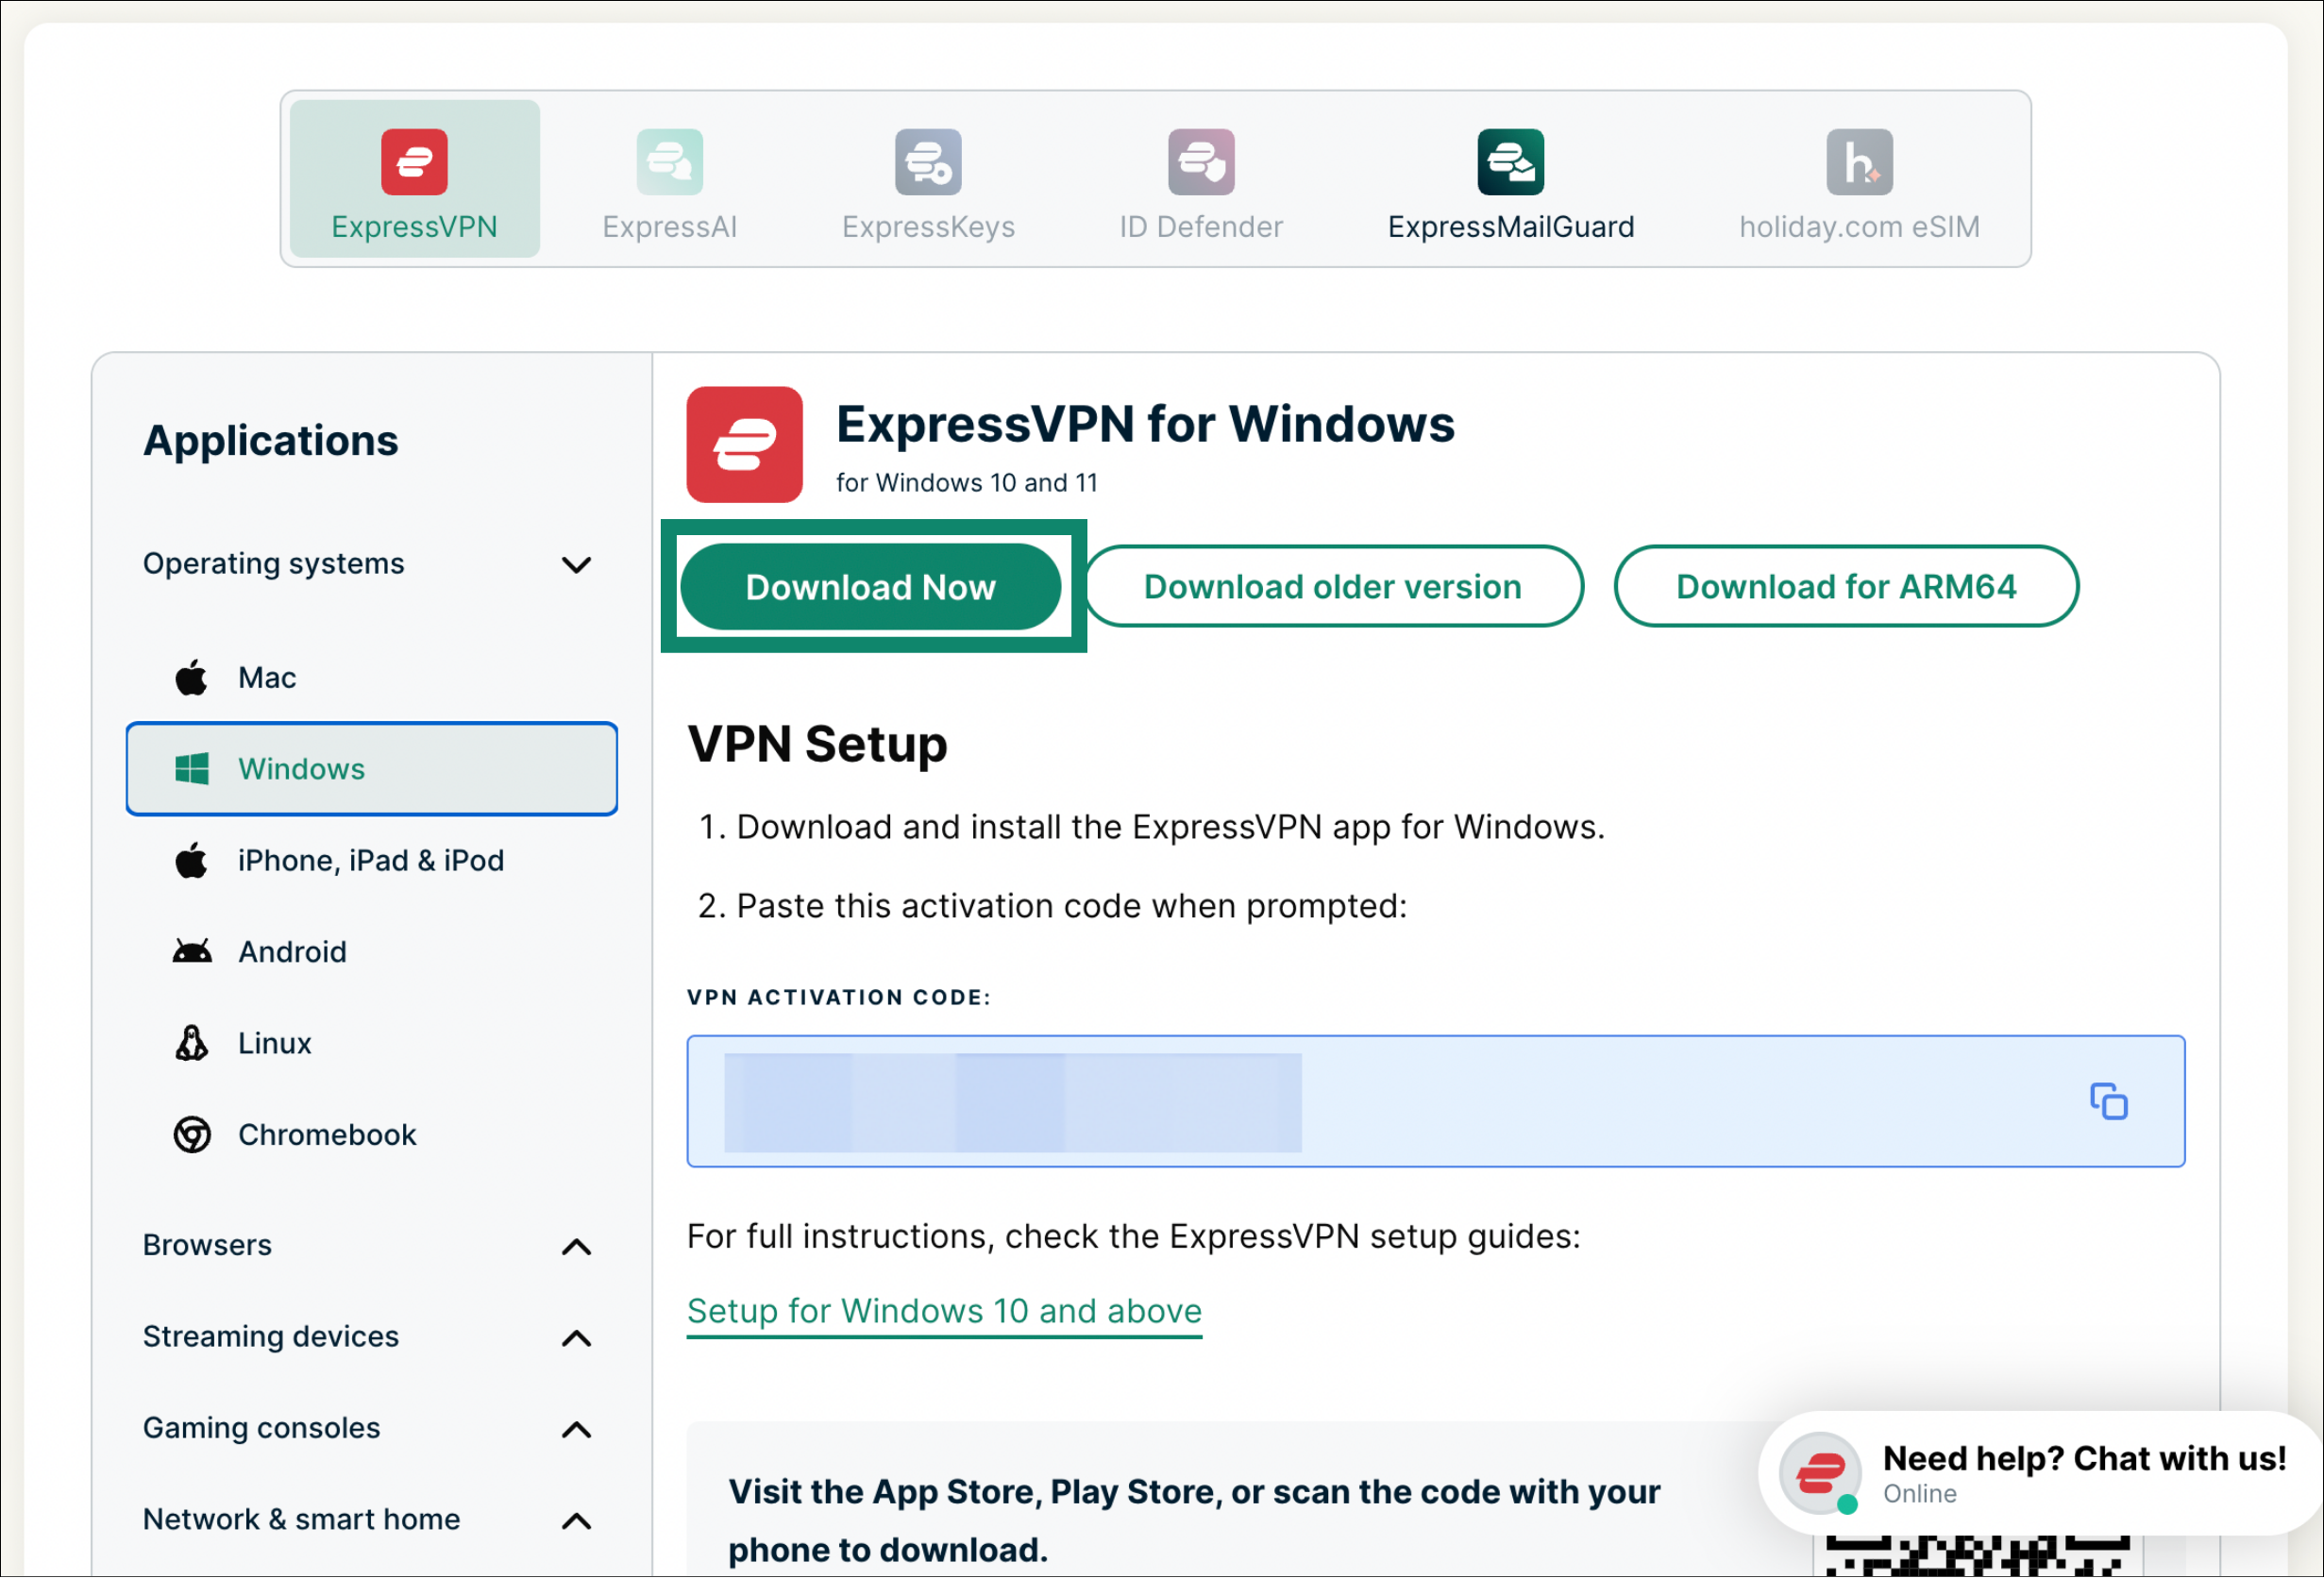
- Under Applications > Operating systems, select Windows.


- Select Download Now.
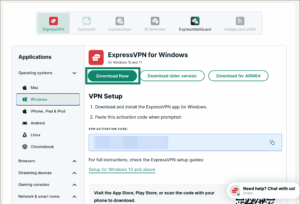

Keep this browser window open. You will need the activation code for the setup later.
Need help? Contact the ExpressVPN Support Team for immediate assistance.
Get your activation code
On the same page where you downloaded the app, locate the VPN Activation Code field and click the copy icon to copy the code to your clipboard.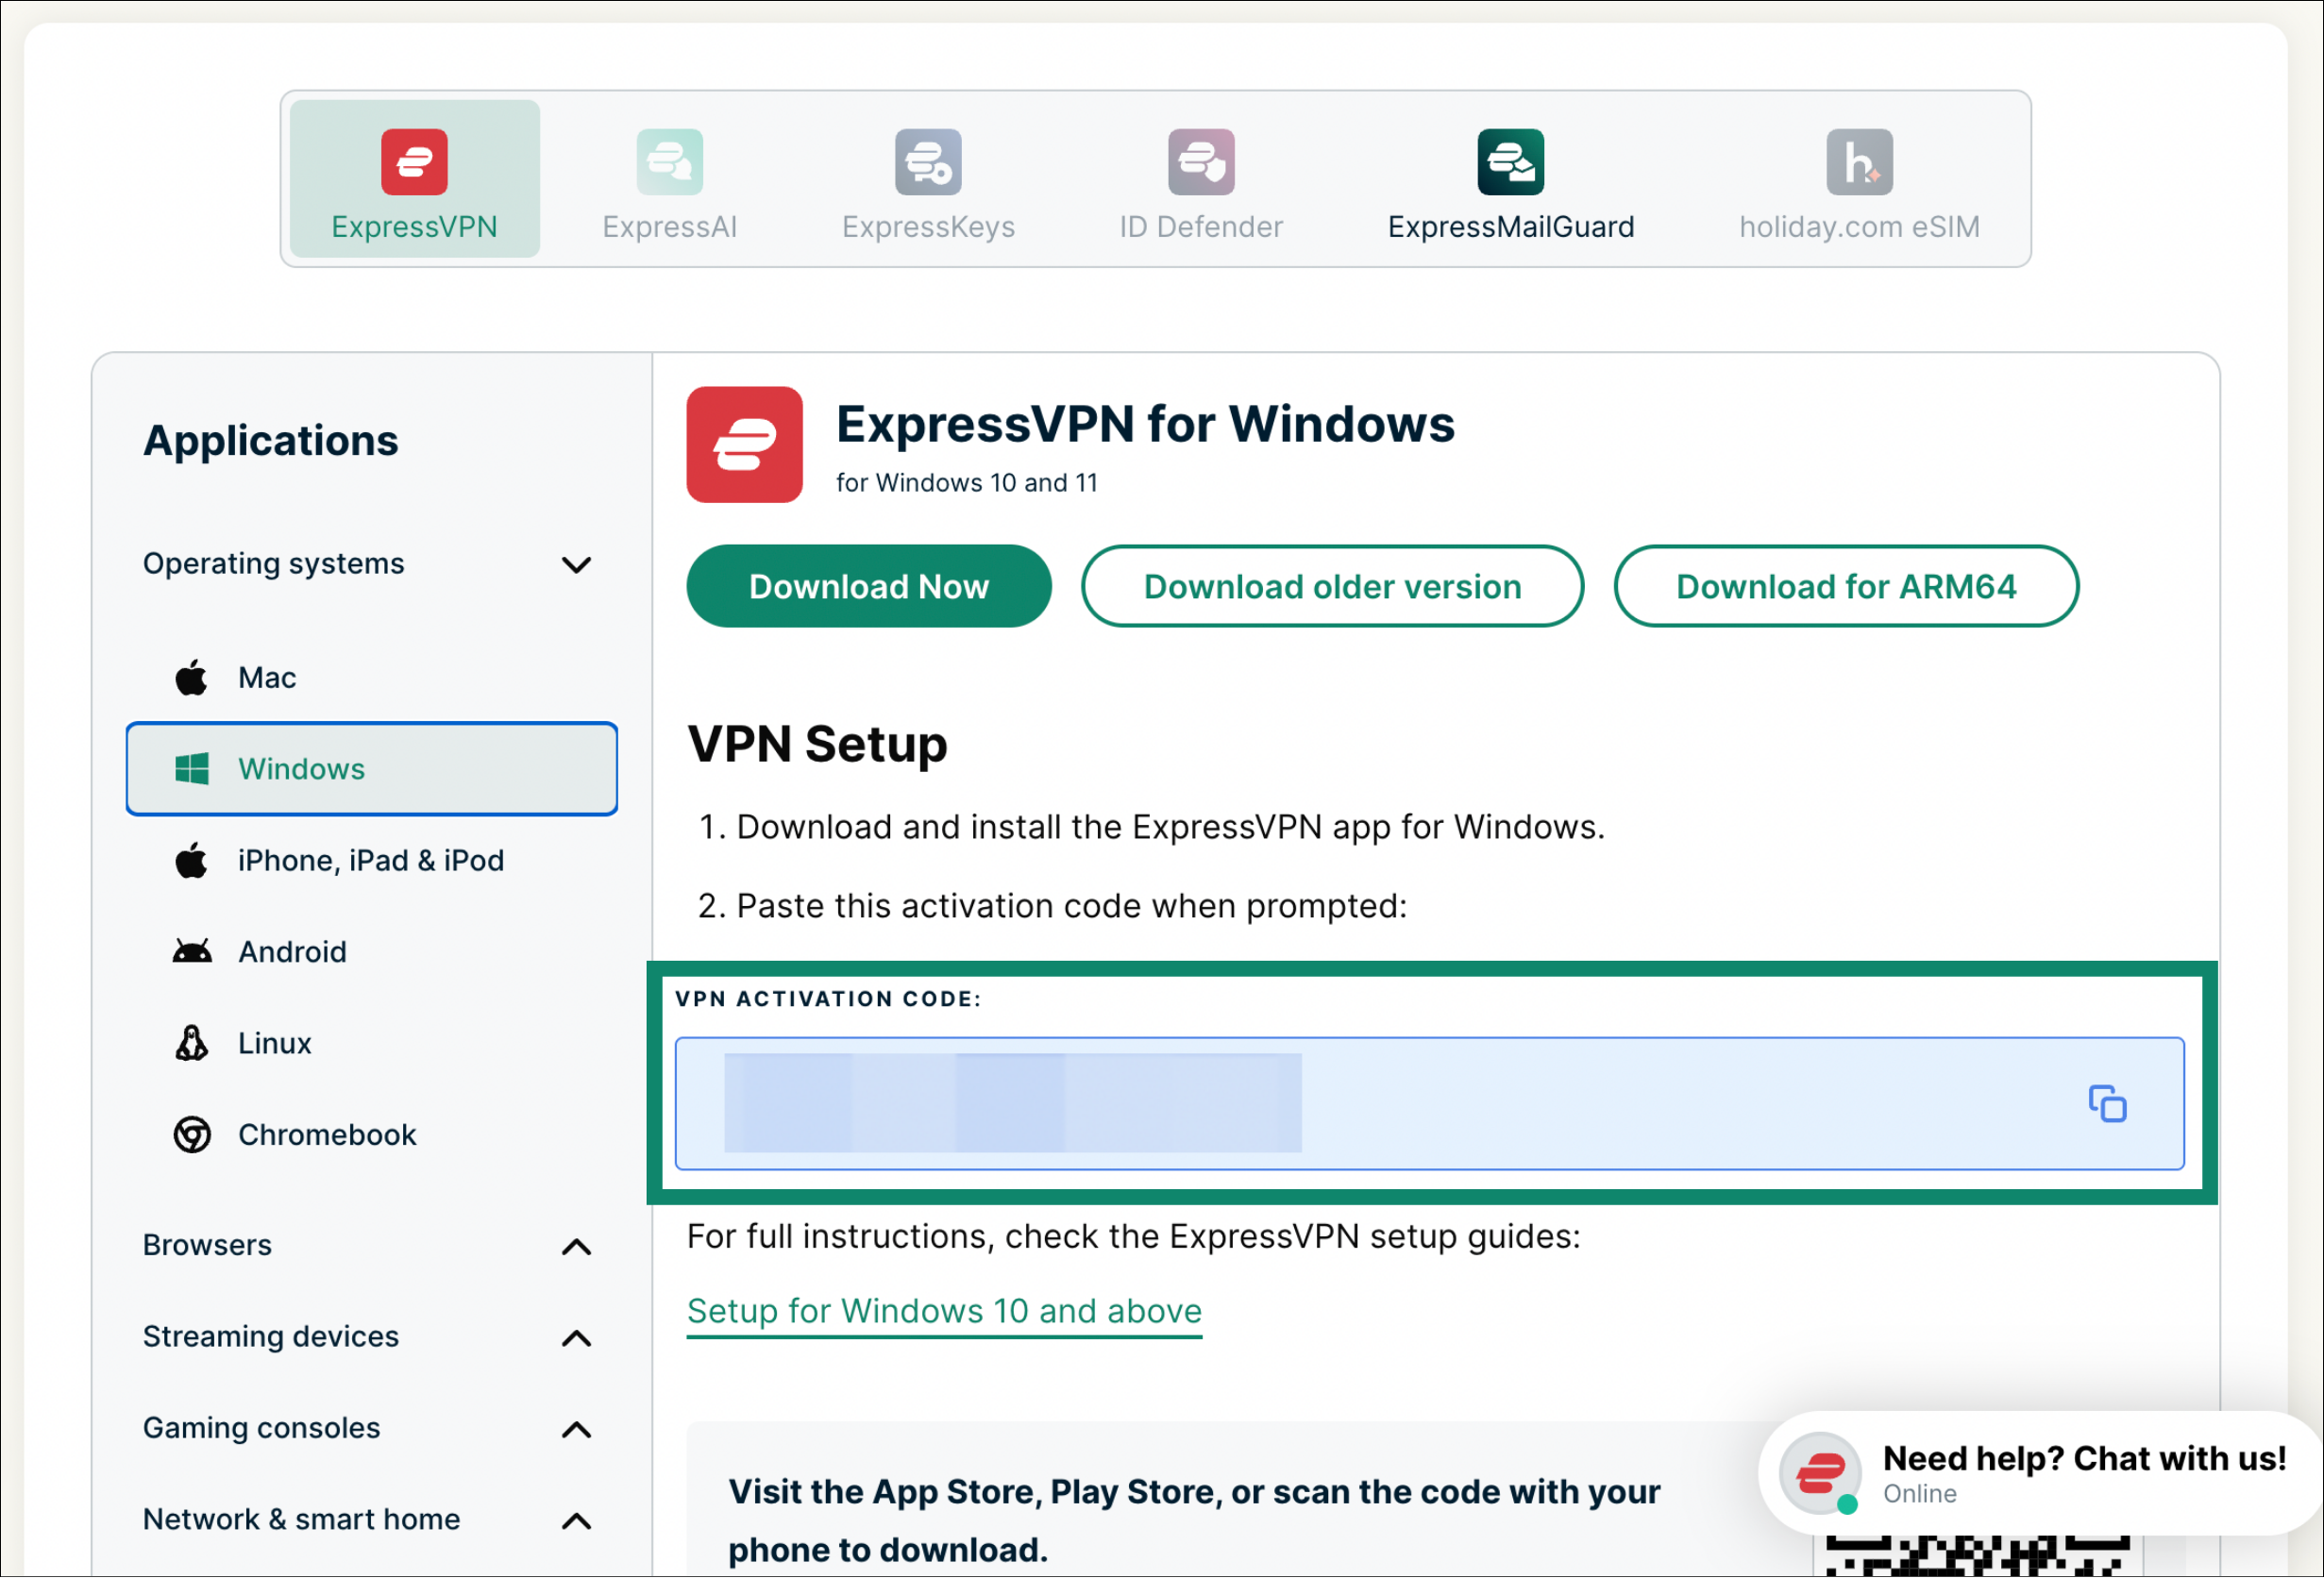
Need help? Contact the ExpressVPN Support Team for immediate assistance.
Install the app
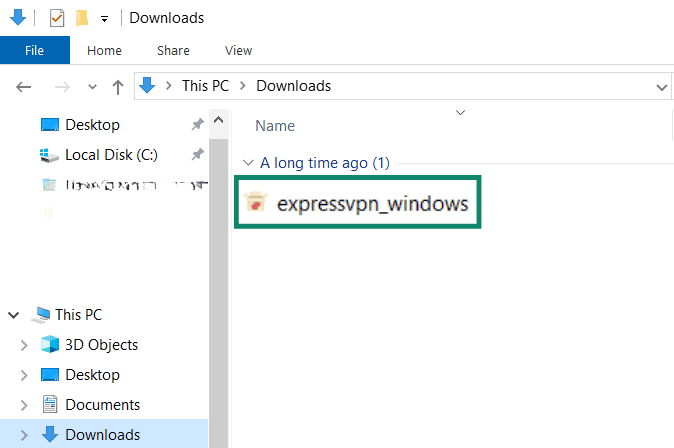
To install the ExpressVPN app for Windows:
- Locate and double-click the download file on your computer.

- You’ll see a prompt asking you to allow the app to make changes to the device. Click Yes.
- Wait while the app is being installed on your PC.
- Once installation is complete, the app will open automatically.

Need help? Contact the ExpressVPN Support Team for immediate assistance.
Sign in and set up the app
To sign in to and set up the ExpressVPN app for Windows:
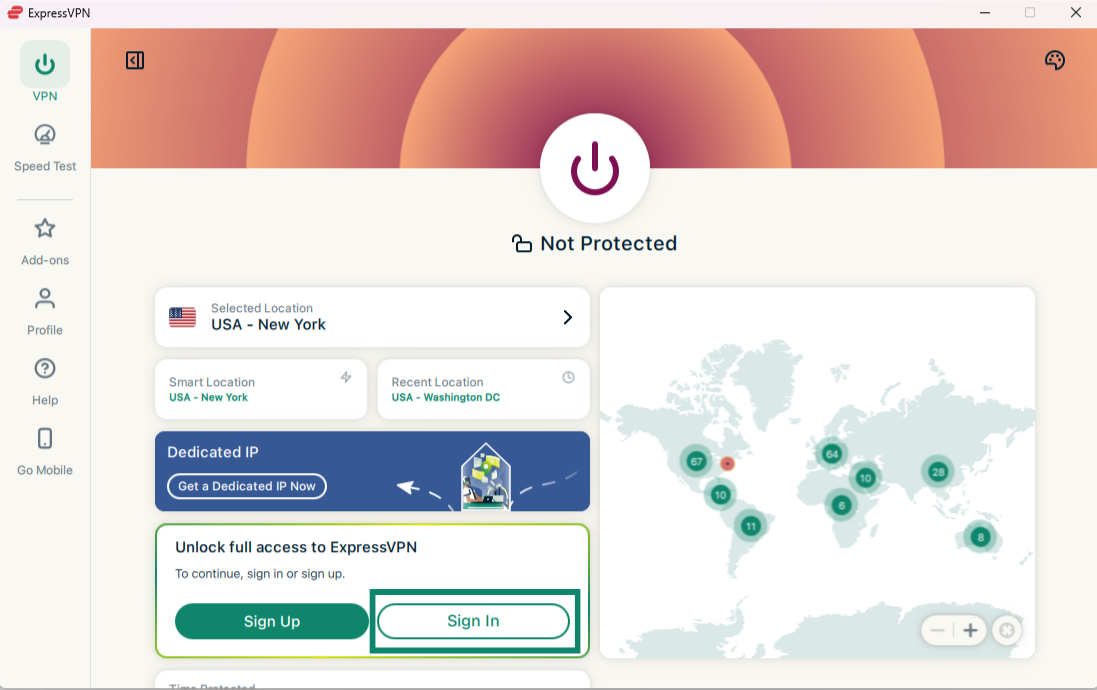
- Open the app (or wait for the app to open automatically once installation is complete) and click Sign In.


- There are three ways to sign in to the app:
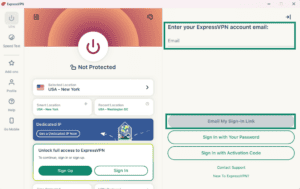
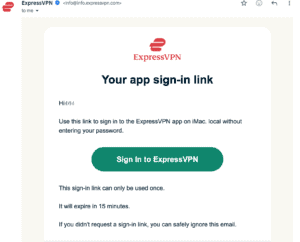
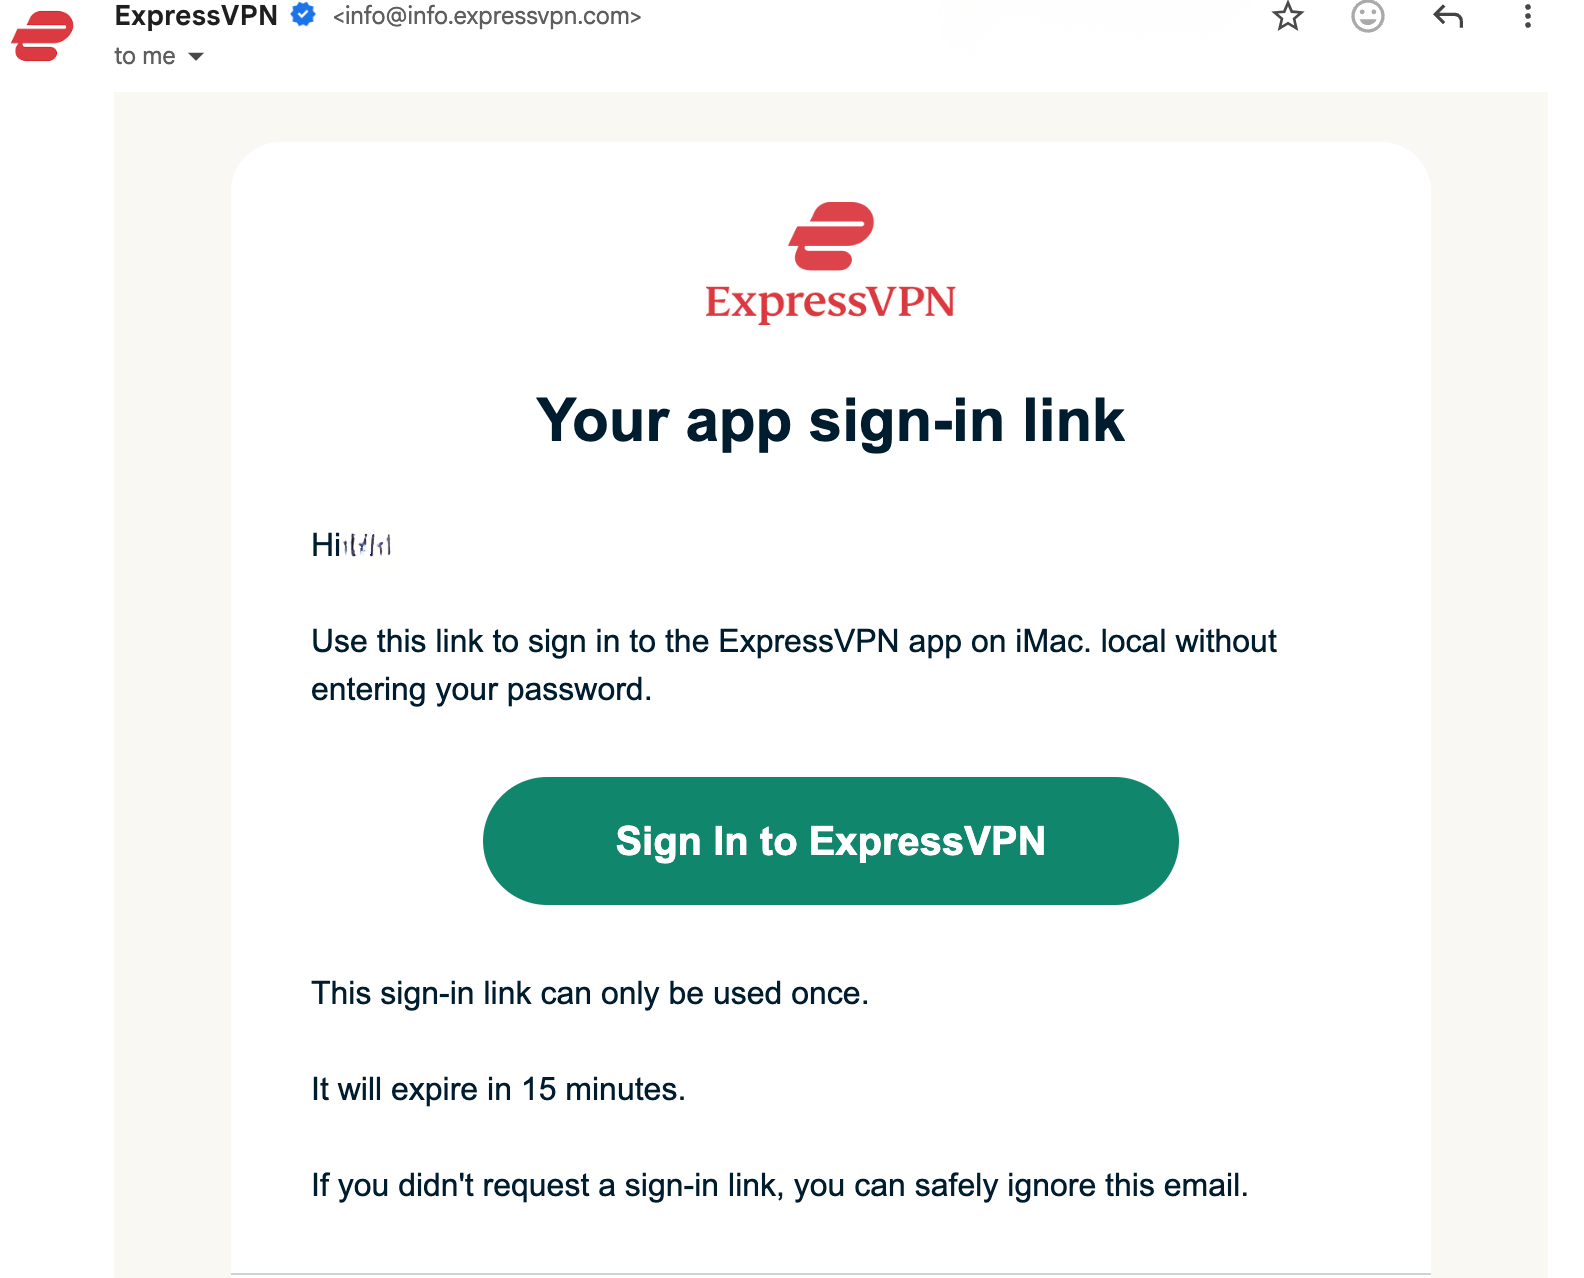
Sign in with an email sign-in link
- Enter the email address connected to your ExpressVPN account and click Email My Sign-In Link.
- Open the email on any device and select Sign In to ExpressVPN. The app will be activated automatically and sign you in.


Sign in with your password
- Click Sign in with Your Password.

- Enter your email address and password and click Sign In.


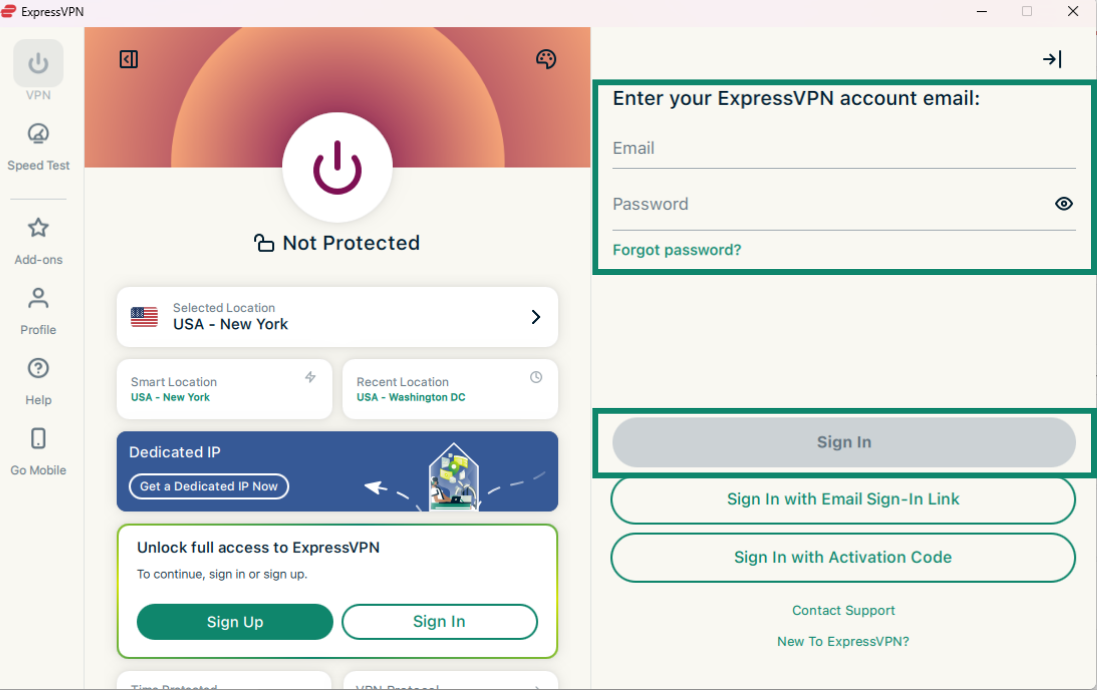
Sign in with activation code
- Click Sign In with Activation Code. This is the code you copied to your clipboard earlier.

- Click Sign In with Activation Code. This is the code you copied to your clipboard earlier.
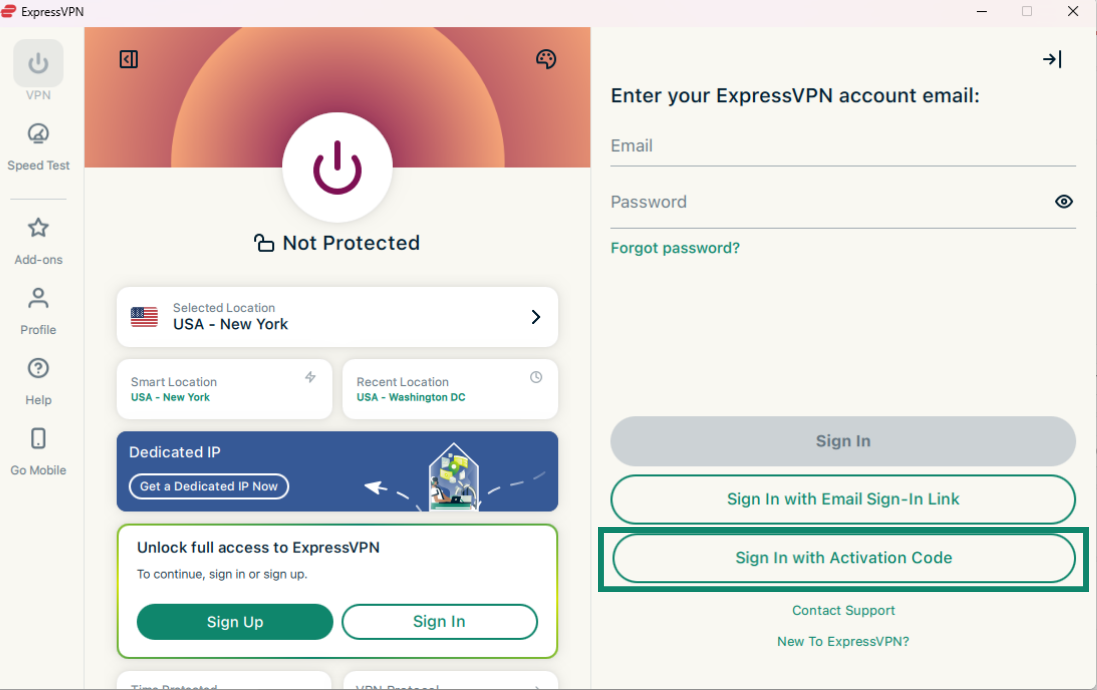
- Then click Sign In.

- You will be asked whether you want to allow ExpressVPN to launch on startup. Select your preference to continue.
- You will be asked whether you want to help improve ExpressVPN by sharing anonymous diagnostics with ExpressVPN. This helps ExpressVPN continually improve its products and services. Select your preference to continue.
- If advanced protection is included in your subscription, you will be asked if you want to block display ads and enable additional safeguards. Select your preference to continue

Congratulations! You have successfully set up ExpressVPN on your Windows PC. You are now ready to access our many VPN server locations.
Need help? Contact the ExpressVPN Support Team for immediate assistance.
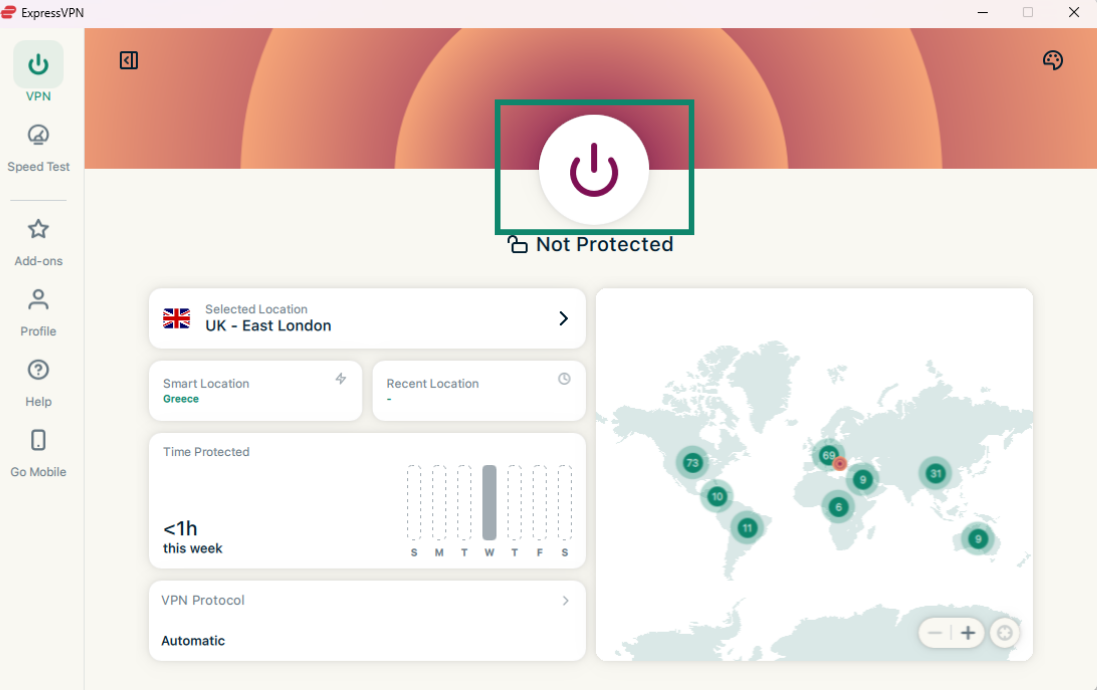
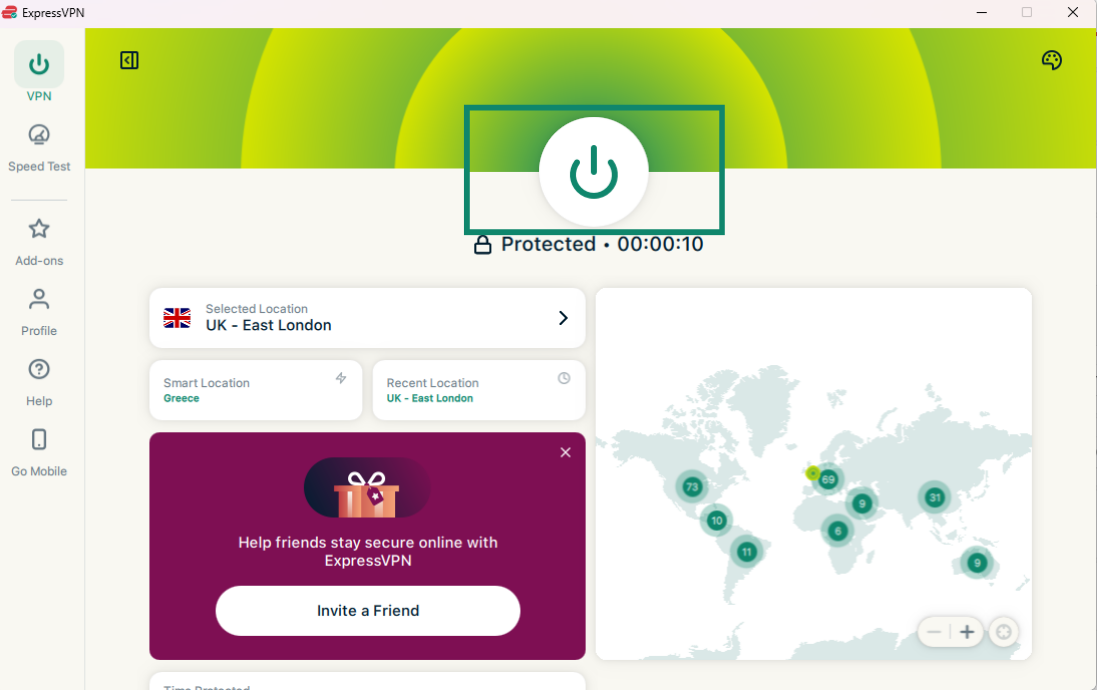
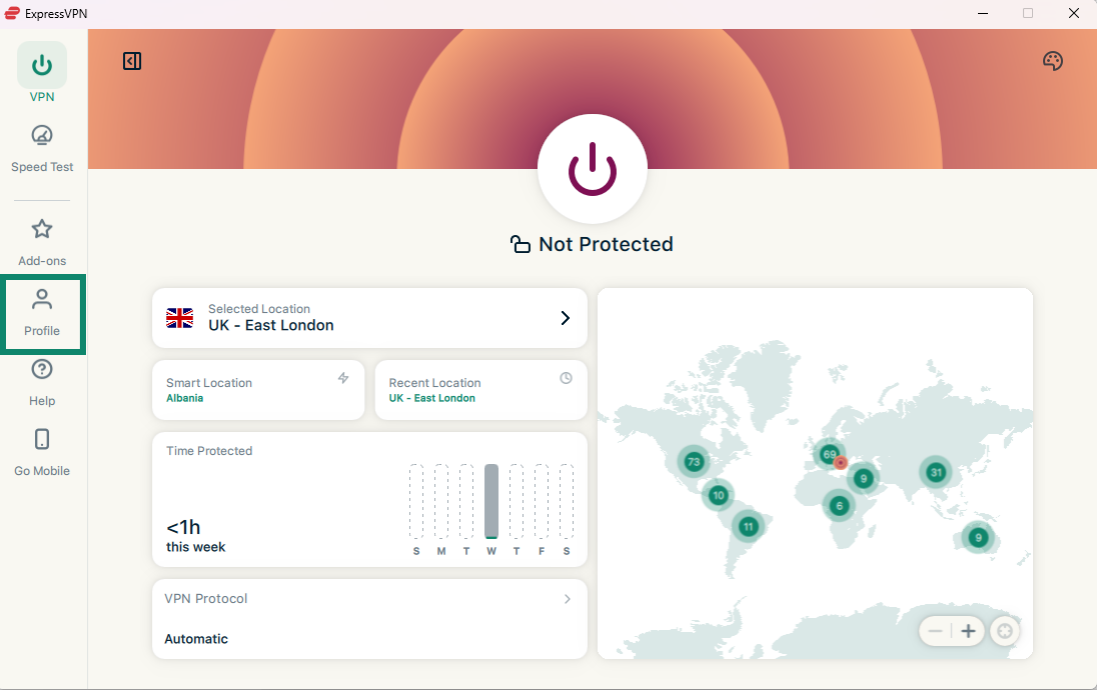
Connect to a server location
To connect to a server location:
- Click

 . By default, ExpressVPN will suggest the location that provides the optimal experience for you.
- Once you see the Protected message on the app screen, you can begin surfing with freedom and security!


Note: The number of devices you can connect to the VPN at the same time depends on the subscription tier you chose at checkout:
- Basic: 10 devices at the same time.
- Advanced: 12 devices at the same time.
- Pro: 14 devices at the same time.
Need help? Contact the ExpressVPN Support Team for immediate assistance.
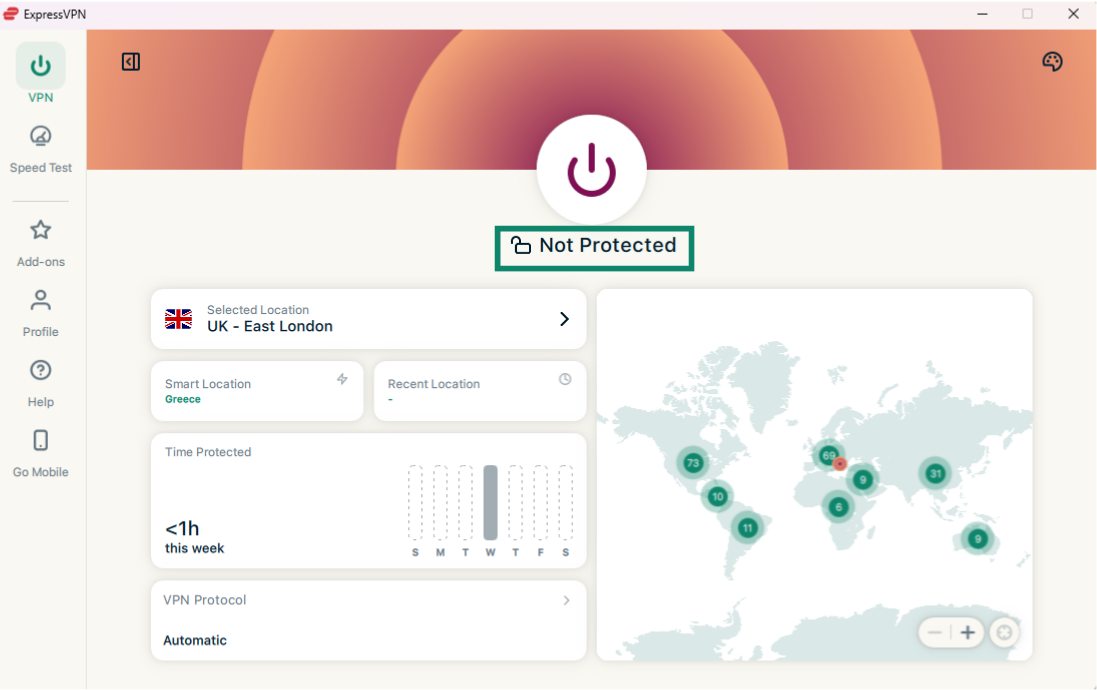
Disconnect from the server location
To disconnect from the server location:
- Click .

- You will know you are disconnected when the screen says, Not Protected.

Need help? Contact the ExpressVPN Support Team for immediate assistance.
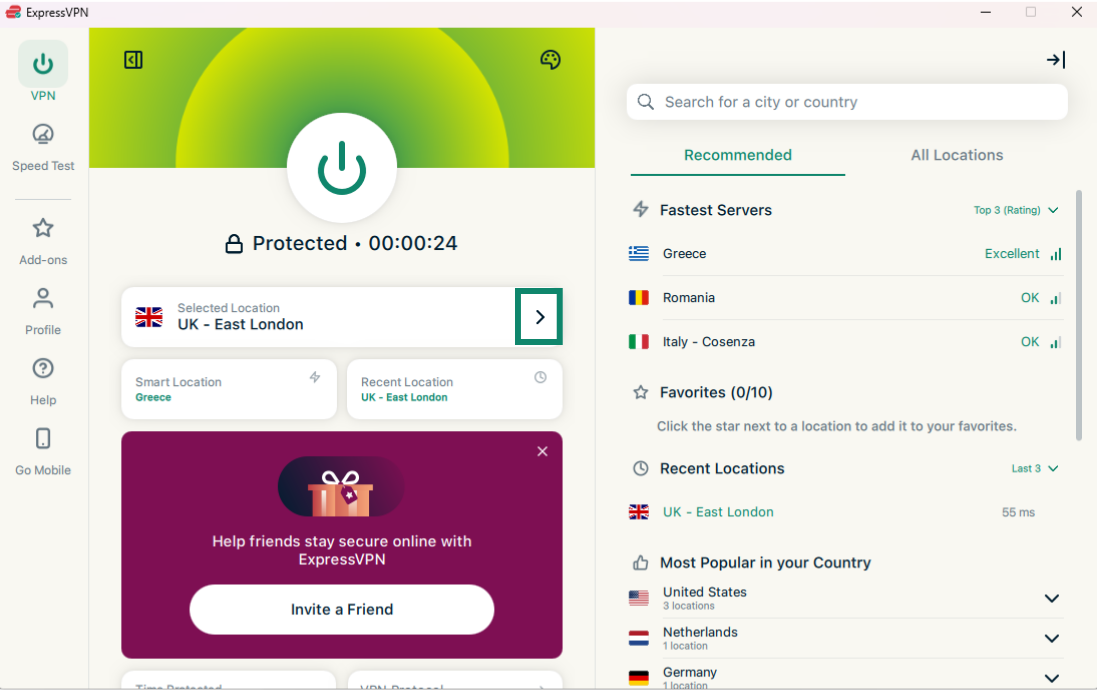
Choose a different server location
To connect to a different server location:
- Click
 next to Selected Location to access the list of VPN locations.
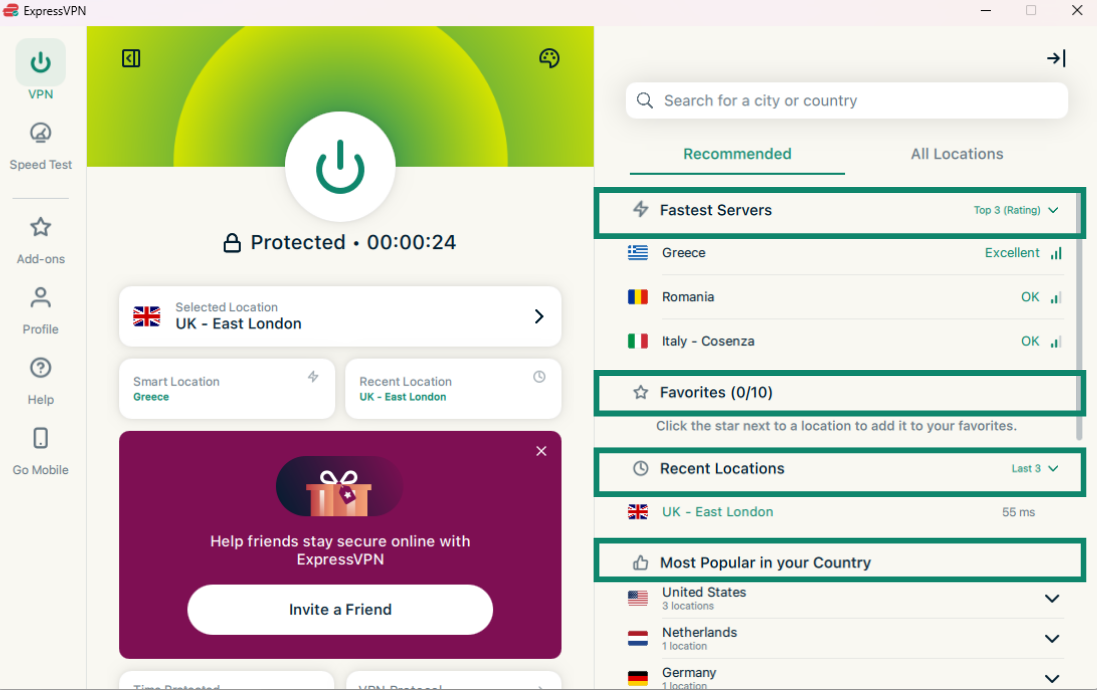
A list of server locations will appear. The list of VPN locations features two tabs: Recommended and All Locations.
The Recommended tab includes four sections:- Fastest Servers: A list of up to five of the fastest servers based on your current location.
- Recent Locations: A list of up to five of the most recent server locations you have connected to.
- Favorites: Server locations you have marked as your favorites. You can add up to 10 server locations.
- Most Popular in Your Country: The server locations most often used by other ExpressVPN users in your country.

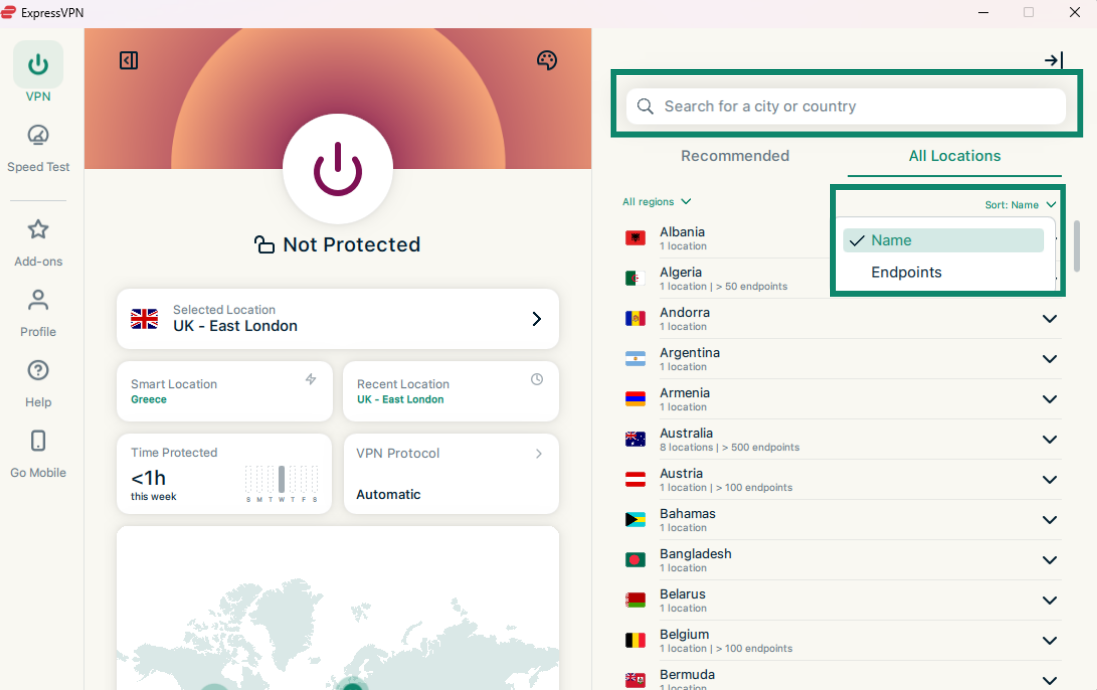
The All Locations tab lists the VPN server locations by region. You can expand and collapse the lists by clicking
 .
.
You can sort the locations by either Name or the number of Endpoints.
You can also search for your desired server location by using the search bar. Inside the search bar, type the name of your desired server location and then click the server location in the search results to connect to it.
- Click any location and ExpressVPN will automatically connect to it
How to add locations to your Favorites
To add server locations to your Favorites, hover over a location with the mouse and click ![]()
![]() next to the server name.
next to the server name.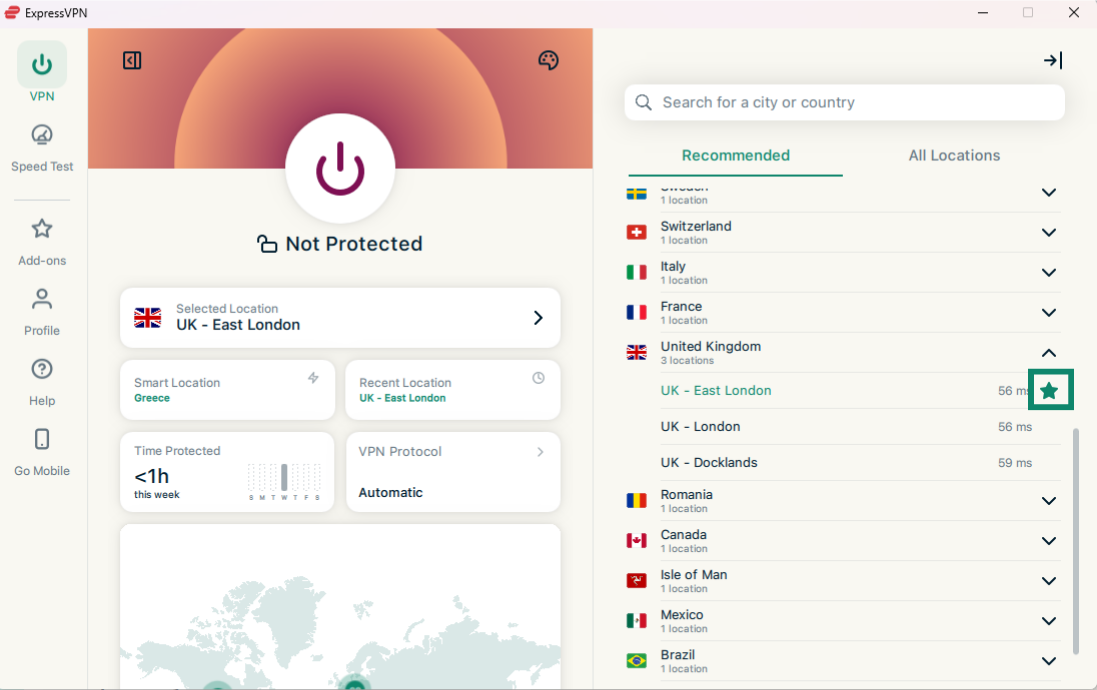
Reconnecting to a location
After disconnecting from a server location you selected, you can return to your Smart Location (the location recommended for optimal experience) by clicking Smart Location.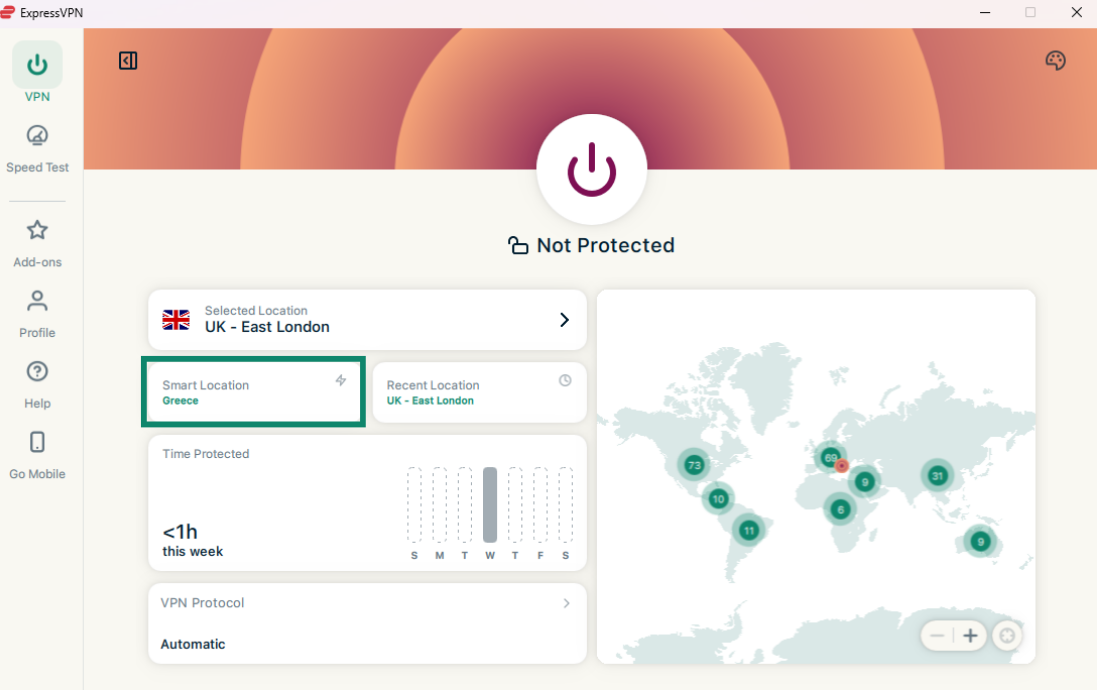
You can also connect to the server location you most recently connected to by clicking Recent Location.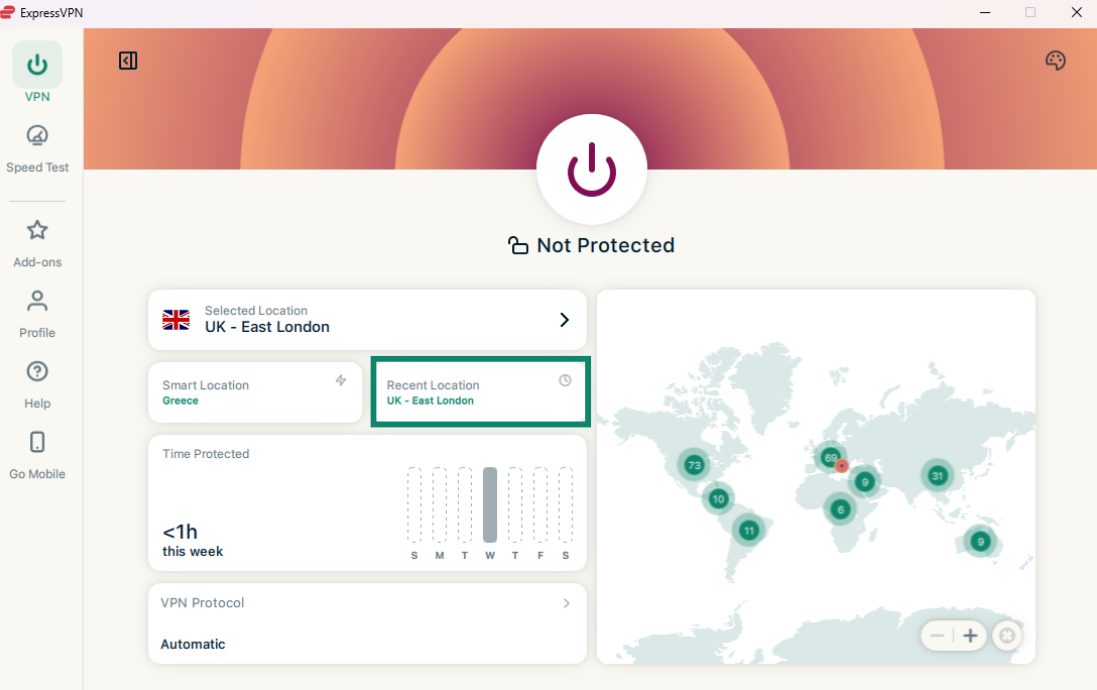
Need help? Contact the ExpressVPN Support Team for immediate assistance.
Switch to a different protocol
Protocols are the methods by which your device connects to an ExpressVPN server. For the best experience, ExpressVPN recommends setting your protocol to Automatic. This is selected by default and automatically picks the protocol most appropriate for your network.
In some cases, such as when advised to do so by our Support Team, switching to a different protocol may help you achieve faster connection speeds.
To switch to a different protocol:
- Click the Profile tab and select VPN Protocol.
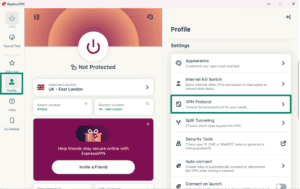
- Click the protocol you want to use.
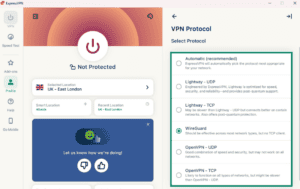

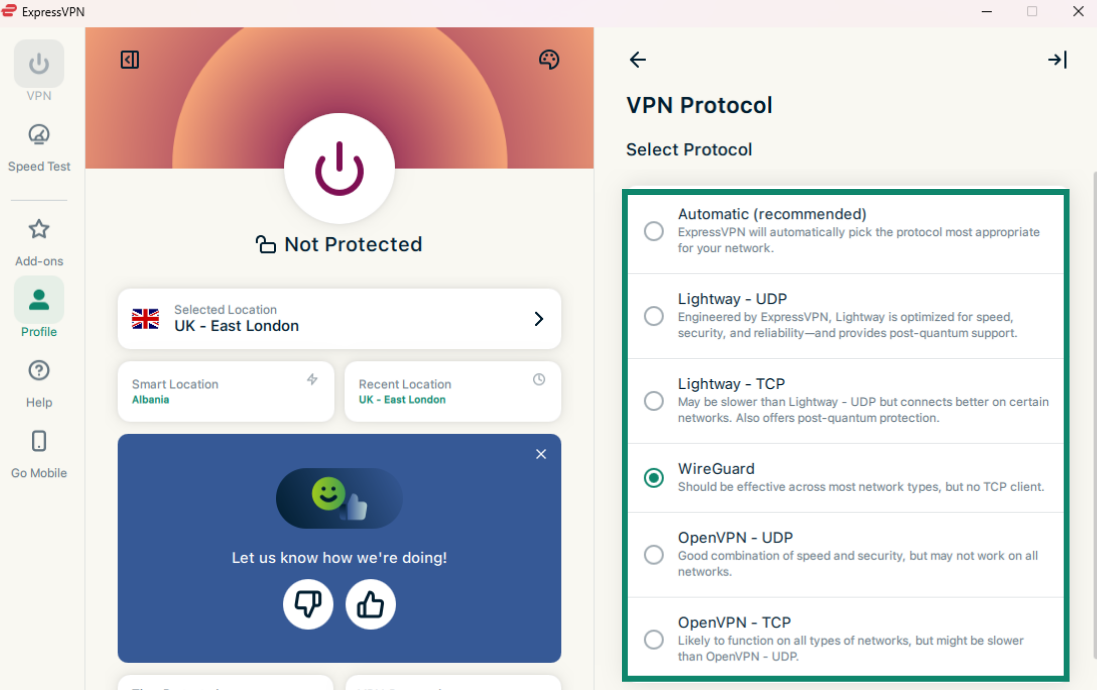
If connecting to a protocol other than Automatic or Lightway – UDP, you will see a pop-up asking if you are sure. Click Change Anyway to continue.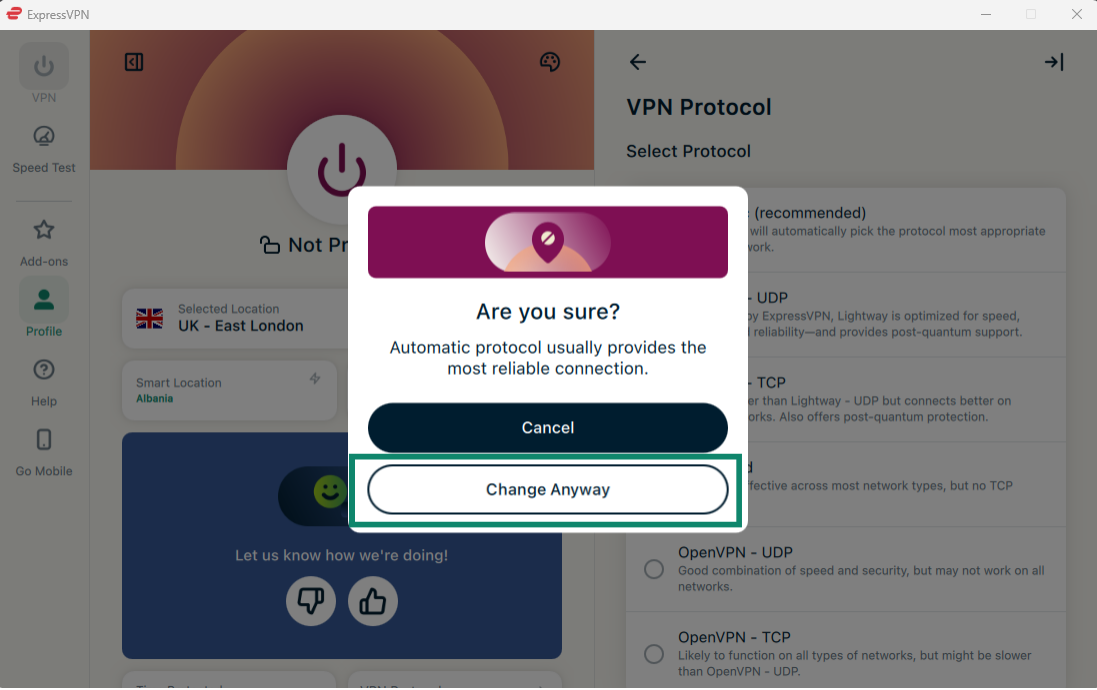
Note: When Advanced Protection features are turned on, only Automatic or Lightway protocols are available.
Need help? Contact the ExpressVPN Support Team for immediate assistance.
Lightway Turbo
When you click on the Automatic or Lightway – UDP protocol options in the ExpressVPN app for Windows, you’ll notice a Lightway Turbo toggle underneath.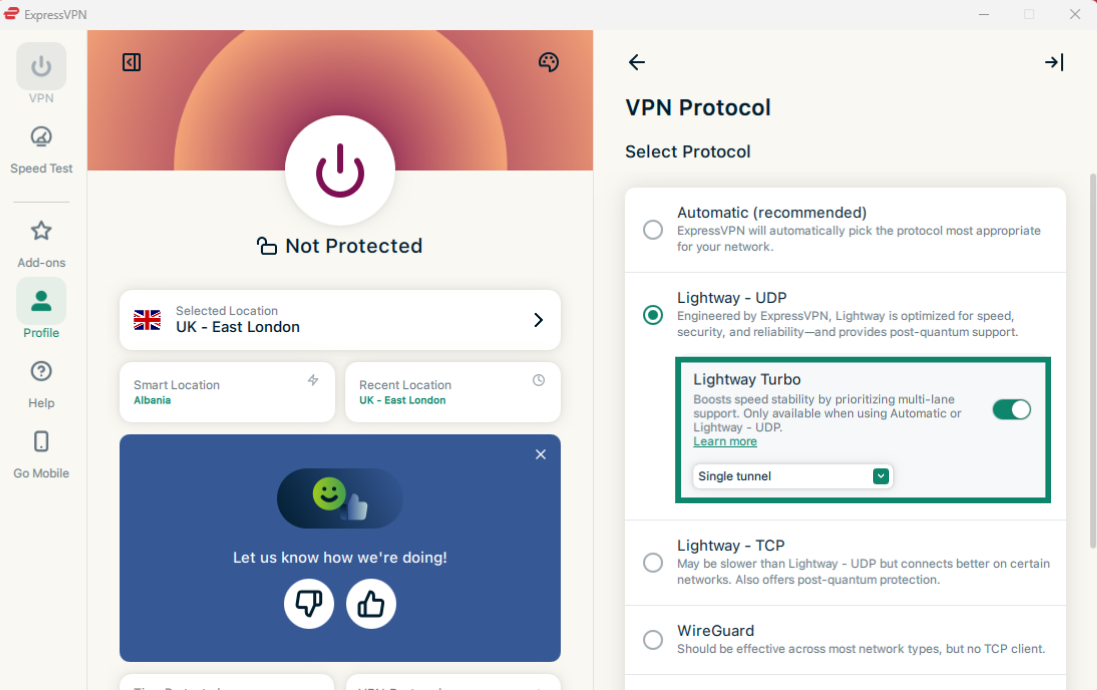
Lightway Turbo is an upgraded version of our Lightway protocol that can give you extremely fast upload and download speeds and lower latency (ping). It improves how data is transmitted through the VPN, which can lead to faster response times and smoother connections.
However, the actual improvement can vary depending on your network, server location, and overall connection quality. For instance, users on slower or congested networks may see more limited gains, while those connecting to distant servers are likely to notice a more significant difference.
Lightway Turbo can be configured to use a:
- Single tunnel: Sends your data through one dedicated path to the VPN server, and it’s compatible with most websites, apps, and games.
- Dual tunnel: Sends your data across two paths simultaneously, increasing the available bandwidth for faster speeds. However, some websites, apps, and games might not work.
To select between single or dual tunnels, click the dropdown menu and select either Single tunnel or Dual tunnel.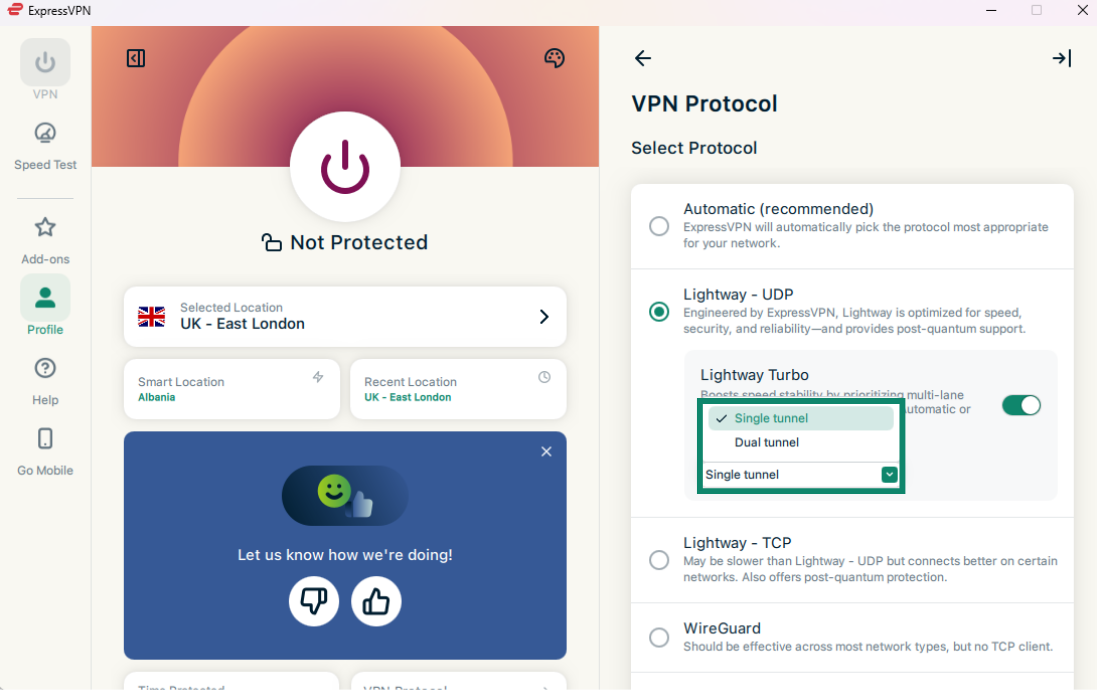 Need help? Contact the ExpressVPN Support Team for immediate assistance.
Block ads, trackers, and harmful sites
You can block many forms of ads, trackers, malicious sites, and adult content with ExpressVPN’s advanced protection features.
A lot of the apps and websites you visit keep a record of and share your activity with third-party companies, including trackers, scammers, and malware sites. This information is often used to serve you more targeted ads and content.
ExpressVPN’s advanced protection features prevent the apps and websites you visit on your device from communicating with the third-party companies in our open-source blocklists. Note that you must be connected to a VPN server for these features to work.
Advanced protection features are disabled by default. To enable them:
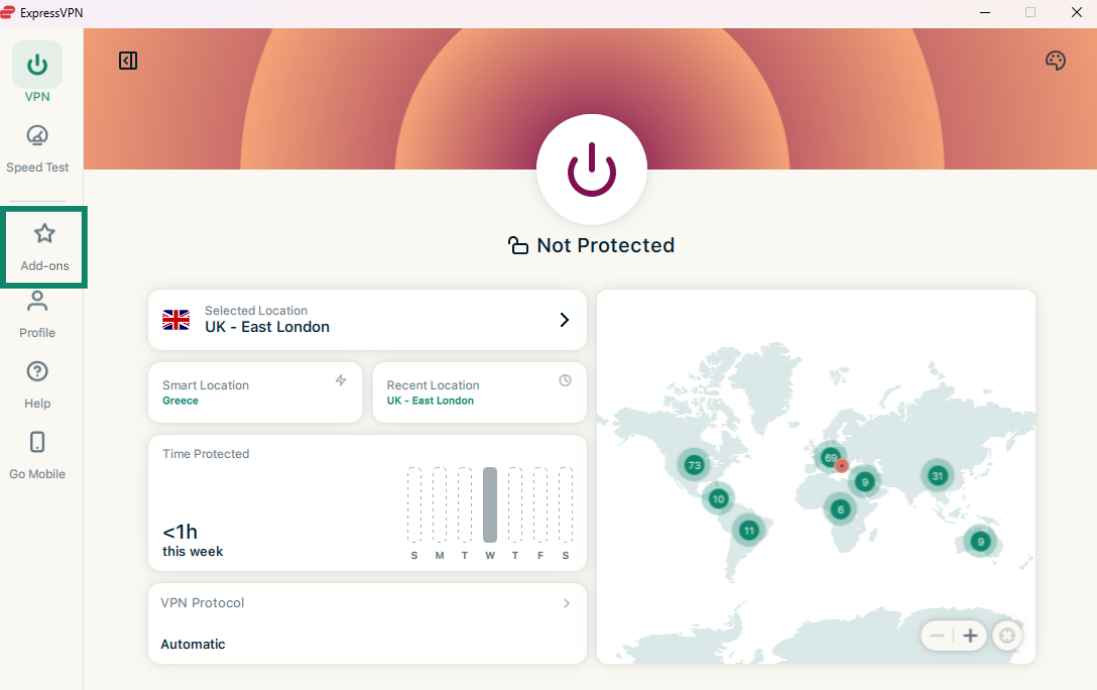
- Click the Add-ons tab.

- Under Advanced Protection, toggle on/off the features to fit your needs.
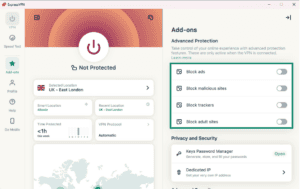
- Click the to reconnect to the VPN to apply the changes.


Read more about ExpressVPN’s advanced protection features.
Need help? Contact the ExpressVPN Support Team for immediate assistance.
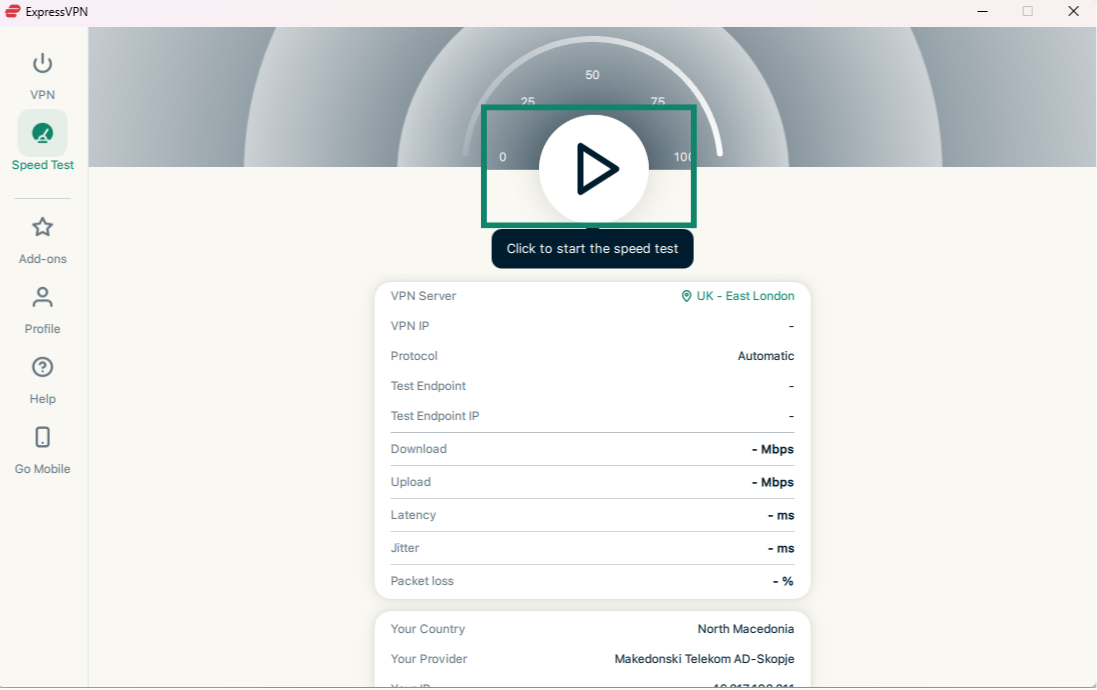
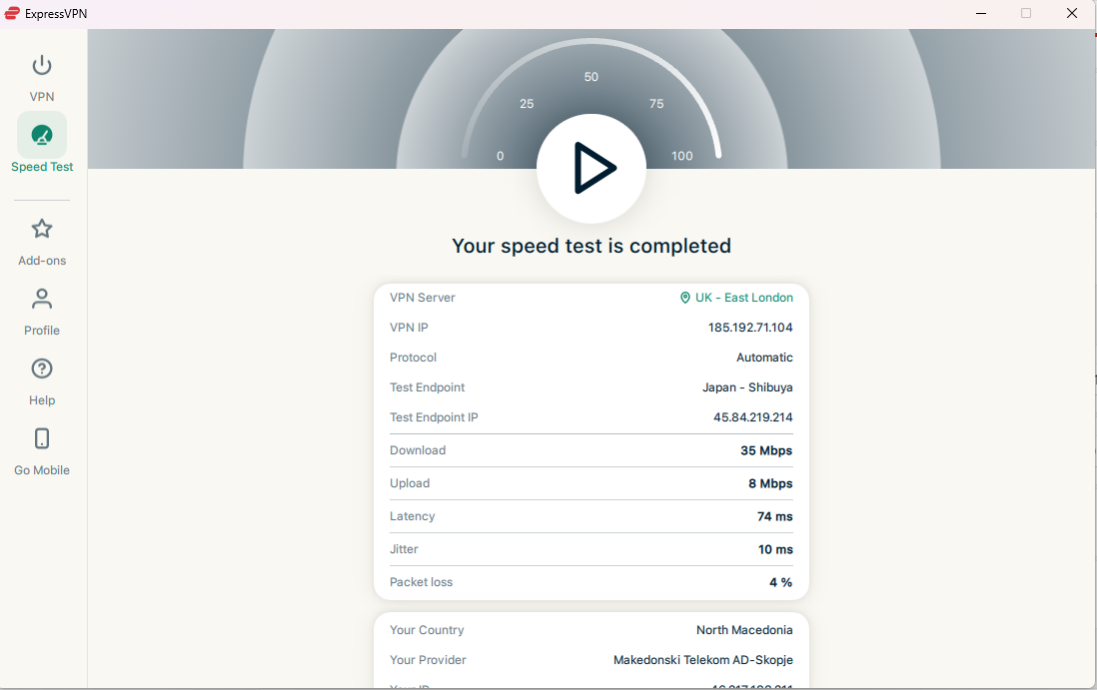
Speed test
You can run a speed test within the ExpressVPN. Here you can compare the speed of your current VPN location versus the speed of your internet service provider (ISP).
To run a speed test:
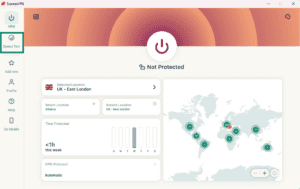
- Click the Speed Test tab.
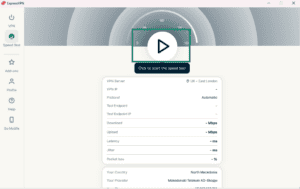
- Click the Play button to start the speed test.
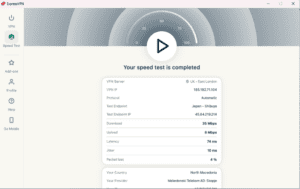
- You will get the results after a few minutes.

You can find more information about ExpressVPN’s speed test here.
Need help? Contact the ExpressVPN Support Team for immediate assistance.
Launch and connect ExpressVPN on startup
You can configure whether ExpressVPN automatically connects after your PC starts up.
To configure these settings:
- Click the Profile tab.

- Click to toggle Launch ExpressVPN on startup and Connect on launch on. You might need to scroll down to find them.
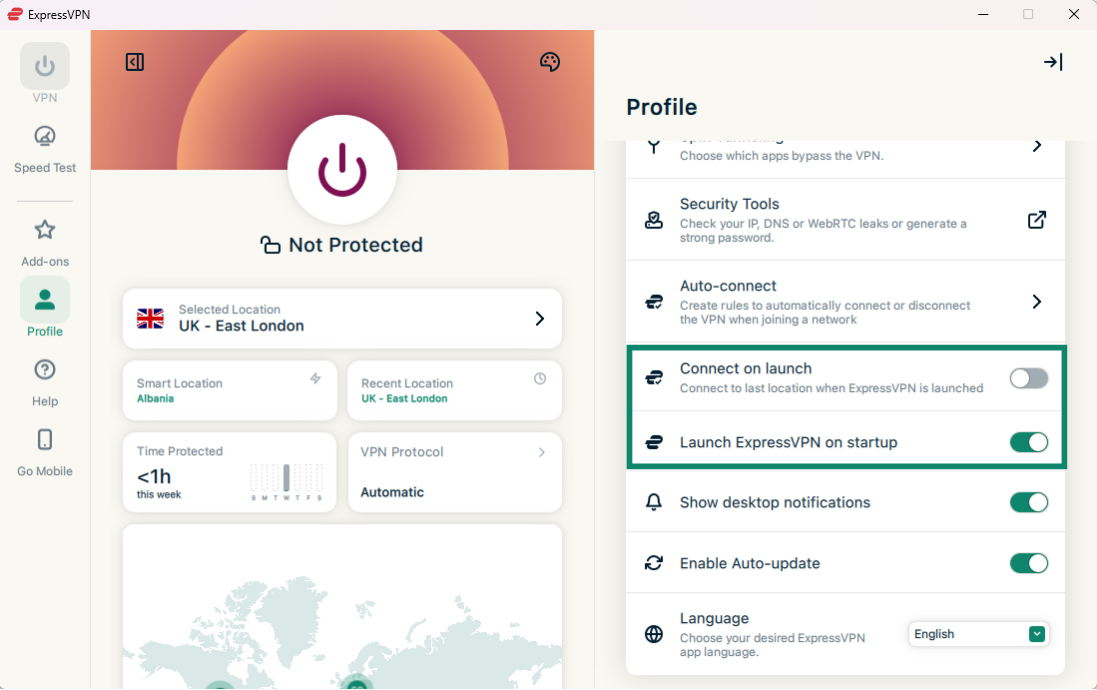
To disable, simply turn the toggles off.
You can also configure ExpressVPN to connect to the last used location when you launch the app.
Need help? Contact the ExpressVPN Support Team for immediate assistance.
Use split tunneling
Split tunneling lets you choose which apps on your PC connect to the VPN and which ones are excluded from using the VPN and instead connect to the internet directly.
To change your split-tunnel settings:
- Click the Profile tab and select Split Tunneling.

- Click the toggle to enable split tunneling.
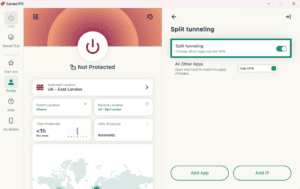
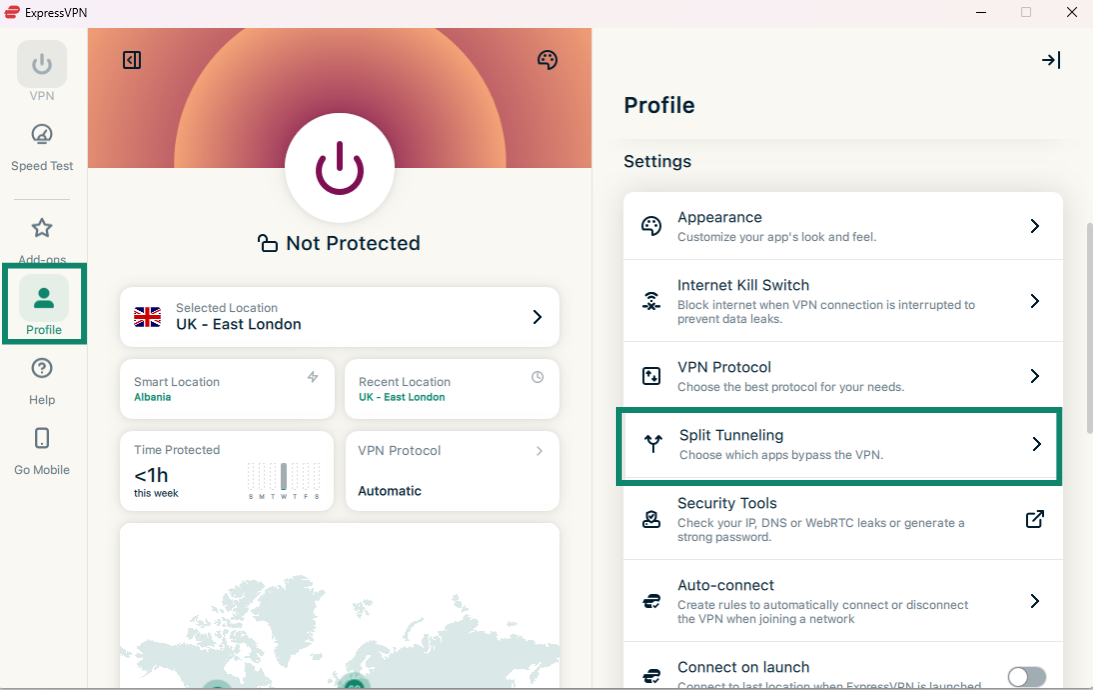

From there, you can select different split-tunneling options. Learn more about each settings option below:
Add apps
- Click Add App.
- Click the app you want to set up split tunneling rules for, then click Add.
- Click the dropdown next to the app you just added.
- Choose either Bypass VPN or Only VPN.
Add IP addresses
- Click Add IP Address.
- Enter an IPv4/IPv6 address or a subnet in CIDR notation.
- Click OK.
- Click the dropdown next to the IP address or subnet you just added.
- Choose either Bypass VPN or Only VPN.
All other apps
This option enables you to decide the split tunneling rules for all the other apps on your device.
To adjust the settings for other apps:
- Click the dropdown menu next to All Other Apps.
- Choose either Bypass VPN or Use VPN.
IN DEPTH: Learn more about the split-tunneling feature
Need help? Contact the ExpressVPN Support Team for immediate assistance.
Use the Internet Kill Switch
The Internet Kill Switch is ExpressVPN’s kill switch. If your VPN connection unexpectedly drops, the Internet Kill Switch blocks all internet traffic, keeping your data safe. It is enabled by default.
To disable or re-enable:
- Click the Profile tab and under Settings, click Internet Kill Switch.
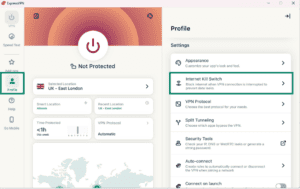
- Click Enable when connected.


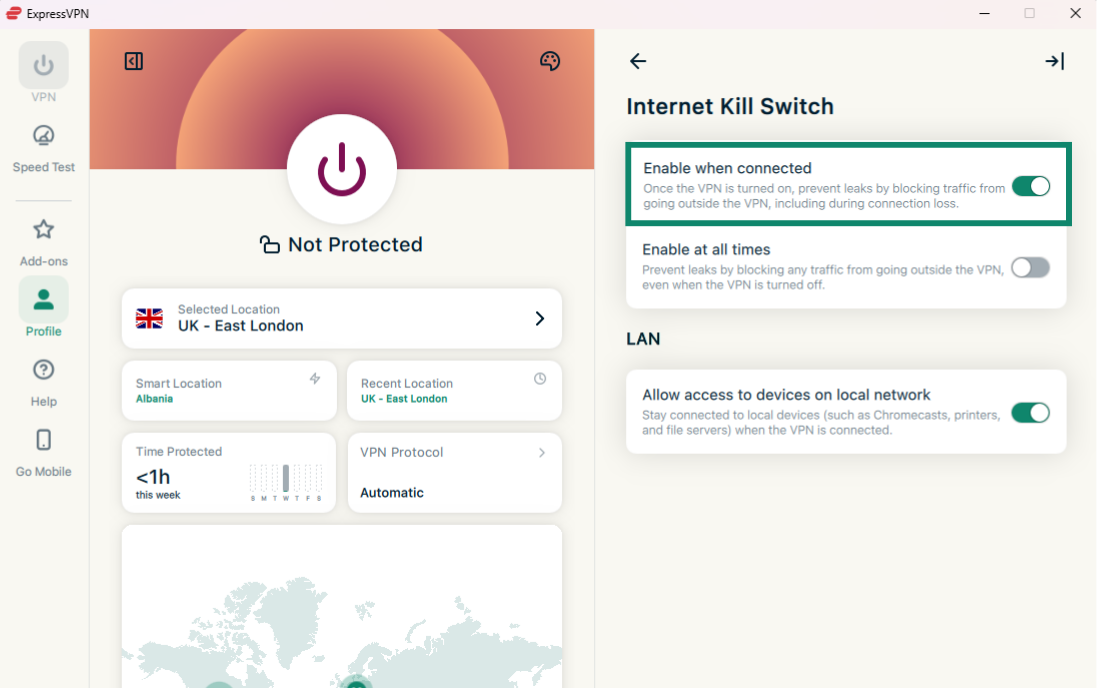
The ExpressVPN app for Windows includes an advanced kill switch called Advanced Internet Kill Switch. When enabled, this advanced kill switch prevents data leaks even when the VPN is off. All internet traffic is blocked unless the VPN is active.
In the apps, this is indicated by a toggle labeled Enable at all times:
- When toggled on: All your internet traffic is blocked unless you’re connected to the VPN. This offers an extra layer of security to protect your data.
- When toggled off: The kill switch works as normal, only blocking internet traffic if your active VPN connection unexpectedly drops.
To enable/disable the Advanced Internet Kill Switch:
On the Internet Kill Switch, click Enable at all times to toggle on/off.
Need help? Contact the ExpressVPN Support Team for immediate assistance.
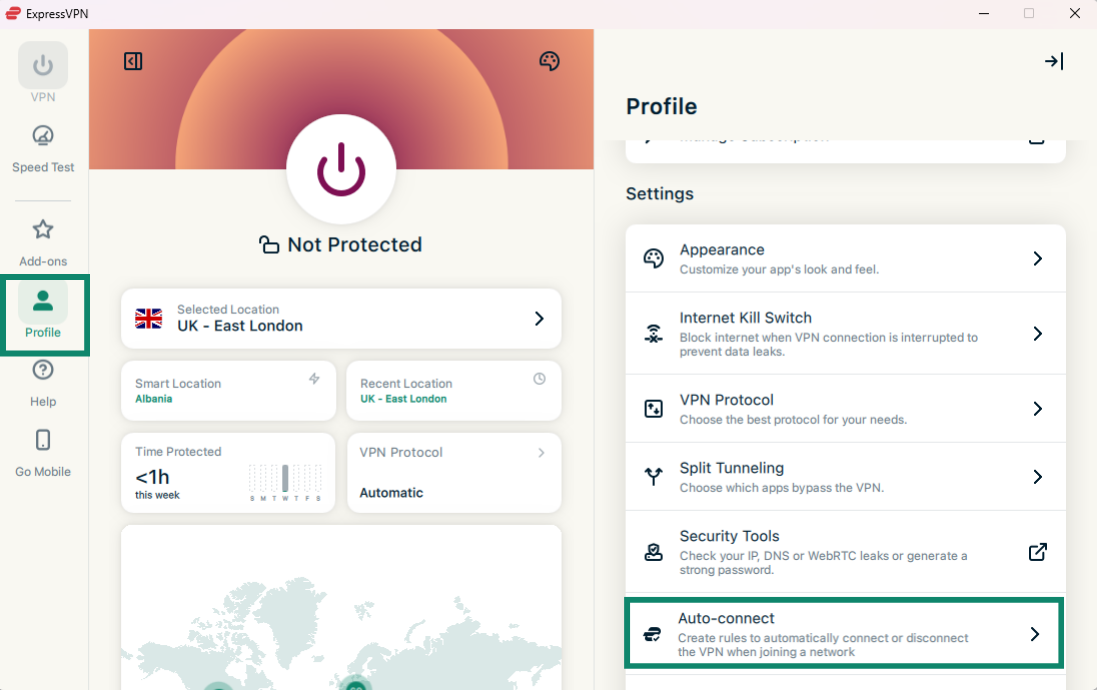
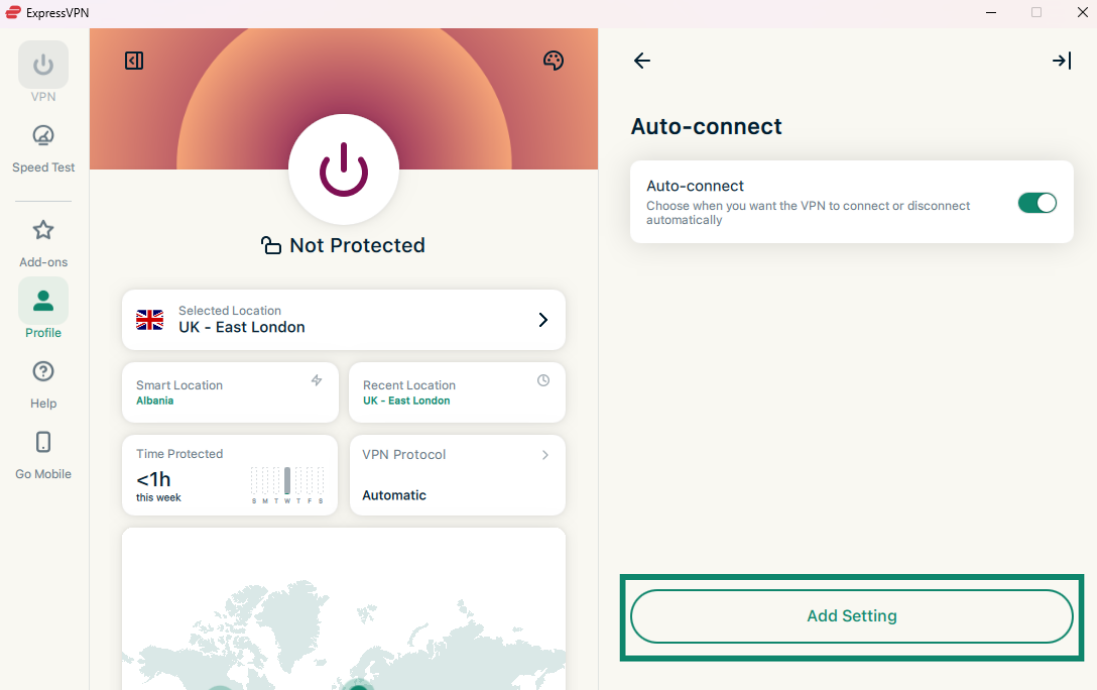
Auto-connect
You can set the ExpressVPN app to automatically connect to your last connected location on start-up. You can use this feature to set automation rules when using different network types.
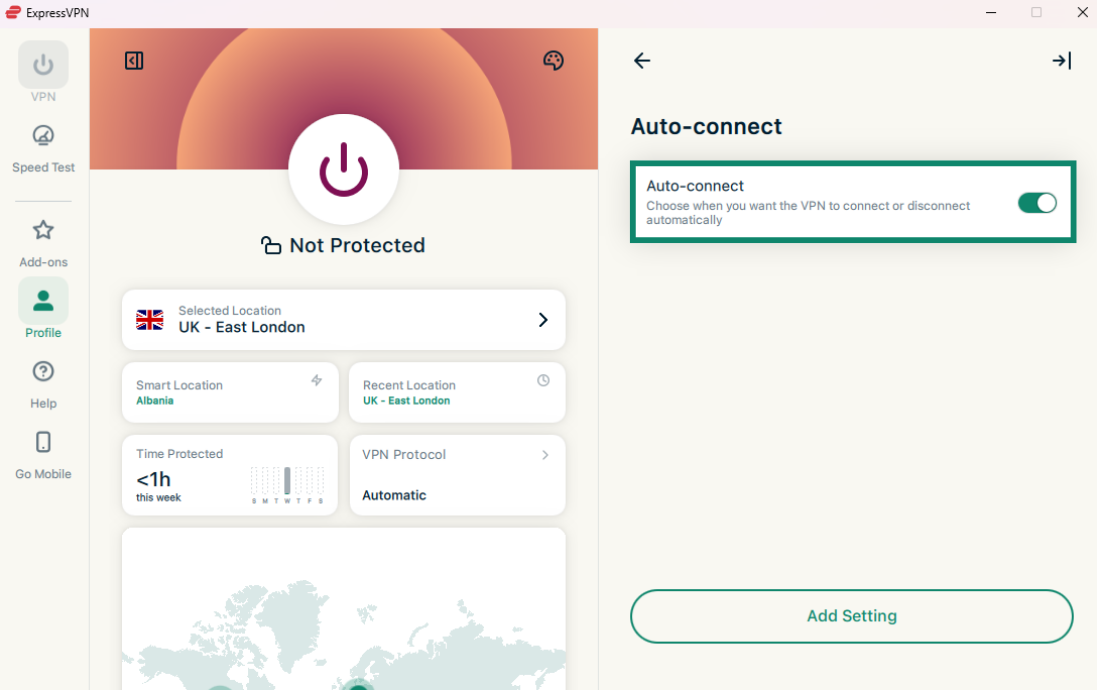
To enable auto-connect:
- Click the Profile tab, and under Settings, click Auto-connect.

- Click the toggle to enable auto-connect.

- Once enabled, click Add Setting.

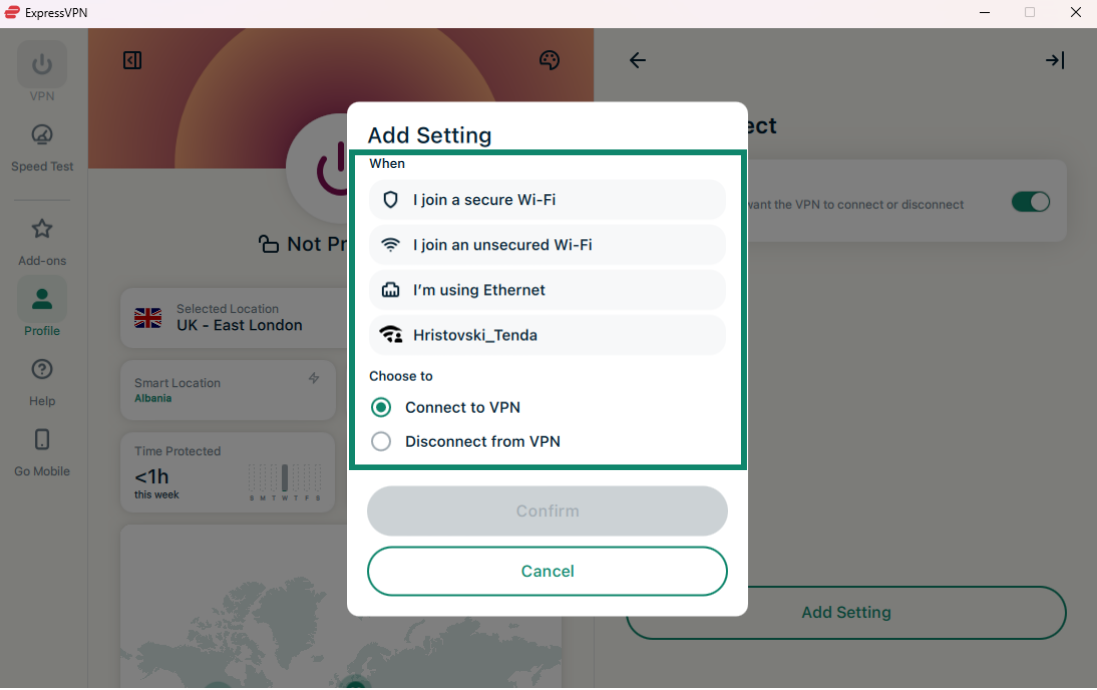
- From here, you can choose when the VPN automatically connects and disconnects. You can choose from the following options:
- When I join a secure Wi-Fi network
- When I join an unsecured Wi-Fi network
- When I’m using Ethernet
- When joining a specific Wi-Fi network
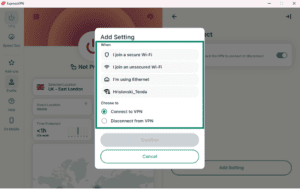
- Select either:
- Connect to VPN
- Disconnect from VPN
- Click Confirm.
To delete an auto-connect setting, click the Trash icon next to the auto-connect setting you wish to delete.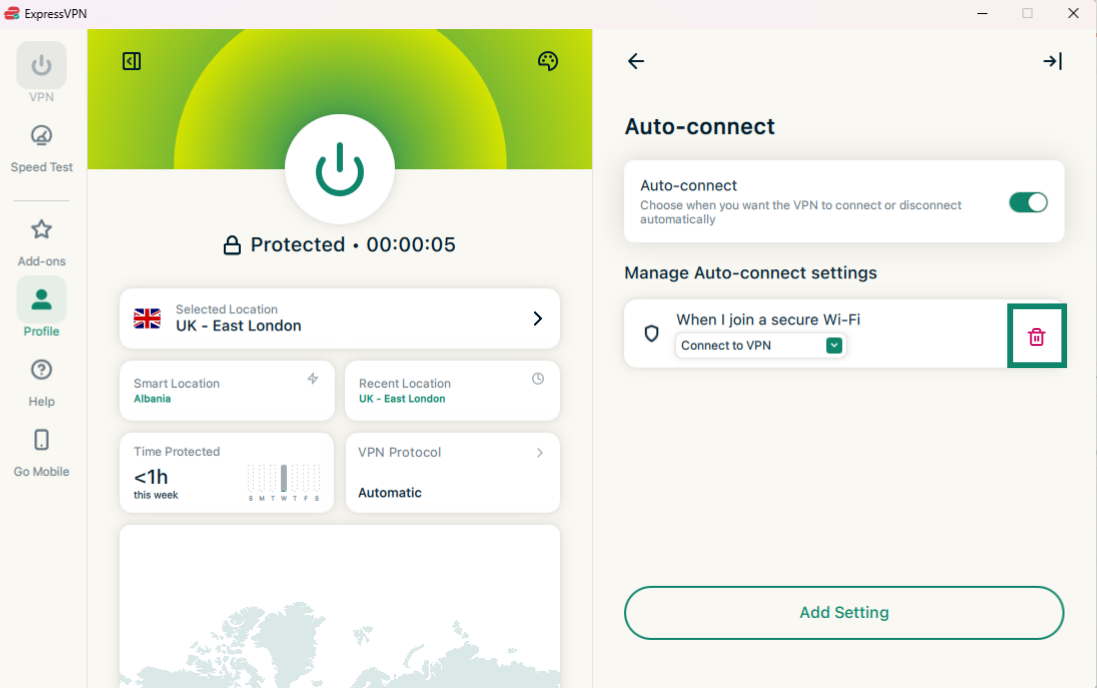
Need help? Contact the ExpressVPN Support Team for immediate assistance.
MCP server
The ExpressVPN MCP server allows you to connect ExpressVPN directly to your AI developer tools using the Model Context Protocol (MCP).
This local integration lets your AI assistant read and control your VPN connection through natural language or programmatic commands. For example, checking your connection state, switching server regions, changing protocols, and troubleshooting issues without you ever needing to open the ExpressVPN app.
This feature is available at no additional cost to all users with an active 1-year or 2-year ExpressVPN or ExpressVPN for Teams subscription. It is not available with monthly subscriptions.
Before you can connect to the ExpressVPN MCP server, you need:
- An MCP-compatible AI client. The tool must support HTTP-based MCP servers.
- An active ExpressVPN or ExpressVPN for Teams subscription (1-year or 2-year subscriptions only; not available with the monthly subscription).
- The latest ExpressVPN app for Windows.
- To enable MCP in ExpressVPN.
To enable MCP in the ExpressVPN app for Windows, click Add-ons and toggle Enable MCP Server on.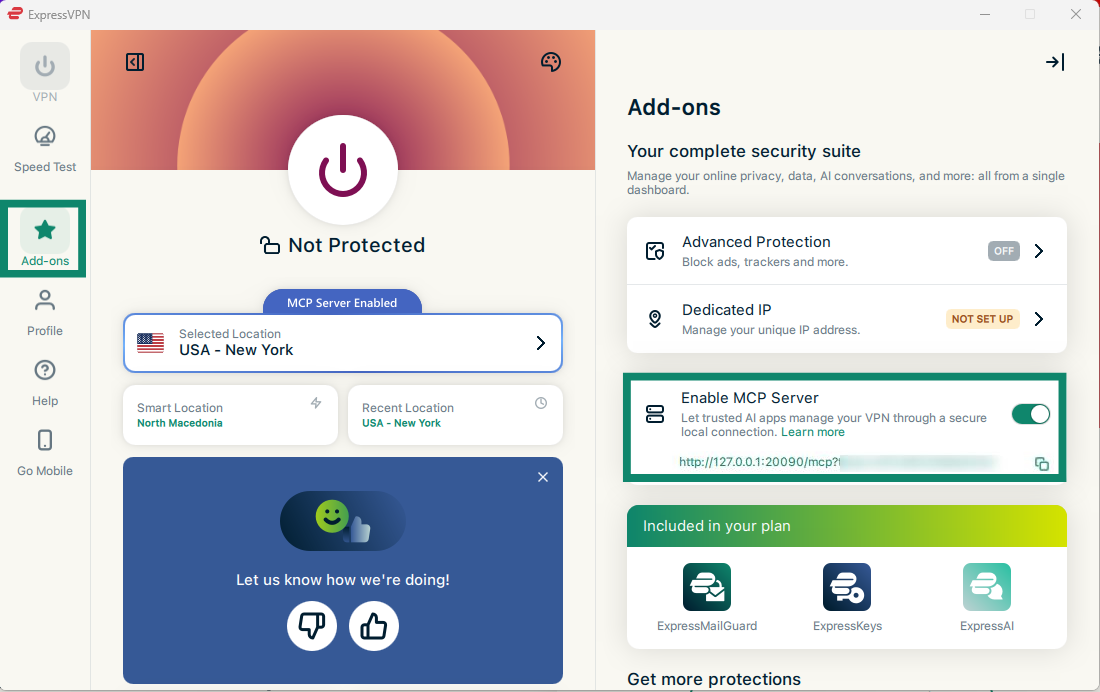
The local MCP server will start automatically in the background.
Once enabled, follow this guide for full instructions on how to connect your chosen AI tool and what you can do with ExpressVPN MCP tools.
Need help? Contact the ExpressVPN Support Team for immediate assistance.
Enable compact mode
Compact mode lets you switch between a slim and expanded interface, depending on your preference. Use it to reduce the app window size and simplify the layout while staying connected to the VPN.
To enable or disable compact mode, click the compact mode toggle.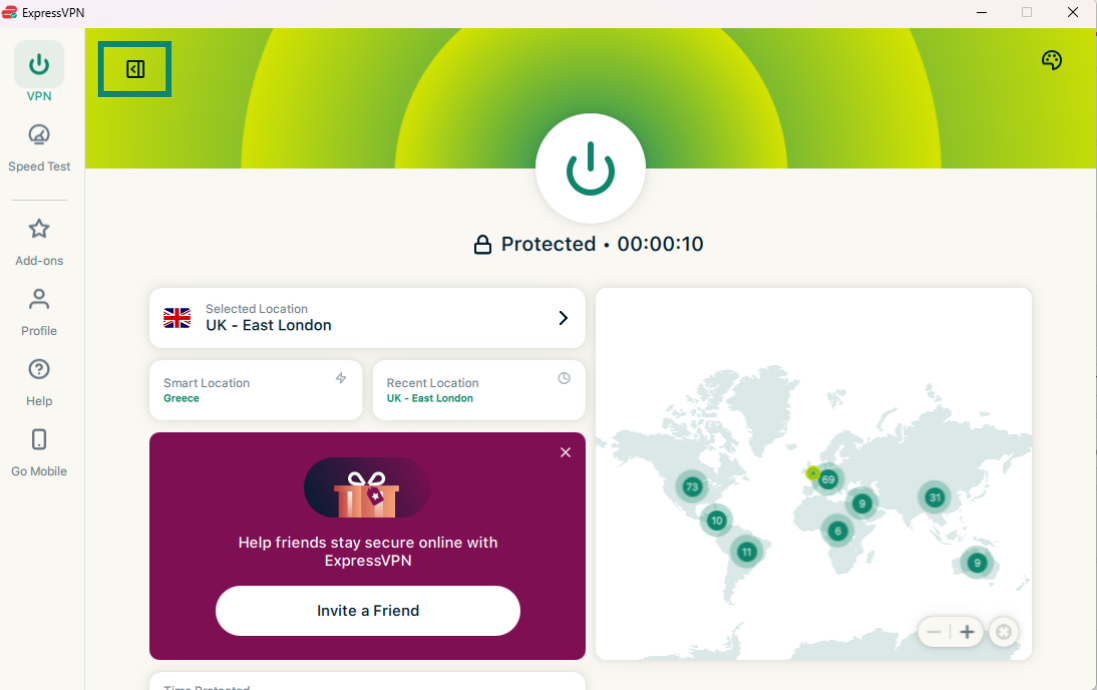
Need help? Contact the ExpressVPN Support Team for immediate assistance.
Change languages in the ExpressVPN Windows app
The ExpressVPN app for Windows is available in 17 languages.
To change languages in the app, go to the Profile tab, click the dropdown menu next to Language, and select your language of choice.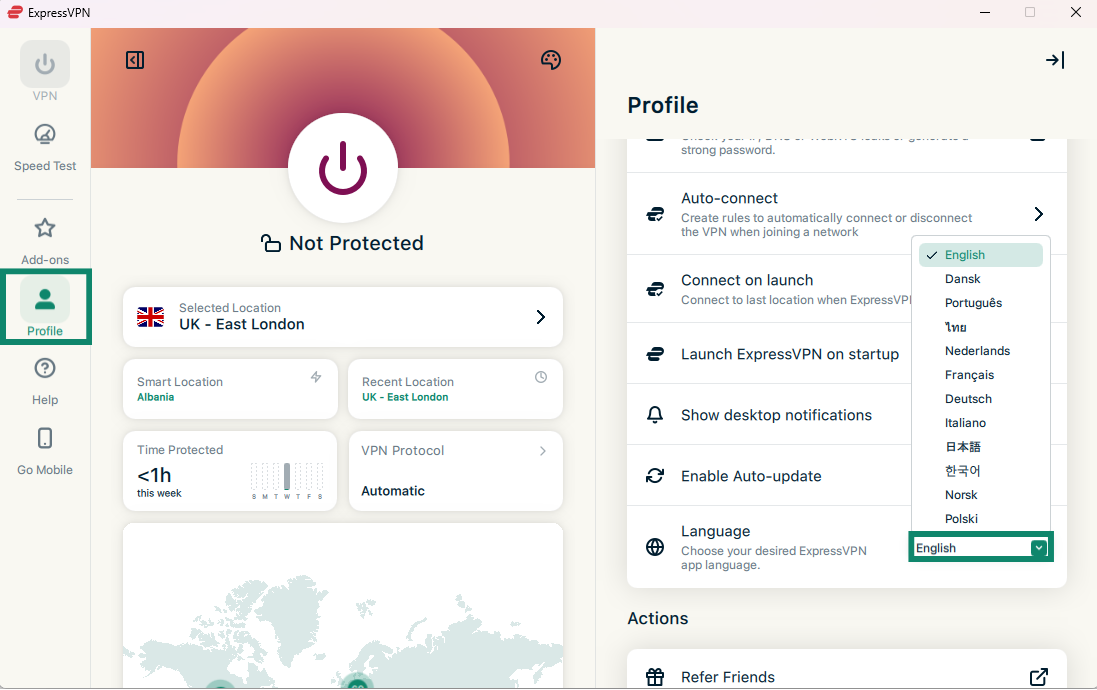
Once you select the language, ExpressVPN will change it automatically.
Need help? Contact the ExpressVPN Support Team for immediate assistance.
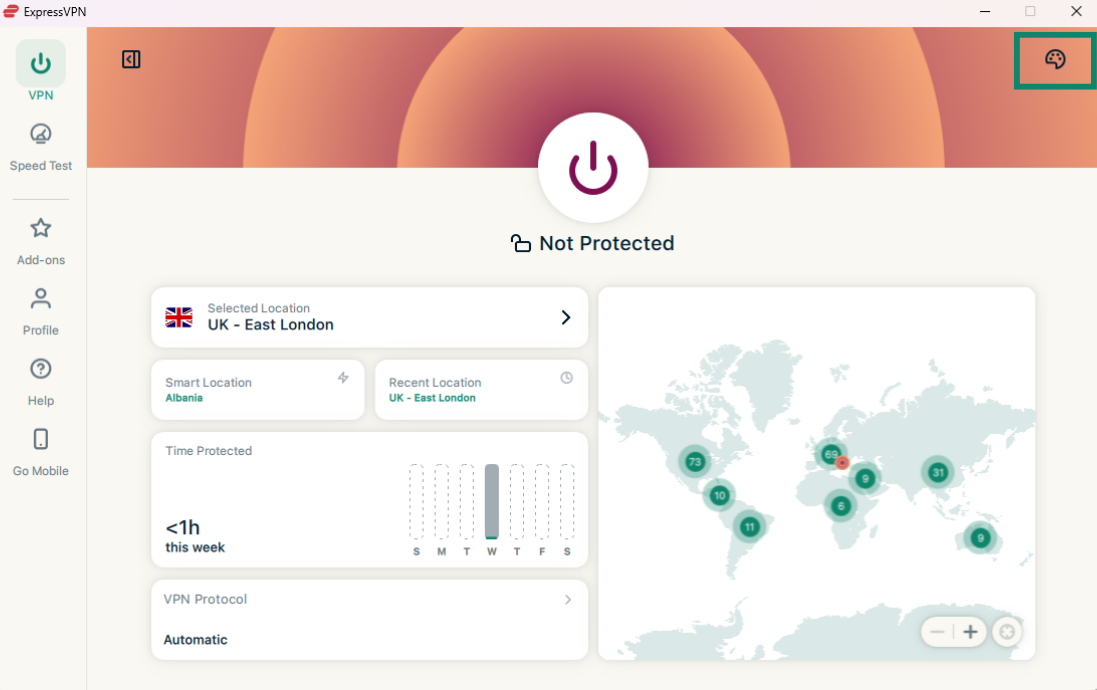
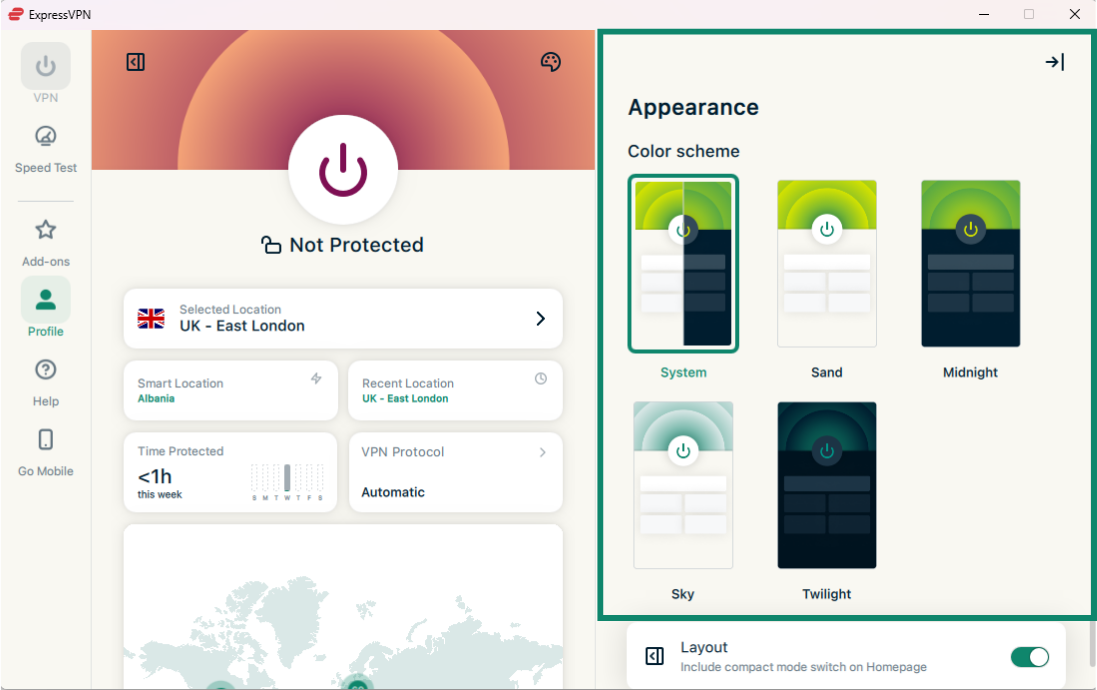
Change app appearance
You can change the color scheme of the app to tailor it to your personal preference. Choose Midnight or Twilight for a dark mode effect.
Note: If you choose System and enable dark mode from your Windows system settings, the ExpressVPN app will automatically switch to dark mode.
To change the color scheme of the ExpressVPN app:
- In the VPN tab, click the color palette icon in the top right corner.

- Under Color scheme, click the theme you want to use. The app color scheme will change immediately.

Need help? Contact the ExpressVPN Support Team for immediate assistance.
Uninstall the app
The below instructions are for Windows 10 and Windows 11.
On Windows 11, you can uninstall the ExpressVPN app in the Installed apps section in Settings.
There are two ways to access it:
Uninstall from Start menu
- Click
 > right-click the ExpressVPN app, and then click Uninstall.
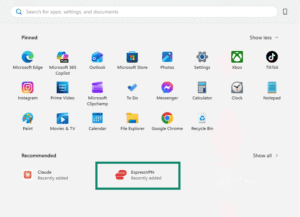

- You will then be taken to the Installed apps section. Right-click the ExpressVPN app and select Uninstall.


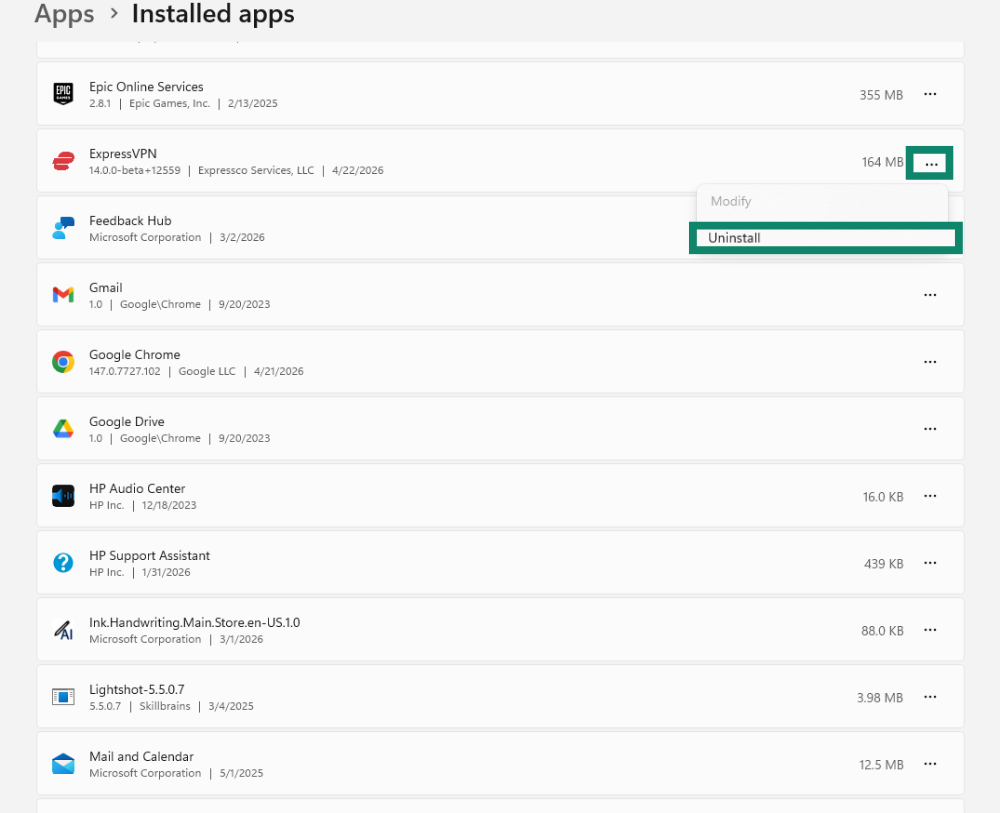
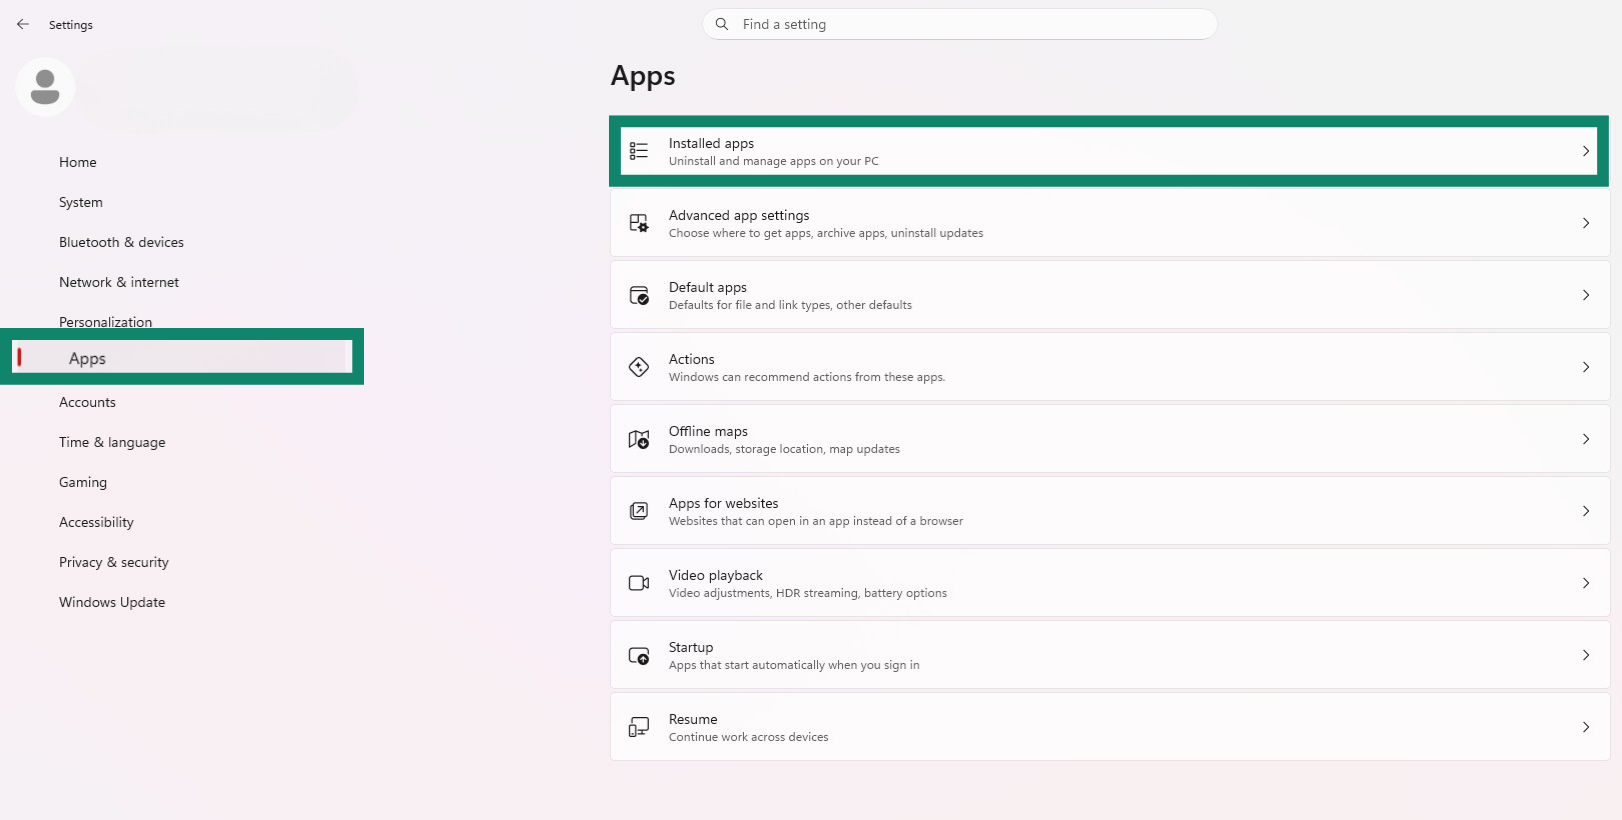
Uninstall from Settings
- Click > Settings .
- Select Apps > Installed apps.


- Find the ExpressVPN app, then click
 > Uninstall.
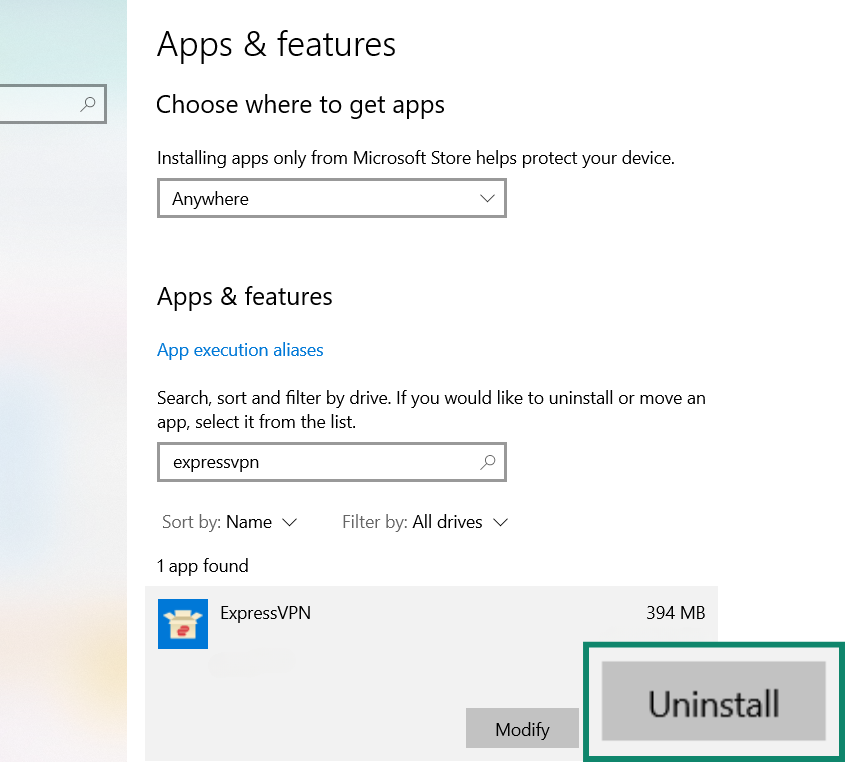
- Select, then select Settings > Apps > Apps & features.
- Scroll through the list of programs until you locate ExpressVPN. Select ExpressVPN and then click Uninstall.


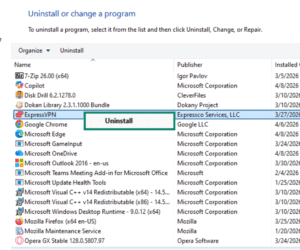
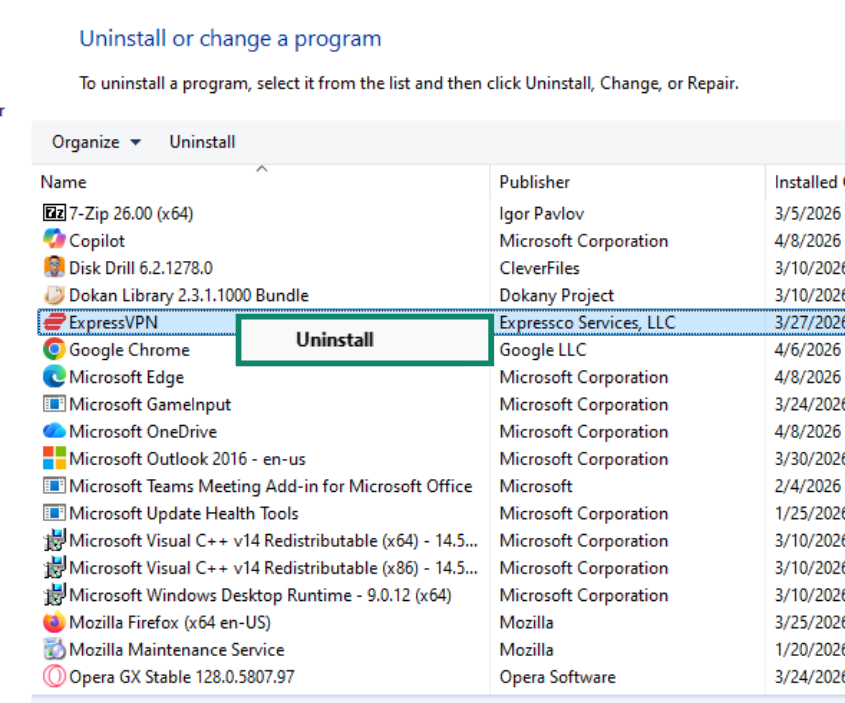
Uninstall from Control Panel
- In the search box on the taskbar, type “Control Panel” and click on it.
- Select Programs > Programs and Features.
- Right-click ExpressVPN and select Uninstall. Then follow the directions on the screen.

Need help? Contact the ExpressVPN Support Team for immediate assistance.