




Need a VPN for Linux?
Get ExpressVPN Now
Love ExpressVPN? Want a free month?
Refer a Friend NowThis guide will show you how to manually set up ExpressVPN on Linux using the OpenVPN protocol with ExpressVPN’s configuration files.
Not all ExpressVPN locations may be available for manually configured connections. To use the full list of VPN locations, use the app setup.
Linux package names, file paths, and DNS handling can change between releases. This guide covers the most common setups, but if a step doesn’t match what you see, please refer to your distribution’s documentation for the most accurate steps:
Prefer app setup? See the instructions for setting up the ExpressVPN app for Linux.
Jump to…
1. Find your ExpressVPN account credentials
2. Install and connect to the VPN
3. Confirm the VPN connection
Disconnect from a VPN server location
1. Find your ExpressVPN account credentials
Go to the ExpressVPN setup page. If prompted, enter your ExpressVPN credentials and click Sign In.

Enter the verification code that is sent to your email.
On the right, with OpenVPN already selected for you, you will see your username, password, and a list of OpenVPN configuration files.
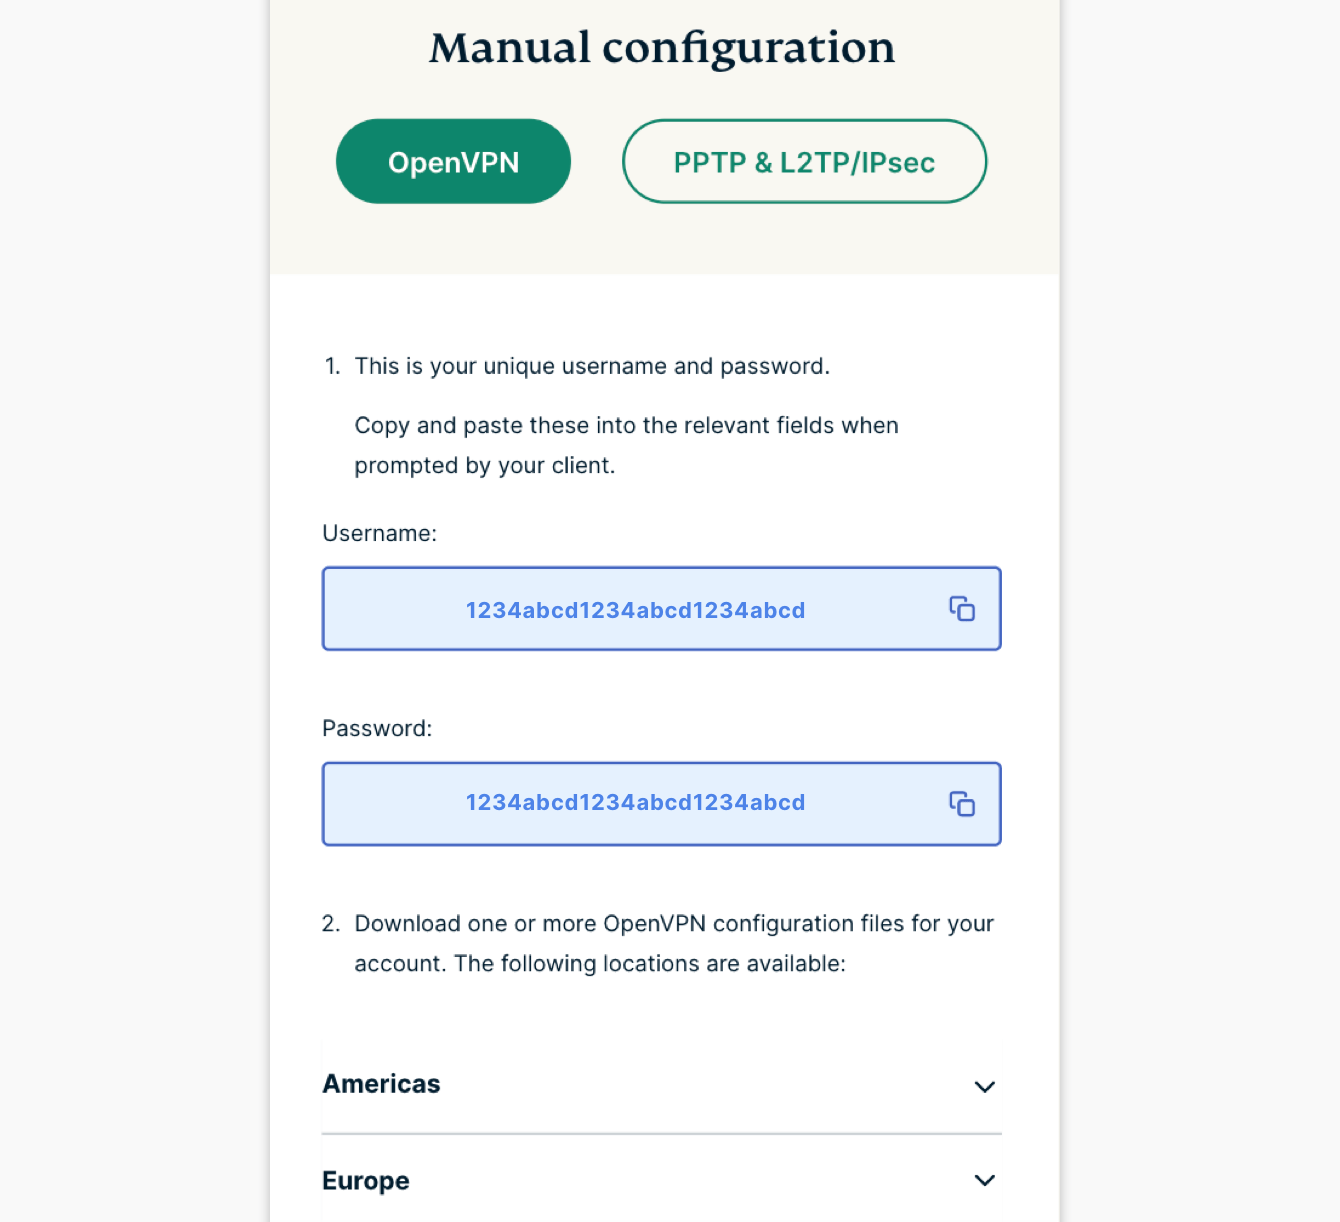
Click the location(s) you want in order to download the .ovpn file(s).
Keep this browser window open. You will need this information for the setup later.
Need help? Contact the ExpressVPN Support Team for immediate assistance.
2. Install and connect to the VPN
Refer to the corresponding section for your Linux distro below.
Note: The following steps were tested on Ubuntu 24.04.4 LTS (Noble Numbat).
To install the packages, enter the following in the Terminal window:
sudo apt install openvpn openvpn-systemd-resolved
Enter your password. Then, enter Y to continue.

To launch OpenVPN, enter the following:
sudo openvpn --config /path/to/my_expressvpn_server.ovpn --script-security 2 --up /etc/openvpn/update-systemd-resolved --down /etc/openvpn/update-systemd-resolved --down-pre --dhcp-option 'DOMAIN-ROUTE .'
Note: Replace [path to file] with the path to where the ExpressVPN configuration file was downloaded, and [server location] with the location shown in the file name.
Enter the username and password you found earlier.
After you are connected to ExpressVPN successfully, you will see the words “Initialization Sequence Completed.”

To keep the VPN connection active, keep the Terminal window running in the background.
Need help? Contact the ExpressVPN Support Team for immediate assistance.
Note: The following steps were tested on Debian 13 (Trixie).
To install the packages, enter the following in the Terminal window:
sudo apt install openvpn openresolv
Enter your password. Then, enter Y to continue.

To launch OpenVPN, enter the following and replace “path/to/my_expressvpn_server.ovpn” with the path to where you downloaded the ExpressVPN configuration file:
sudo openvpn --path/to/my_expressvpn_<server>.ovpn \ --script-security 2 \ --up /etc/openvpn/update-resolv-conf \ --down /etc/openvpn/update-resolv-conf
Note: Depending on your system’s DNS configuration, you may need additional setup for VPN-provided DNS. However, the above command is sufficient to establish a working VPN connection on standard Debian systems.
Enter the username and password you found earlier.
After you are connected to ExpressVPN successfully, you will see the words “Initialization Sequence Completed.”

To keep the VPN connection active, keep the Terminal window running in the background.
Need help? Contact the ExpressVPN Support Team for immediate assistance.
Note: The following steps were tested on Fedora 43. These steps should also work for CentOS.
To install the packages, enter the following in the Terminal window:
sudo dnf install openvpn
To configure DNS, enter the following:
sudo cp /usr/share/doc/openvpn/contrib/pull-resolv-conf/client.{up,down} /etc/openvpn/
sudo chmod +x /etc/openvpn/client.up /etc/openvpn/client.down
To launch OpenVPN, enter the following:
sudo openvpn --config /path/to/my_expressvpn_server.ovpn --script-security 2 --up /etc/openvpn/client.up --down /etc/openvpn/client.down
Enter the username and password you found earlier.
Arch and openSUSE do not have a ready-made DNS hook script. The easiest solution is to connect without handling DNS, and verify that the tunnel works. For DNS through the VPN, consult your distribution’s documentation for the recommended way to integrate OpenVPN with resolvconf or systemd-resolved.
To connect to the VPN, simply use the command
sudo openvpn –config /path/to/my_expressvpn_server.ovpn
After you are connected to ExpressVPN successfully, you will see the words “Initialization Sequence Completed.”
To keep the VPN connection active, keep the Terminal window running in the background.
Need help? Contact the ExpressVPN Support Team for immediate assistance.
3. Confirm the VPN connection
After you see “Initialization Sequence Completed” in the terminal, open a second terminal and check your public IP with this command:
curl -4 https://ifconfig.me
The address you see should match the VPN location you connected to, instead of your home IP.
Need help? Contact the ExpressVPN Support Team for immediate assistance.
Disconnect from a VPN server location
To disconnect, enter Ctrl + C in the Terminal window.
Need help? Contact the ExpressVPN Support Team for immediate assistance.