


Need a VPN for Mac?
Get ExpressVPN Now
Love ExpressVPN? Want a free month?
Refer a Friend NowThis guide will show you how to change the DNS settings on your Mac device.
The Domain Name System (DNS) matches domain names with IP addresses so your device can find the correct website. By default, your DNS requests are handled by your internet service provider’s (ISP) DNS servers, which means your ISP can see the domains you look up. When you connect to ExpressVPN, your DNS requests are routed through ExpressVPN’s private, encrypted DNS servers instead of your ISP’s.
To use other DNS servers on your Mac:
- In the ExpressVPN app, disconnect from the VPN.
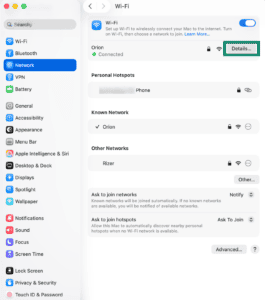
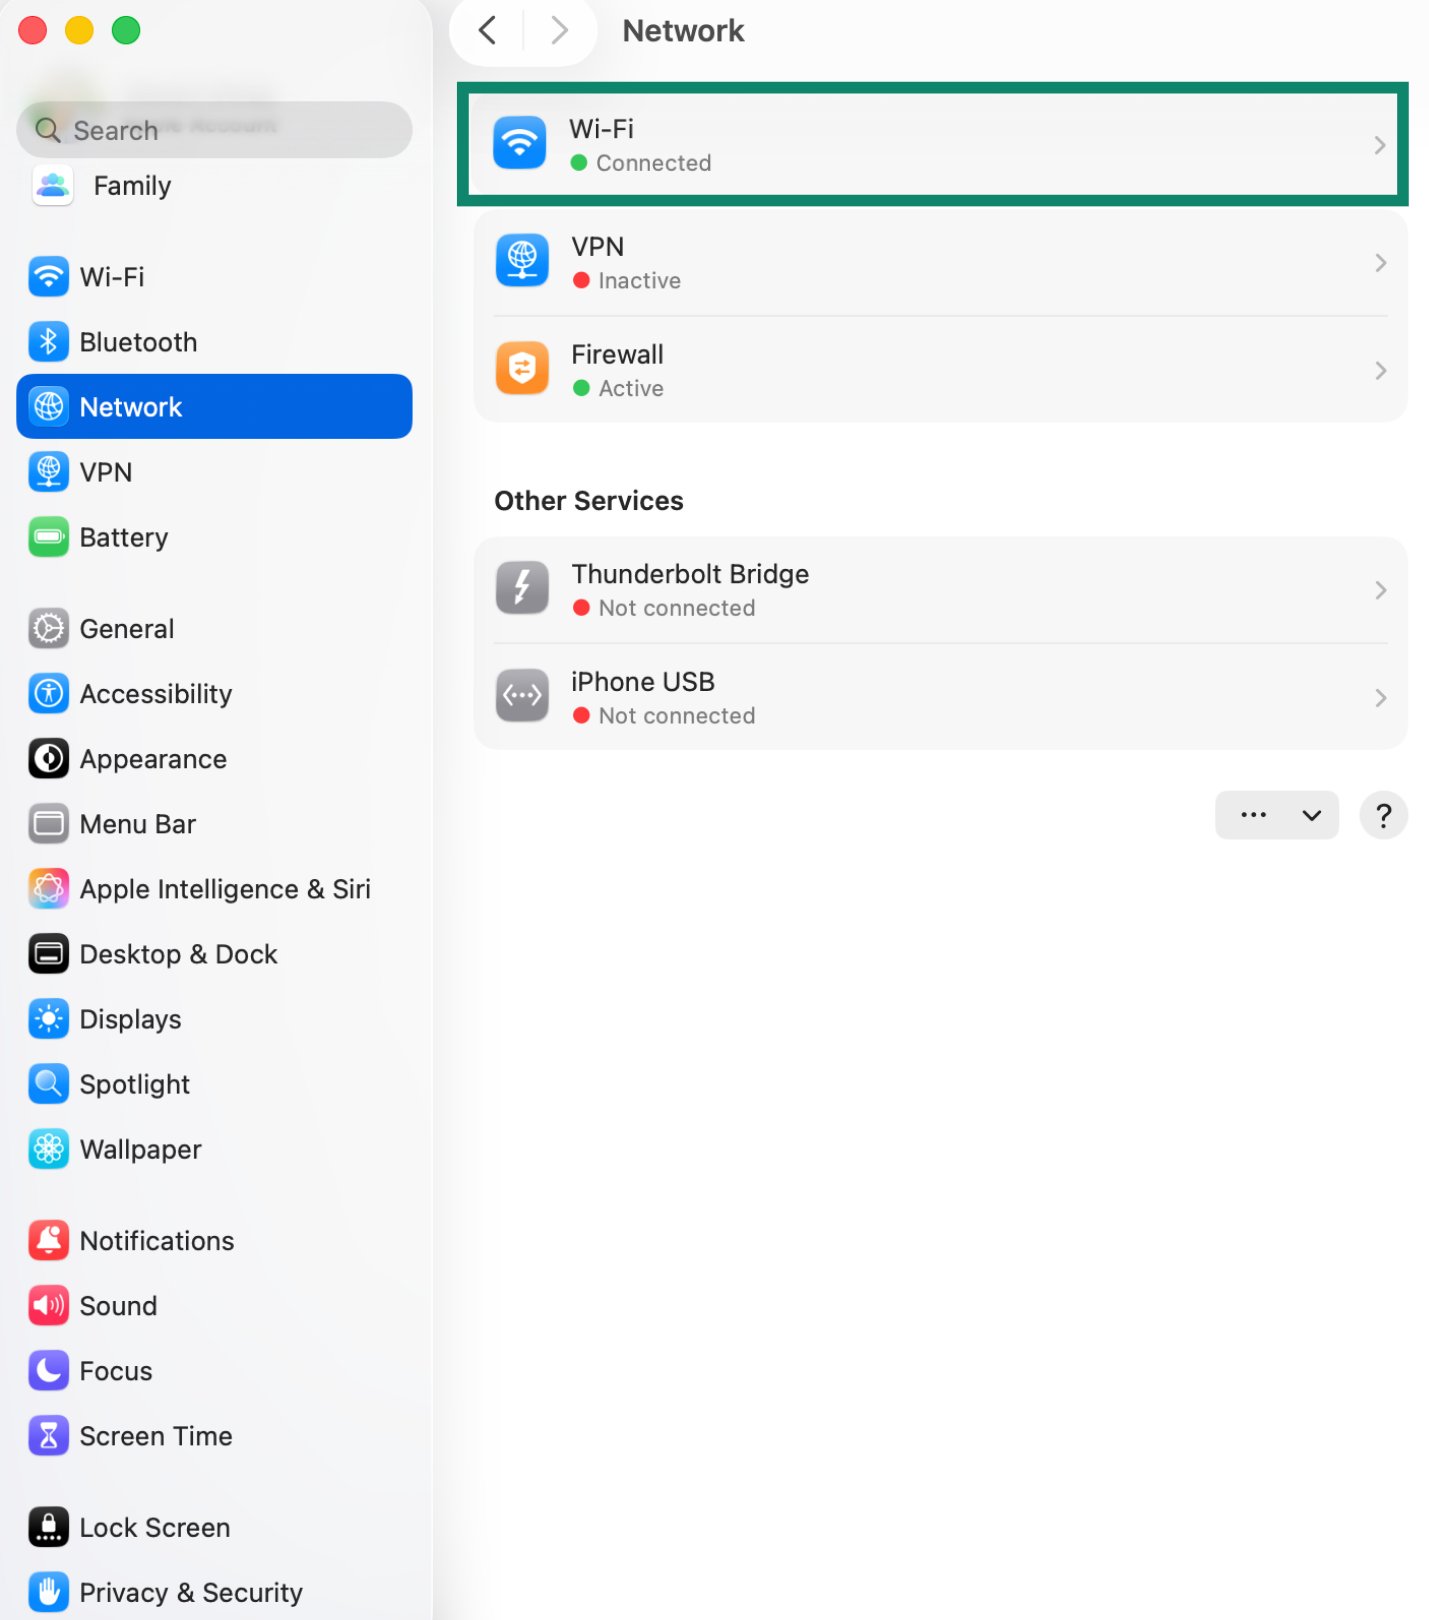
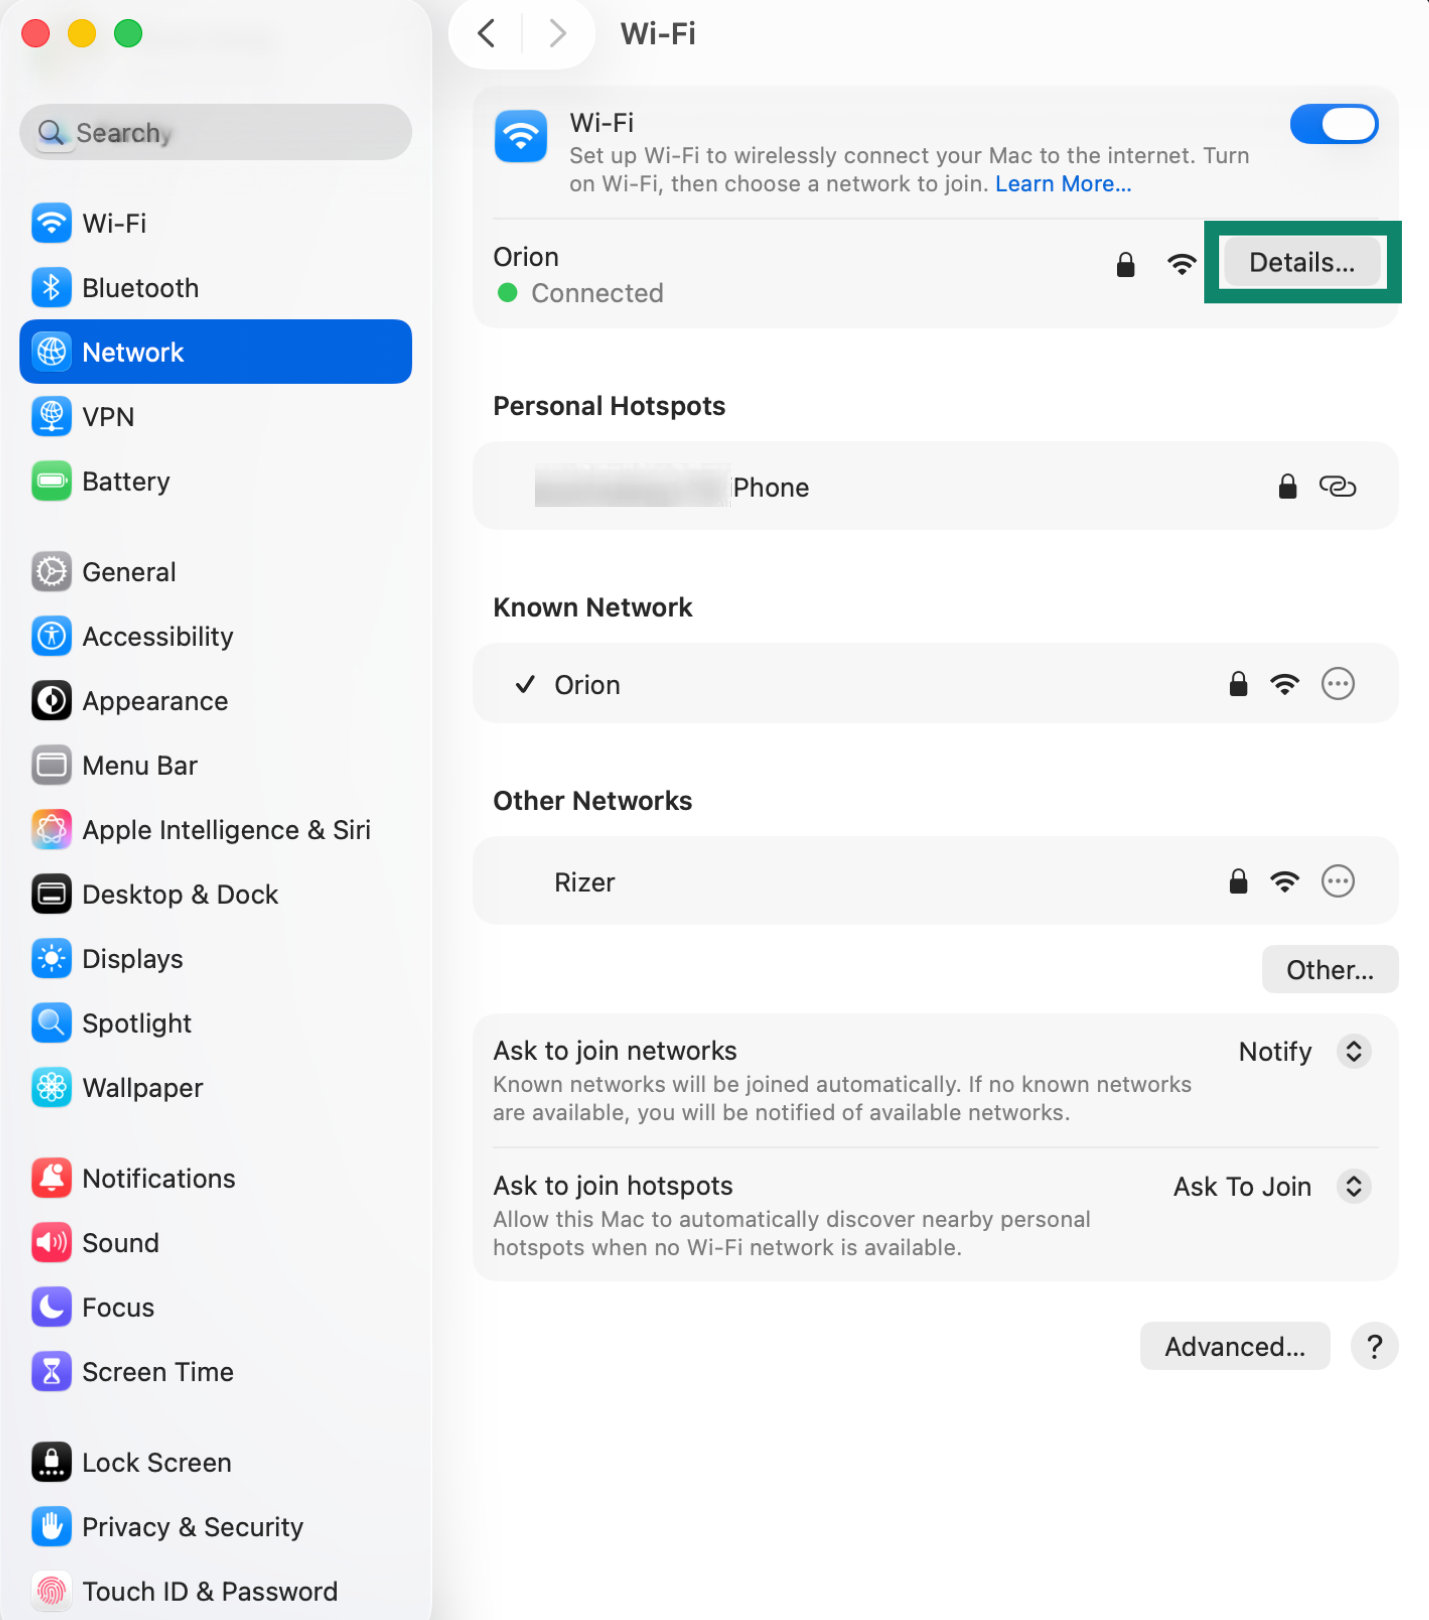
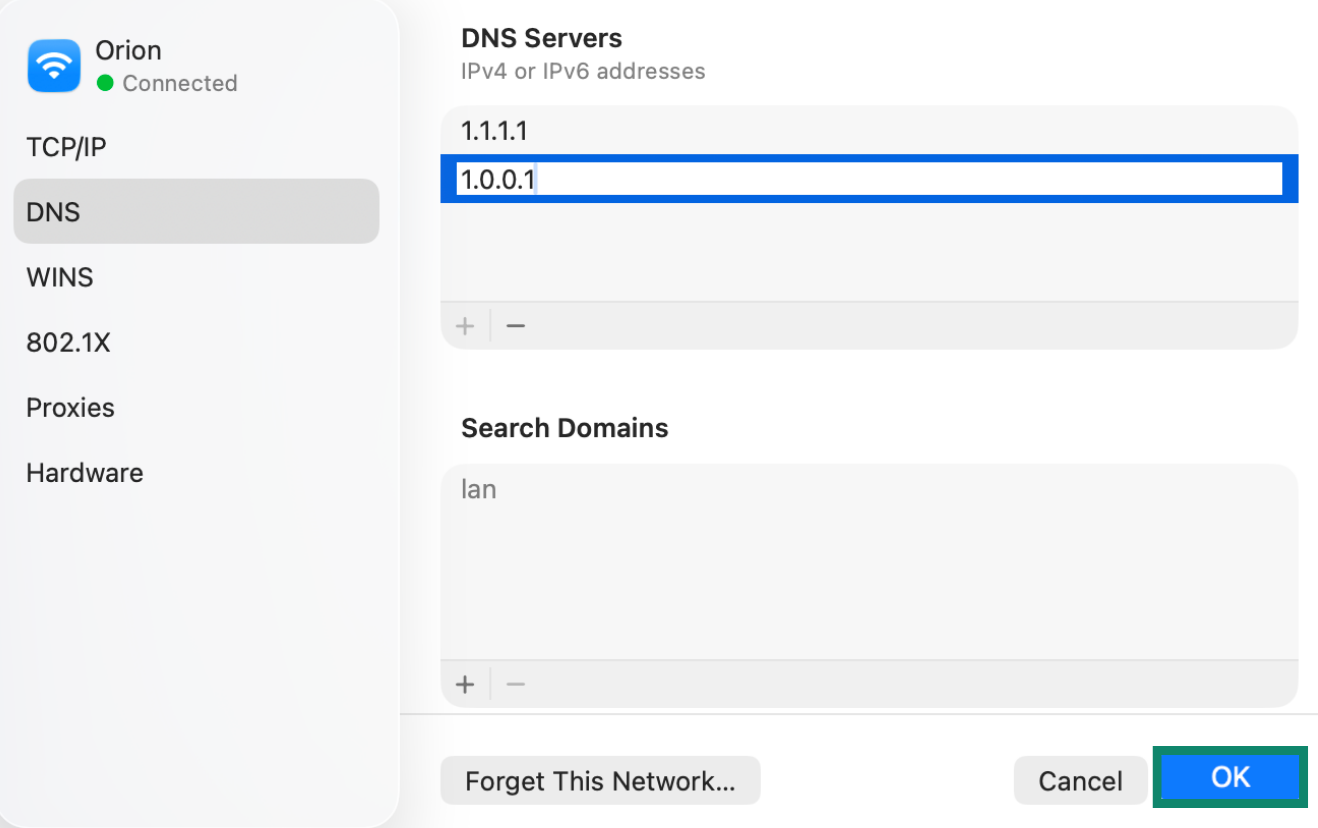
- On your Mac, go to Apple menu > System Settings > Network, and select your current connection (Wi-Fi or Ethernet).


- Click Details.
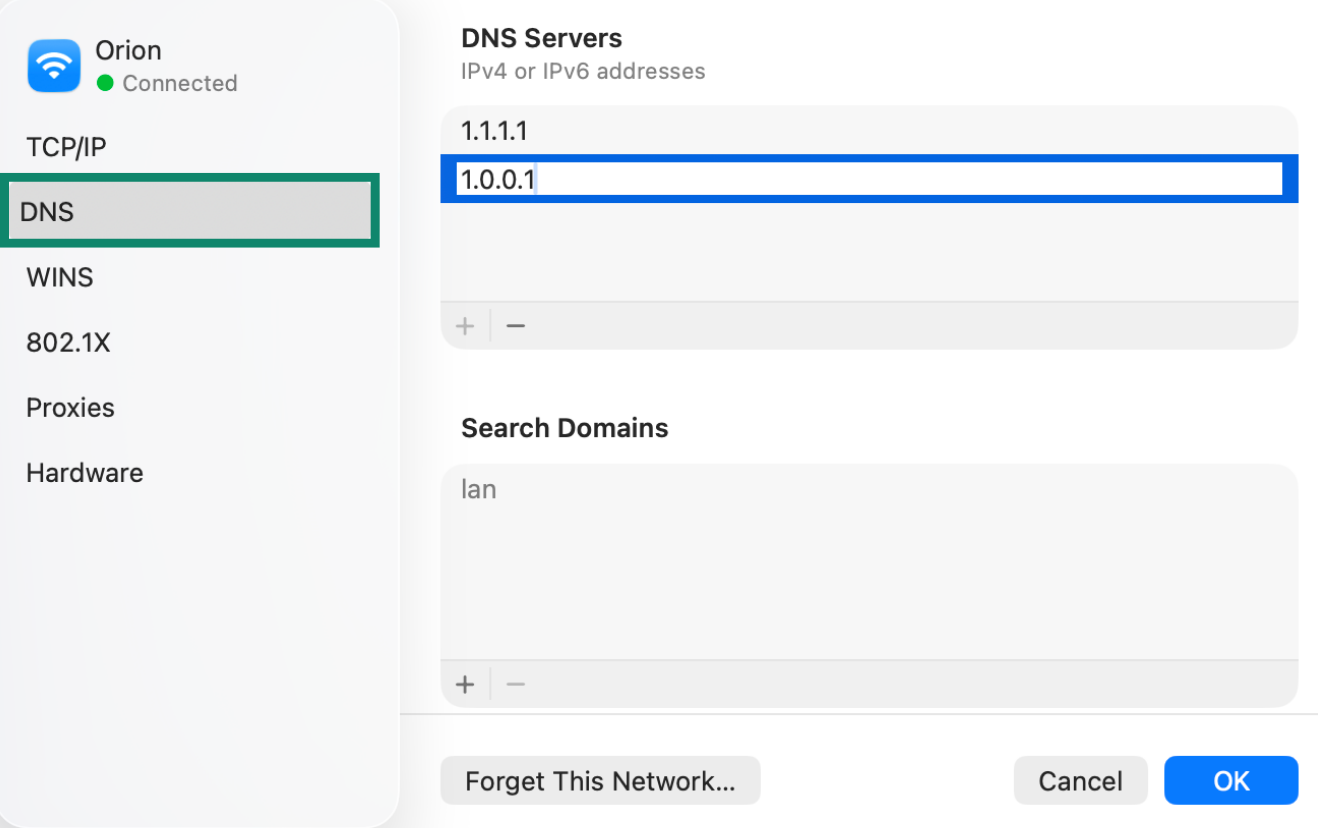
- In the sidebar, click DNS. Under DNS Servers, click the + button and enter the DNS server addresses you want to use. (You can use 1.1.1.1 and 1.0.0.1. These are Cloudflare’s public DNS servers.)


- Click OK.

Need help? Contact the ExpressVPN Support Team for immediate assistance.