How to kick people off your Wi-Fi and stop them coming back


Your Wi-Fi network connects all the devices in your home, from phones and laptops to smart TVs and other connected devices. When an unknown or untrusted device joins that network, it doesn’t just use your internet. It can become part of your local network. These connections may affect performance and, more importantly, introduce security or privacy concerns.
This guide explains how to identify devices on your network, remove unwanted ones, and prevent them from reconnecting.
Understanding Wi-Fi security
Wi-Fi networks allow devices to connect to the internet using a shared network name (called SSID, which stands for Service Set Identifier) and password. Any device with these credentials can join the network, and if the password is shared or exposed, unknown devices can become part of the local environment without your knowledge.
Why network security matters
Devices on your home network share the same local environment. Your laptop, smart TV, security camera, and phone can all communicate with each other over the network.
When a new device connects, it becomes part of that same network and may be able to detect or interact with other connected devices, depending on how your network is configured. Because of this, controlling who can join your Wi-Fi is important for maintaining a trusted and manageable network.
Risks of unauthorized access
An unsecured network increases the likelihood of unauthorized access, which can lead to the following risks.
- Wi-Fi performance: Even if the user with unauthorized access isn’t malicious, an additional device on the network can slow down connections, consume bandwidth, increase latency, and affect overall Wi-Fi network performance.
- Network scanning and service discovery: A connected device may be able to scan the local network to identify other devices and determine whether certain ports or services are accessible.
- Potential misuse of the connection: Any activity performed through your network is associated with your public IP address. Unauthorized users may use your connection for downloads, spam, or other activities without your knowledge.
- Weaker device security: Devices with outdated software or default credentials may be more vulnerable when unknown devices are present on the network.
Who is using my Wi-Fi?
The most reliable way to see which devices are connected to your Wi-Fi network is by checking your router’s dashboard or mobile app. Most routers provide a list of currently connected devices, allowing you to review them and identify any unfamiliar ones.
How to check connected devices
You can usually check which devices are connected to your Wi-Fi network by logging into your router’s admin interface through a web browser. Many modern routers also come with a dedicated mobile app, where you manage your network and view connected devices.
Check connected devices using your router dashboard
To access your router dashboard, open a web browser and enter your router’s IP address in the address bar. Most routers use 192.168.1.1 or 192.168.0.1, but if that doesn’t work, you can also find this information on a label on the router or in your network settings.
Next, enter your router username and password into the router dashboard. The admin credentials are separate from your Wi-Fi password. If you've never changed them, you can check the label on the router or its documentation.
The exact steps that come next may vary depending on your router model and manufacturer, but most routers provide a similar interface for viewing connected devices. The steps below use a TP-Link router as an example:
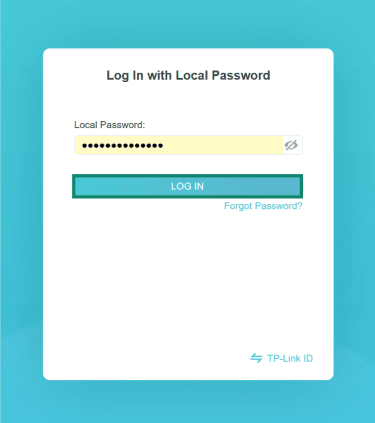
- Once you enter your router username and password into the router dashboard, click Log in.
- Navigate the Network Map tab and look for an option such as Clients.
Note: On other routers, you may find labels like DHCP Client List, Attached Devices, or Connected Devices.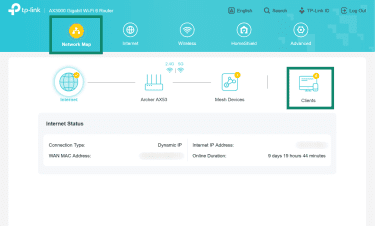
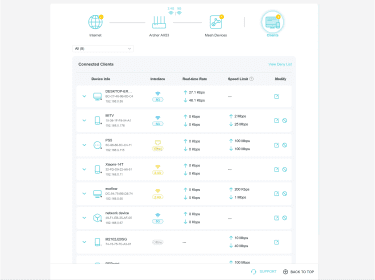
- This page will display a list of all devices currently connected to your network, along with details such as their name, IP address, and Media Access Control (MAC) address.
Check connected devices using your router's mobile app
If your router supports one, it can be a quicker and more user-friendly way to manage your network than logging into the dashboard via a browser. Search for your router's app on the Play Store or App Store, and log in using your router account credentials.
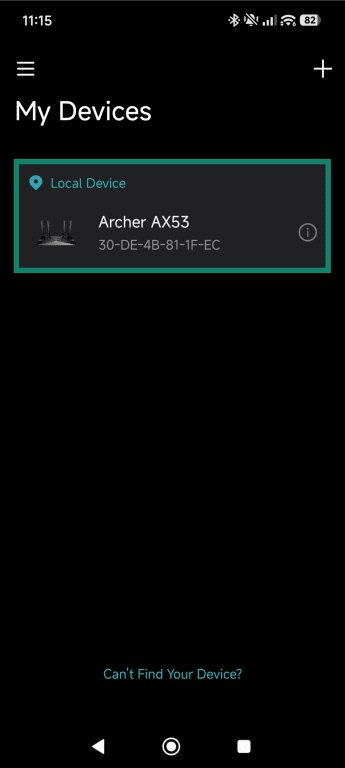
- Launch your router’s mobile app, log in, and select your router.
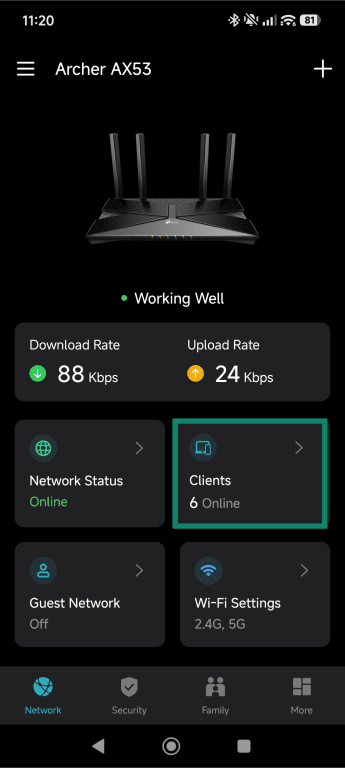
- Tap Clients. Other routers may include options like Devices or Connected Devices.
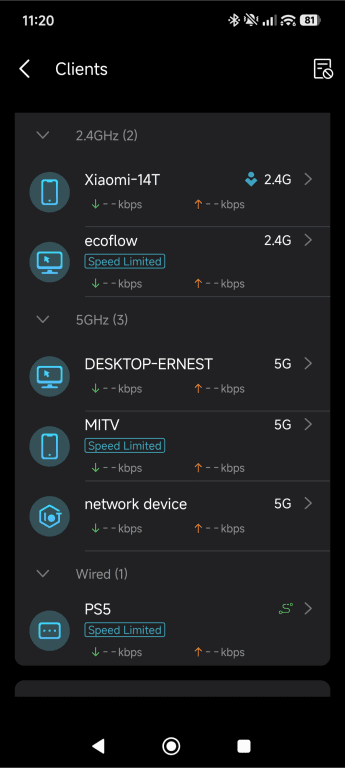
- Here, you’ll see a list of all devices connected to your network, with their name, type of device, and more information depending on the app.
How to identify devices by name, IP, and MAC address
Once you have a list of connected devices, the next step is to identify which ones belong to you. Routers typically display information that you can use to recognize each device.
Device name (hostname)
The device name (or hostname) is the name you see next to each item on the list. It’s often auto-set by the device’s operating system and shared on the network. Personal devices often use recognizable names like “John’s iPhone” or “DESKTOP-AB3KX7.” If you can match everything in the list to a device you own, you're done.
However, many devices, especially smart home or Internet of Things (IoT) devices, may use generic or manufacturer-based names or even appear as an “unknown device.” If you can’t confidently identify a device based on its name, move on to the IP address for more details.
IP address
If you couldn’t identify a device by its name, you can confirm which router entry belongs to which device by checking the IP address on the device itself and matching it to the router list. Here’s how to find the local IP address on different devices:
- Windows: Run ipconfig in Command Prompt and look for IPv4 Address under your Wi-Fi adapter.
- macOS: Run ifconfig en0 in Terminal and look for the address next to inet.
- Linux: Run ip addr show in Terminal and look for inet under your wireless interface (usually wlan0 or wlp2s0).
- iOS: Go to Settings > Wi-Fi, tap your network name, and you’ll find the IP address listed under the IPv4 section.
- Android: Go to Settings > Wi-Fi, and tap the gear icon next to your network. Select View More and the IP is displayed under IP address.
MAC address
The Media Access Control (MAC) address is a more reliable identifier for anything you can't identify by hostname or IP. It’s a 48-bit hardware address formatted as six hex pairs (AA:BB:CC:DD:EE:FF).
The first three octets are the Organizationally Unique Identifier (OUI), which identifies the manufacturer. You can paste any MAC into macvendors.com to look it up. A MAC registered to Samsung is probably a Samsung phone or TV. An unknown vendor is worth investigating.
To find the MAC address of your devices for cross-referencing:
- Windows: Run getmac /v in Command Prompt, or ipconfig /all and look under Physical Address.
- macOS and Linux: Run ifconfig or ip link show and look for ether.
- iOS: Go to Settings > Wi-Fi, tap your network, and look under Wi-Fi Address.
- Android: Go to Settings > About Phone > Status, and you’ll see a field that says Wi-Fi MAC Address or similar. It can vary depending on the manufacturer.
How to kick people off your Wi-Fi
You can remove unauthorized devices from your Wi-Fi either through your router's web dashboard or its mobile app. We have used a TP-Link router to illustrate the steps, but they may vary slightly depending on your router's manufacturer or model.
Disconnect devices from your router
Many router admin panels have a disconnect button next to each device in the client list. This drops the device from the network immediately.
However, if the person has your Wi-Fi password, their device reconnects automatically. You can use this method only as an instant measure while you set up a password change or until you block the device.
Block devices from your router's web admin panel or via the router app
Blocking a device prevents it from reconnecting, even if it has the password. Router admin panels handle device blocking differently depending on the manufacturer, model, and firmware version. Many offer a direct per-device block button in the client list.
Depending on your router model, the device may be cut off from the network entirely, or it may still show as connected but with no internet access.
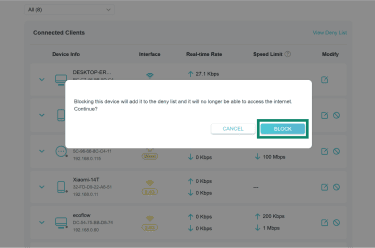
Here’s what that looks like on TP-Link routers’ web app:
- Log into your router dashboard in a web browser, navigate to Clients, and locate the device you want to remove. Next, click the block icon next to it.
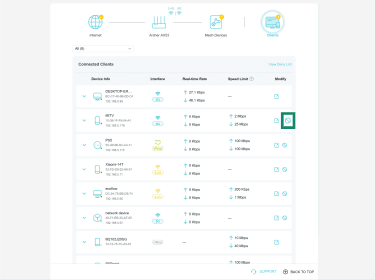
- Select Block to confirm.
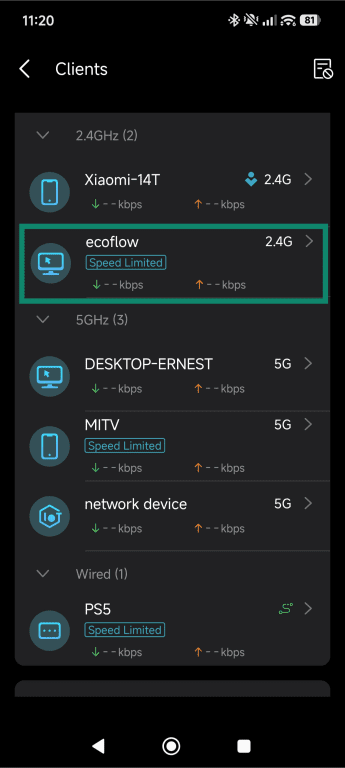
Most router companion apps also follow similar steps for blocking devices. We use TP-Link's Tether app for the following steps:
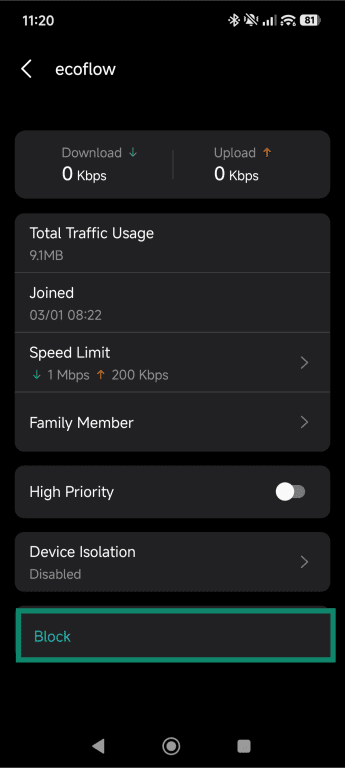
- Log into your router’s mobile app, navigate to the Clients section, and tap the device you want to block.
- Select Block.
Kick off devices on common routers with MAC address filtering
MAC filtering lets you block a device by its hardware address. This is useful when the device you want to block isn't currently connected, or when you want to block a device that your router's client list doesn't show a block button for.
Depending on the router, you may be able to do this via the web interface, the router app, or both. Manufacturers call this feature different things, but the mechanism is similar across all of them: you add a MAC address to a deny list and the router refuses that device.
TP-Link
- Log in at tplinkwifi.net or 192.168.0.1.
- Go to Advanced > Security > Access Control and enable it.
- Select Blacklist and click Save.
- In the Online Devices table, check the box next to the device you want to block.
- Click Block and the device is added to the blacklist automatically.
Netgear
- Log in at routerlogin.net.
- Go to Advanced > Security > Access Control.
- Select Turn on Access Control.
- Find the device in the list and check the box next to it.
- Select Block and confirm by clicking Apply.
ASUS
- Log in at router.asus.com.
- Go to Wireless > Wireless MAC Filter.
- Set Enable MAC Filter to Yes.
- Set MAC Filter Mode to Reject.
- Select the device from the Client Name (MAC Address) dropdown.
- Click Add, then click Apply.
D-Link
- Log in at 192.168.0.1.
- Click the Advanced tab and then Network Filter.
- From the dropdown, select MAC Filtering ON and DENY computers listed to access the network.
- Add the device's MAC address and click Save Settings.
If you want stricter control, you can also consider using MAC filtering to create an allow list. The flow is typically similar to creating a block list, but in this model, the only devices that can connect to your Wi-Fi are the ones on the list.
Keep in mind, though, neither of these solutions is foolproof. Some devices use MAC address randomization, which assigns a different hardware address to your device per network. It’s also possible to spoof a MAC address. So, in either case, you may experience devices not connecting, even though you added the MAC address to the allow list, or unwanted devices connecting even though you added them to a block list.
Change your Wi-Fi password to remove everyone
Changing your Wi-Fi password is the quickest way to disconnect every device on your network at once, including unauthorized ones, without having to identify and block them individually. Once the password is changed, all connected devices are usually dropped from the network and have to re-enter the new password to reconnect.
This can be done either from your router’s web browser interface or through the router’s mobile app. The steps below use a TP-Link router and Tether app as examples, but the process is similar on other routers and apps.
Via web app
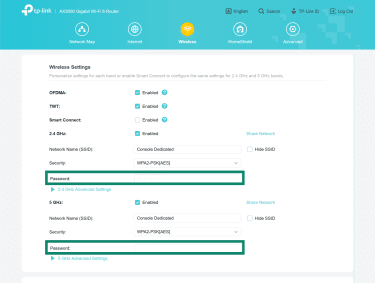
- In your router dashboard, go to Wireless.
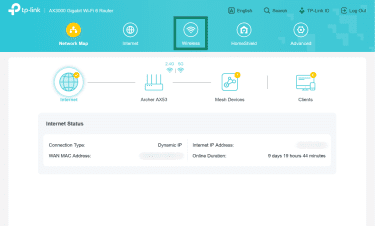
- Change the passwords under both the 2.4GHz and 5GHz bands.
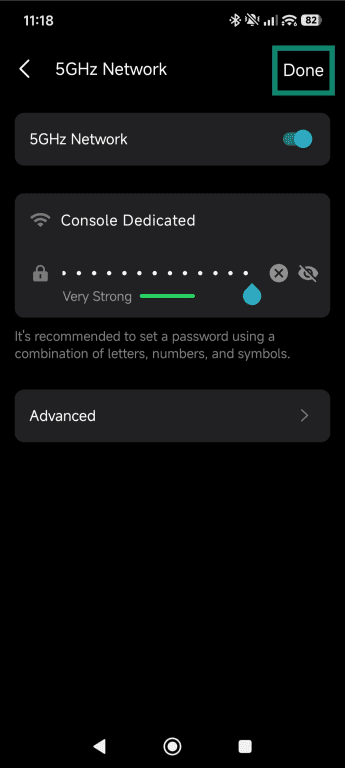
Via router app
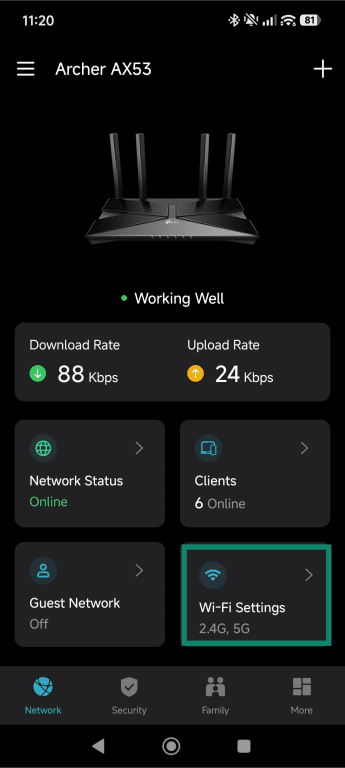
- In your router’s mobile app, tap Wi-Fi Settings.
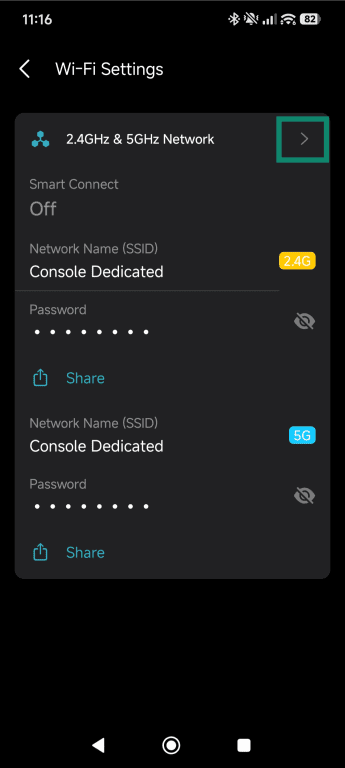
- Tap the arrow next to 2.4GHz & 5GHz Network to open the network settings.
- Tap the arrow next to 5GHz Network.
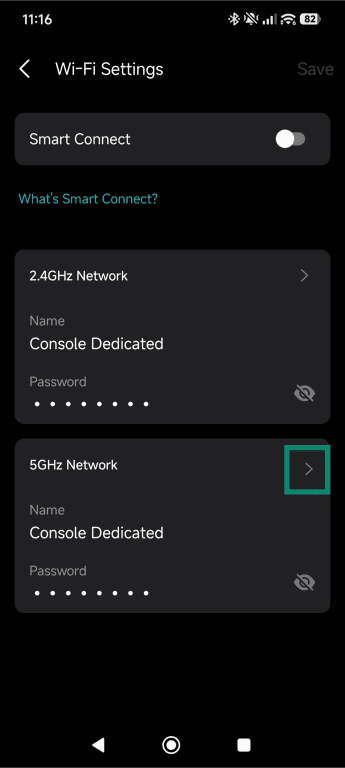
- Enter a new strong password and tap Done. Repeat the process for the 2.4GHz network.
Once saved, only devices with the new password can reconnect.
How to protect your Wi-Fi from unauthorized access
Removing unauthorized devices is only the first step. You should also follow good Wi-Fi security practices to prevent them from reconnecting.
Set a strong password and use WPA2 or WPA3
To keep your Wi-Fi secure, start by using a strong password. Aim for at least 10–12 characters with a mix of uppercase and lowercase letters, numbers, and symbols. To make this easier, you can use a password generator and then store it in a safe password manager like ExpressKeys. An even better option is a passphrase, which is easier to remember but still difficult to crack.
You should also make sure your network is using Wi-Fi Protected Access 2 (WPA2) or WPA3 security. These are encryption standards that protect the data being sent over your Wi-Fi, so others can’t easily intercept it.
WPA2 is still widely used and secure, as it relies on strong Advanced Encryption Standard (AES) encryption. WPA3 is the newer and more secure option, improving both protection and efficiency, and it also includes a feature called perfect forward secrecy (PFS). PFS uses temporary encryption keys to help keep your past and future data protected. That said, not all older devices support WPA3, so you may need to stick with WPA2 depending on your setup.
Turn off WPS
Wi-Fi Protected Setup (WPS) was designed to make it easy to connect devices like printers without entering a password, but it has a flaw that makes your network vulnerable.
The PIN used by WPS looks secure at 8 digits, but routers check it in two parts instead of all at once, which drastically reduces the number of possible combinations an attacker needs to try. This means an attacker only needs to brute-force part of the PIN, reducing the search space from 10 million down to about 11,000.
Once the correct PIN is found, they can connect to the network and retrieve the Wi-Fi password. Disabling WPS entirely in your router's wireless settings is the safest approach to prevent exploitation of this vulnerability.
Create a guest network for visitors
Instead of giving out your main Wi-Fi password to every visitor, set up a Wi-Fi guest network. This is a separate access point on your router that lets people connect to the internet without placing them on your main network.
If a guest's device is infected with malware or an IoT device gets compromised, the damage often stays contained to the guest network. You can usually enable a guest network in your router settings or ISP app under options like “Guest Network” or “Guest Access.”
Guest network best practices
To keep your guest network secure and under control, you can consider adjusting the following settings.
- Enable AP (Access Point) isolation: This prevents devices on the guest network from communicating with each other, reducing the risk of unwanted interaction between guests.
- Limit bandwidth: If your router supports it, set speed limits so one device can’t use up all your internet.
- Use it for IoT devices: Smart devices like cameras, plugs, and TVs often have weaker security and don’t need access to your main network, so placing them on the guest network adds an extra layer of separation.
- Set a session timeout: Automatically disconnect devices after a certain period to avoid lingering connections you might forget about.
- Schedule access: Disable the guest network during times you don’t need it to reduce unnecessary exposure.
Keep router firmware updated
The router's firmware is the software that controls how the router operates and manages connected devices and security within your network. However, over time, the firmware may become outdated and develop security flaws.
Outdated firmware may also affect router performance, leading to high latency and slower speeds. This is why it is important to periodically update your router's firmware.
Some routers include an automatic update feature where the device regularly checks for new firmware and installs updates during quiet hours. Alternatively, you can check for updates by logging into your router’s admin dashboard.
Depending on your router’s interface, the update section may be accessible through the Firmware Update, Advanced Settings, or Administration tab. Once you locate the update section, click Check for updates to see if a newer firmware version is available. If so, click Install and restart the router once the update is complete.
Older router models may require you to manually download the new firmware from the manufacturer’s website and then upload it to the admin dashboard.
Enable security alerts and device notifications
Many ISP providers offer security alerts and notification features that notify you whenever a new device joins the network, helping you monitor new connections. These alerts allow you to quickly detect unknown connections, block suspicious devices before they cause network issues, and monitor activity more effectively.
If someone keeps reconnecting
Sometimes you may notice a device reconnecting to your Wi-Fi network even after frequent disconnections. Here are some specific scenarios where simply disconnecting or blocking might not work, and you may have to take additional steps to secure your Wi-Fi network.
What to do if your password gets shared
If your password gets shared or multiple people have access to it without your consent, the simplest solution is to change your Wi-Fi password. You can do so from your router's admin panel in a web browser or through your router’s mobile app.
How to handle unknown devices returning
If a device shows up again after a password change, check these:
- If 2.4GHz and 5GHz use different SSIDs or passwords, the device may still be connecting to the other one. Update both, or enable band steering.
- Devices with an active session may stay connected after a password change. Reboot the router to force reauthentication.
- If your password is guessable or already known, it may have been obtained again. Use a strong, unique password.
- Old phones, IoT devices, and consoles are easy to forget. Check MAC OUIs before assuming anything malicious.
When to reset your router and start fresh
Resetting your router is a good idea if you suspect the problem is with the router itself, if your admin credentials were changed, or if the device is second-hand.
To reset: hold the reset button for 10–30 seconds until the LEDs change, then release. After reboot, immediately set new admin credentials, configure WPA2 or WPA3 with a strong password, disable WPS, and only then reconnect devices.
FAQ: Common questions about kicking people off your Wi-Fi
How do I block devices connected to my Wi-Fi?
How can I block someone from using my Wi-Fi without changing the password?
How can I block a Wi-Fi user using my phone?
What can I do if someone keeps reconnecting to my Wi-Fi?
How do I secure my Wi-Fi network effectively?
Explore the web with greater privacy
Get ExpressVPNSign up today for a chance to win FIFA World Cup 2026™ tickets.