


Need a VPN for Linux?
Get ExpressVPN Now
Love ExpressVPN? Want a free month?
Refer a Friend NowThis guide will show you how to manually configure your Linux computer with other DNS server addresses to activate the ExpressVPN app.
Jump to…
Method 1: Configure DNS using your desktop network settings
Check which terminal method to use
Method 2: Configure DNS using NetworkManager nmcli
Method 3: Configure DNS using resolvconf
Method 1: Configure DNS using your desktop network settings
On many Linux desktop distributions, you can configure DNS settings without the terminal. The exact steps may vary depending on the distribution and desktop environment, but the general steps are:
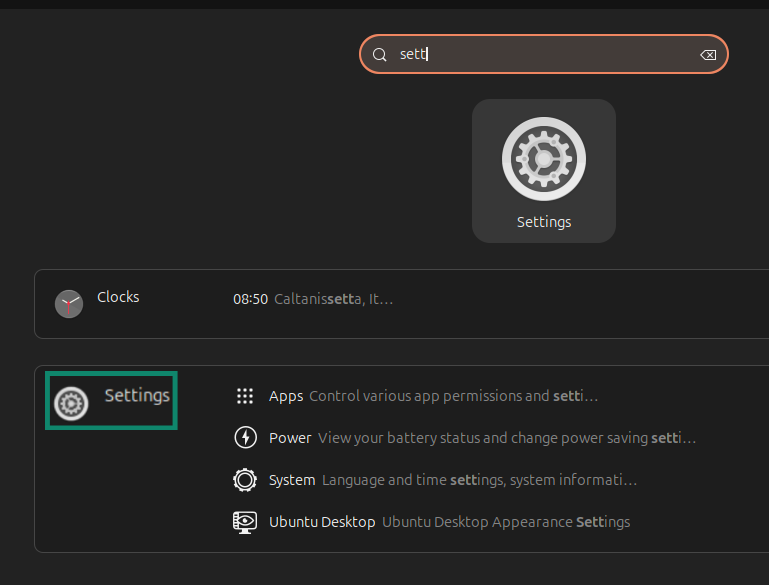
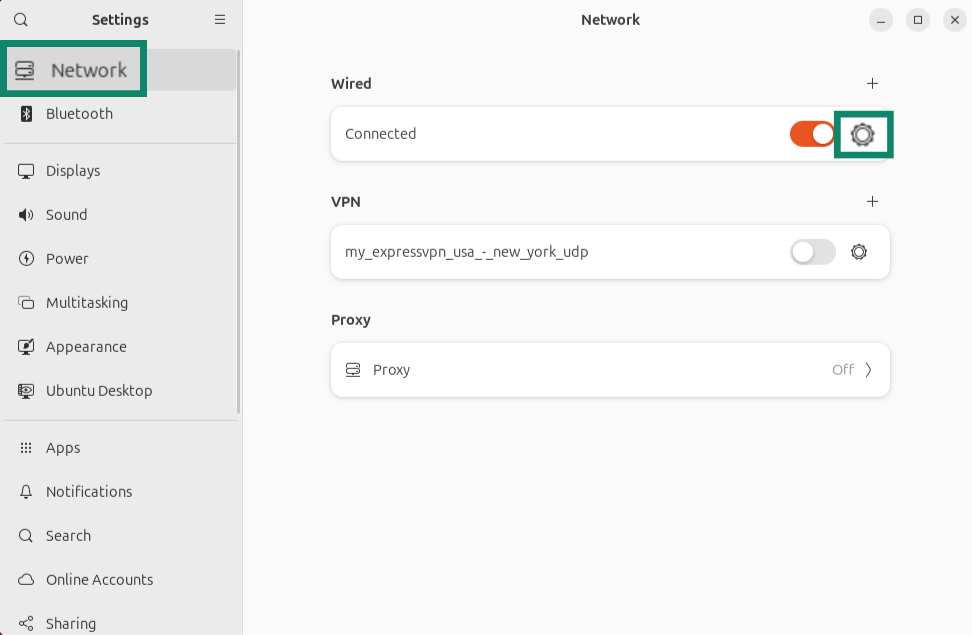
- Open Settings.


- Go to Network and open your main connection’s settings.


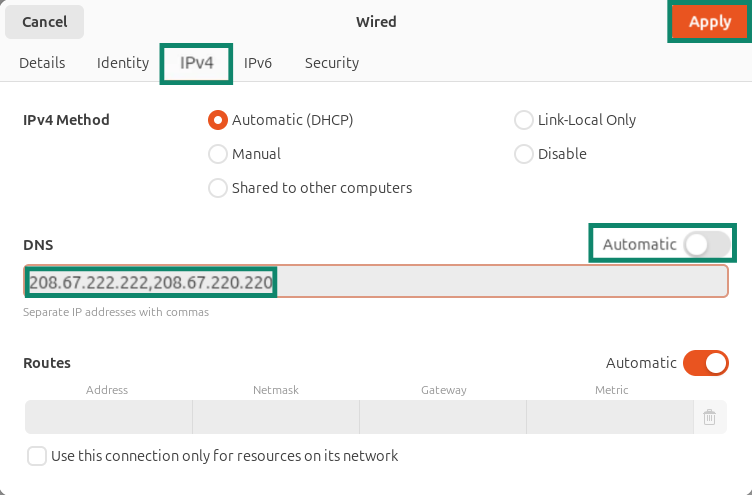
- Select IPv4 and disable automatic DNS. Enter the DNS server addresses you want to use, with commas separating them. Apply the changes.


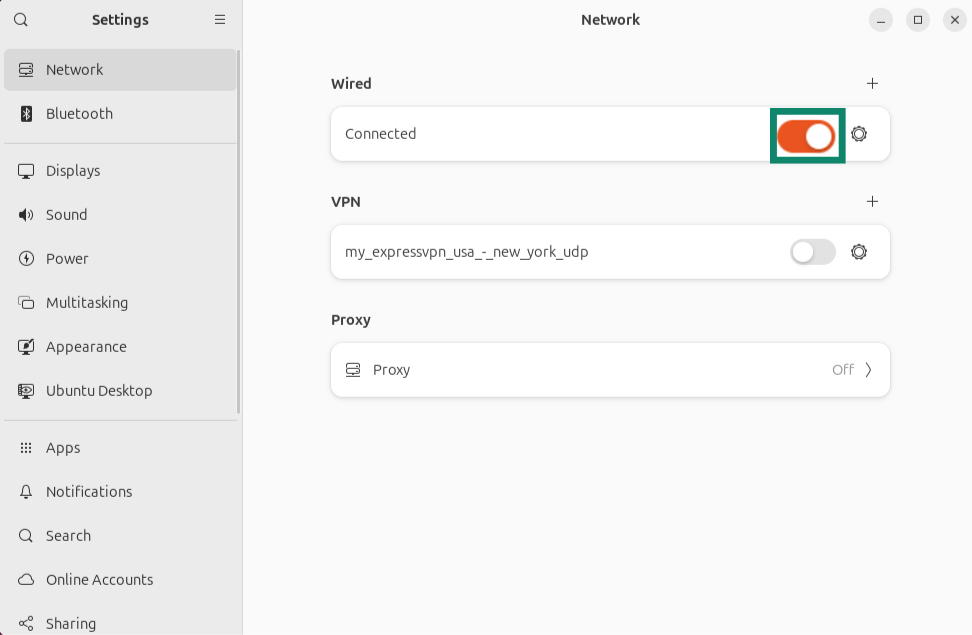
- Disconnect and reconnect to the network.

- Run the following command to verify that the DNS addresses have been added:
resolvectl status
If that command is not available or does not show your DNS servers, run:
cat /etc/resolv.conf
If you can’t change DNS from the graphical settings app, use the terminal method that matches your system.
Need help? Contact the ExpressVPN Support Team for immediate assistance.
Check which terminal method to use
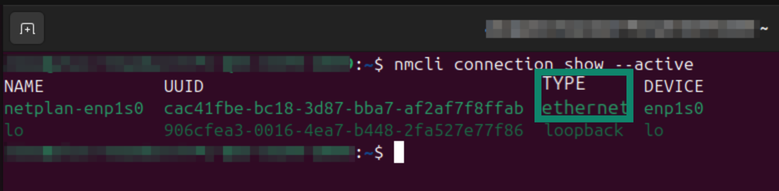
First, check whether NetworkManager is managing your active connection:
nmcli connection show --active
If this command shows your active Wi-Fi or Ethernet connection, use Method 2. If the command is not available, does not show your active connection, or you are not using NetworkManager, check which DNS method your system uses:
ls -l /etc/resolv.conf
If the output is “/run/systemd/resolve/stub-resolv.conf” or “/run/systemd/resolve/resolv.conf,” then the system uses systemd-resolved. In this case, use your desktop network settings or the NetworkManager method below if NetworkManager is active.
If the output is “/run/resolvconf/resolv.conf,” then the system uses resolvconf. If your system uses resolvconf, use Method 3.
Need help? Contact the ExpressVPN Support Team for immediate assistance.
Method 2: Configure DNS using NetworkManager nmcli
- With the “nmcli connection show –active” command, find your active connection name. In the “TYPE” column, you may see either “ethernet” for a wired connection or “wifi” for a wireless connection.


- Run the following command and replace “name-of-your-active-connection” with the connection name from the “NAME” column.
sudo nmcli connection modify “name-of-your-active-connection" ipv4.ignore-auto-dns yes
Then run the following command:sudo nmcli connection modify "name-of-your-active-connection" ipv4.dns "208.67.222.222 208.67.220.220" - Restart your internet connection with the following commands:
sudo nmcli connection down “name-of-your-active-connection"sudo nmcli connection up “name-of-your-active-connection" - To check that you’re using the new DNS addresses, run the following command:
resolvectl status
The “Current DNS Server” and “DNS Servers” entries for your active connection should show the DNS addresses you configured.
Need help? Contact the ExpressVPN Support Team for immediate assistance.
Method 3: Configure DNS using resolvconf
Note: Only use this method if your system already uses resolvconf or if your distribution’s documentation tells you to use resolvconf. Installing resolvconf on a system that does not already use it may change how DNS is managed.
If your system uses resolvconf, follow these steps to configure DNS:
- Install resolvconf using the command:
sudo apt-get install resolvconf - Open the resolvconf configuration file with a text editor (like Vim):
sudo vim /etc/resolvconf/resolv.conf.d/base - Remove any “nameserver” lines that are already in the file and add the DNS server addresses with the commands:
nameserver 208.67.222.222
nameserver 208.67.220.220
Save the file. - Back up the current resolver file with the command:
sudo mv /etc/resolv.conf /etc/resolv.conf.backup
Link resolv.conf to resolvconf with the command:
sudo ln -s /run/resolvconf/resolv.conf /etc/resolv.conf
Then run:
sudo resolvconf -u - Restart the network services using the command:
sudo /etc/init.d/networking restart
You have changed the DNS server used on your Linux computer. If you had trouble activating the ExpressVPN app for Linux before, try activating the ExpressVPN app again.
Need help? Contact the ExpressVPN Support Team for immediate assistance.