


In some cases, you may need to block specific IP addresses on your router, for example, when troubleshooting streaming or VPN connectivity issues.
This guide will show you how to block IP addresses on TP-Link routers.
To block IP addresses on your TP-Link router, you will need to set some special routing rules to ensure your network traffic will not flow through the IPs you specified.
Jump to…
Block IP addresses on your TP-Link router
Check if the IP addresses are blocked
Block IP addresses on your TP-Link router
Log in to your router admin panel
To access your router admin panel, go to 192.168.0.1 in your web browser and log in with your username and password (by default, both are admin). If your router’s IP address was changed in the past, and you cannot remember it, you can find it in your device’s settings.
Different TP-Link router models have their own dashboard interfaces, so refer to the section below that matches your router admin panel.
Change your router’s network settings
For more recent TP-Link router models
In your router admin panel, click the Advanced tab.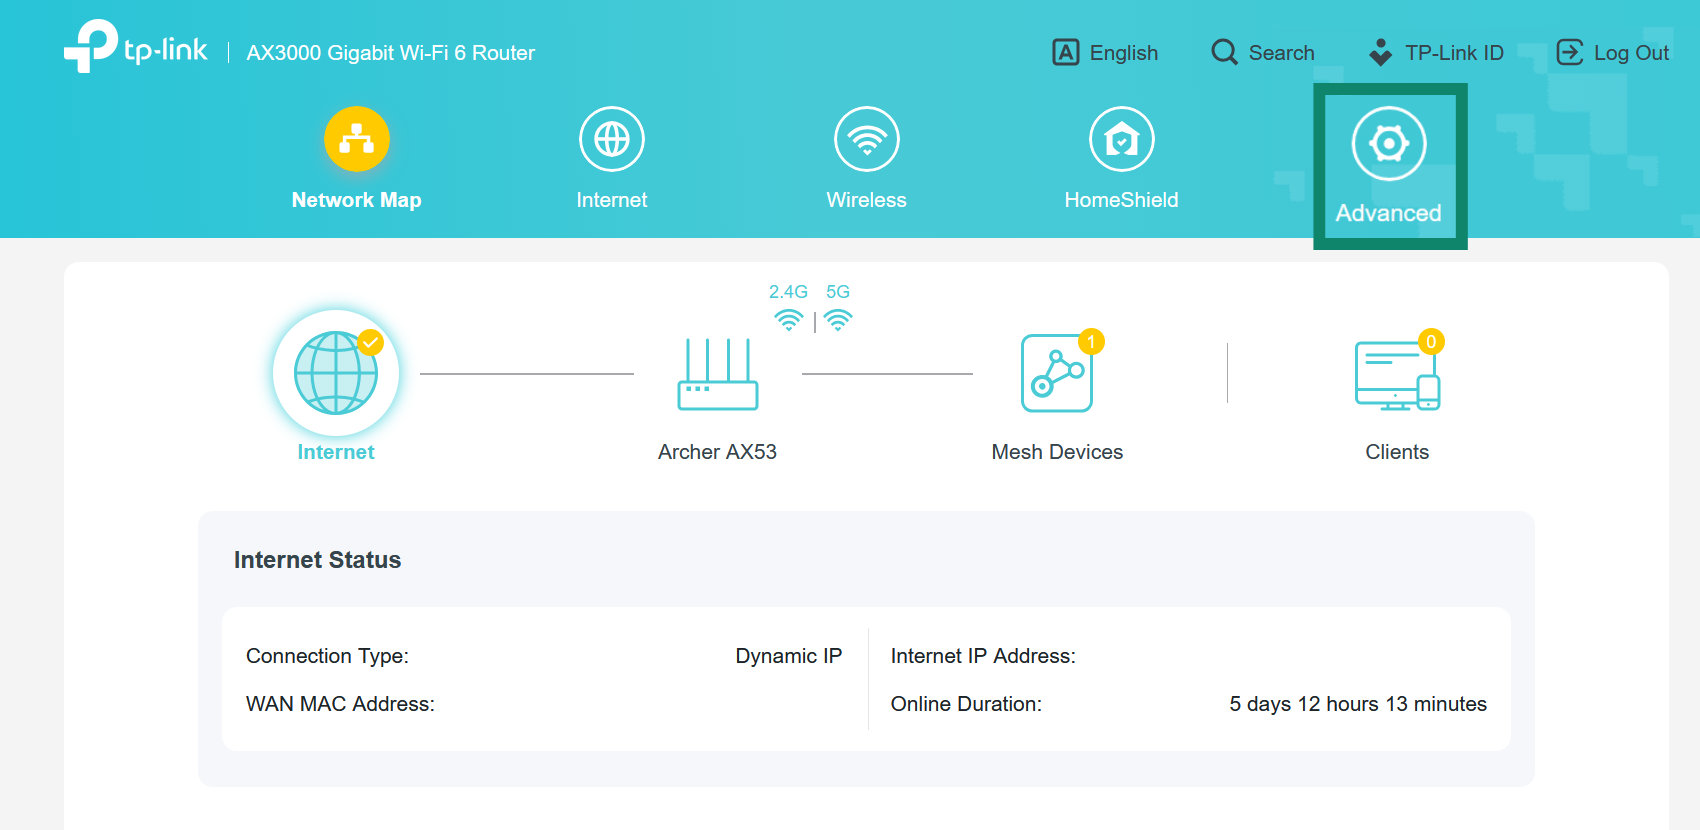
From the sidebar, go to Network > Routing.
Under Static Routing, click + Add.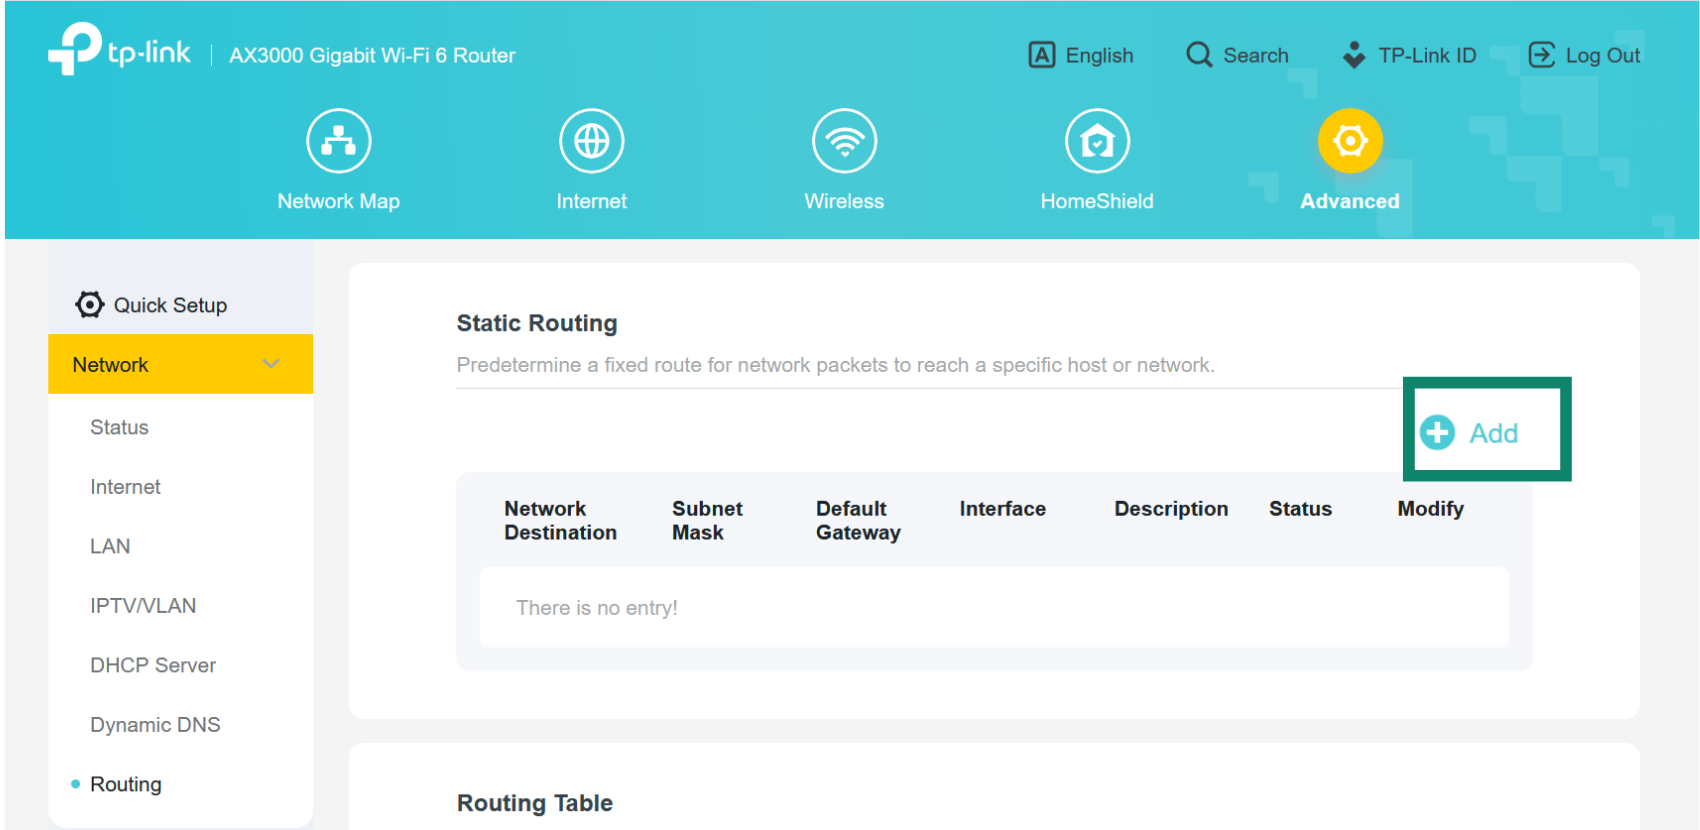
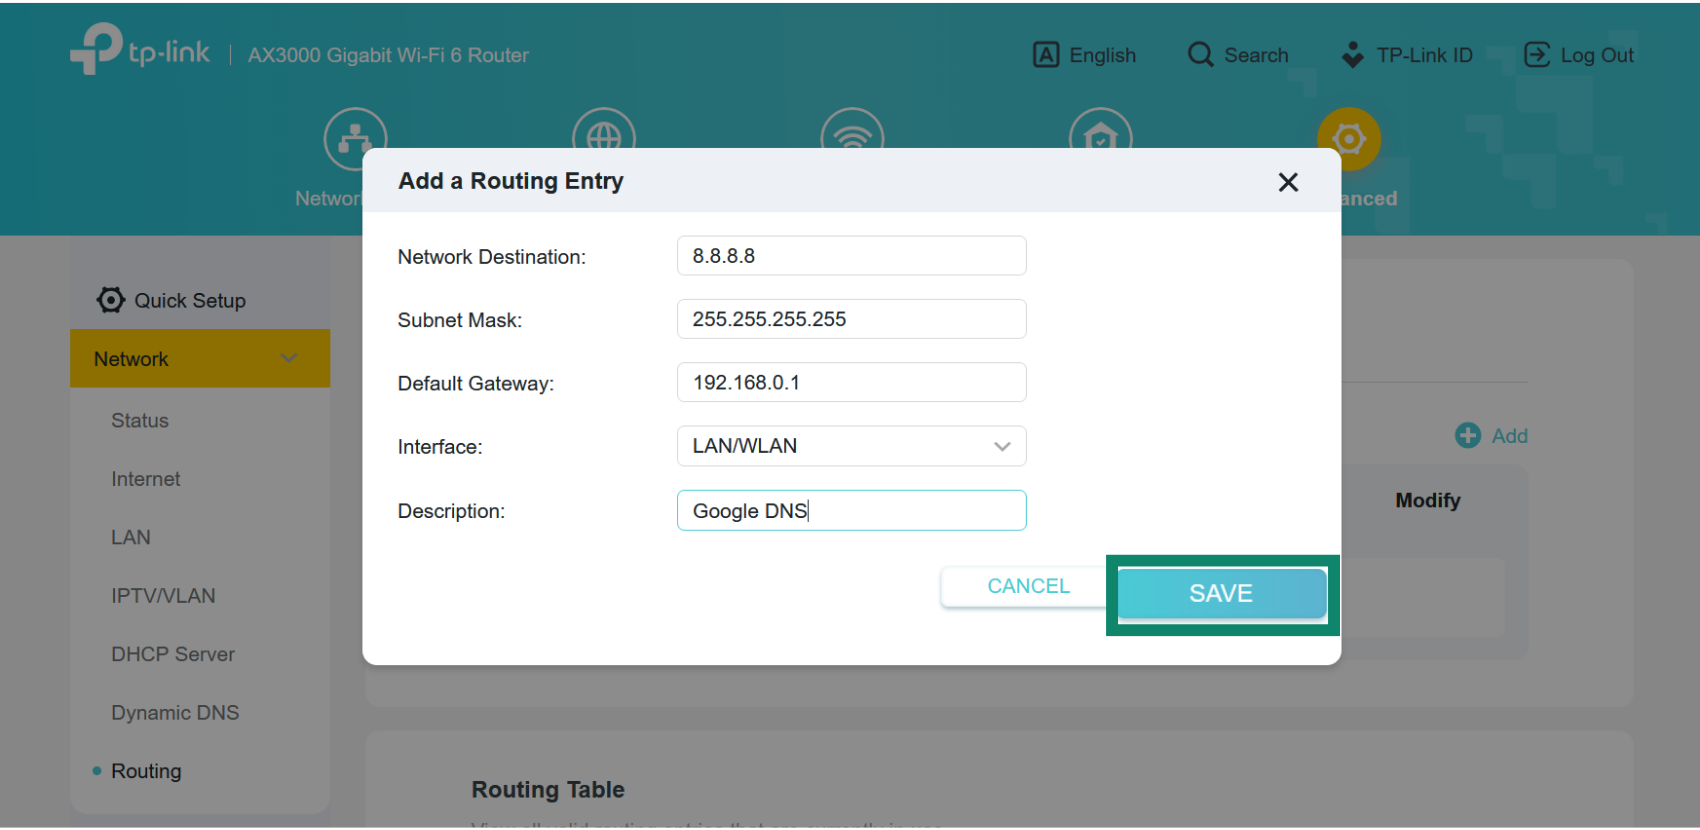
Enter the following:
- Network Destination: Enter the IP address you wish to block.
- Subnet Mask: Enter 255.255.255.255.
- Default Gateway: Enter 192.168.0.1. (If your default gateway was changed in the past, find it in your device’s settings.)
- Interface: Select LAN/WLAN.
- Description: Enter a description for the IP address you are blocking (e.g., Google DNS).
Click Save.
You may need to block a few more IP addresses, depending on what you are troubleshooting. To learn more about which IPs you may need to block, contact the ExpressVPN Support Team.
For older TP-Link router models
In your router admin panel, click Advanced Routing > Static Routing List.
Click Add New…
Enter the following:
- Destination Network: Enter the IP address you wish to block.
- Subnet Mask: Enter 255.255.255.255.
- Default Gateway: Enter 192.168.0.1. (If your default gateway was changed in the past, find it in your device’s settings.)
- Status: Select Enabled.
Click Save.
You may need to block a few more IP addresses, depending on what you are troubleshooting. To learn more about which IPs you may need to block, contact the ExpressVPN Support Team.
Need help? Contact the ExpressVPN Support Team for immediate assistance.
Check if the IP addresses are blocked
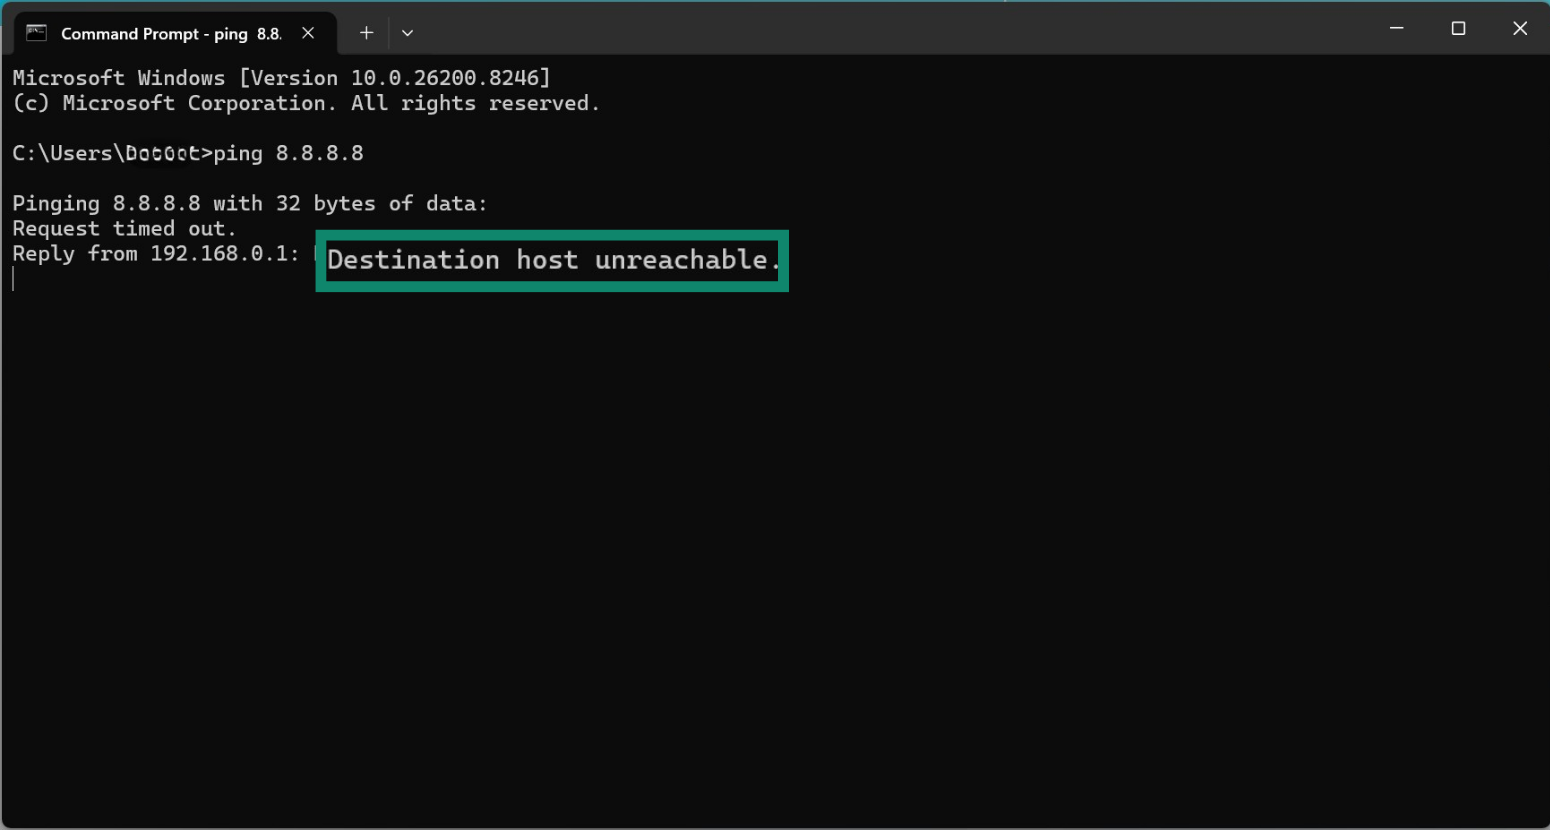
To check if you have successfully blocked the IP addresses, open Terminal (for Mac), or Command Prompt (for Windows).
Enter the IP addresses you have blocked, e.g.,
ping 8.8.8.8
The ping tests should read “Timed out” or “Destination host unreachable.”
If not, repeat the steps above.
Then restart your router.
Need help? Contact the ExpressVPN Support team for immediate assistance.