How to identify and remove the Windows Defender Security Center scam


Fake Windows Defender Security Center alerts are a common online scam. They’re designed to do one thing: make you panic.
These messages often look official, sound urgent, and warn you about serious security threats that don’t actually exist. They pressure you to act fast, usually by calling a fake support number or clicking a dangerous link.
Knowing how this scam works and how to shut it down quickly can help you avoid identity theft, financial loss, and long-term device problems.
This guide explains how to tell the difference between a real system alert and a Windows Defender scam pop-up, what to do if one appears, and how to protect yourself from similar scams in the future.
What is the Windows Defender Security Center scam?
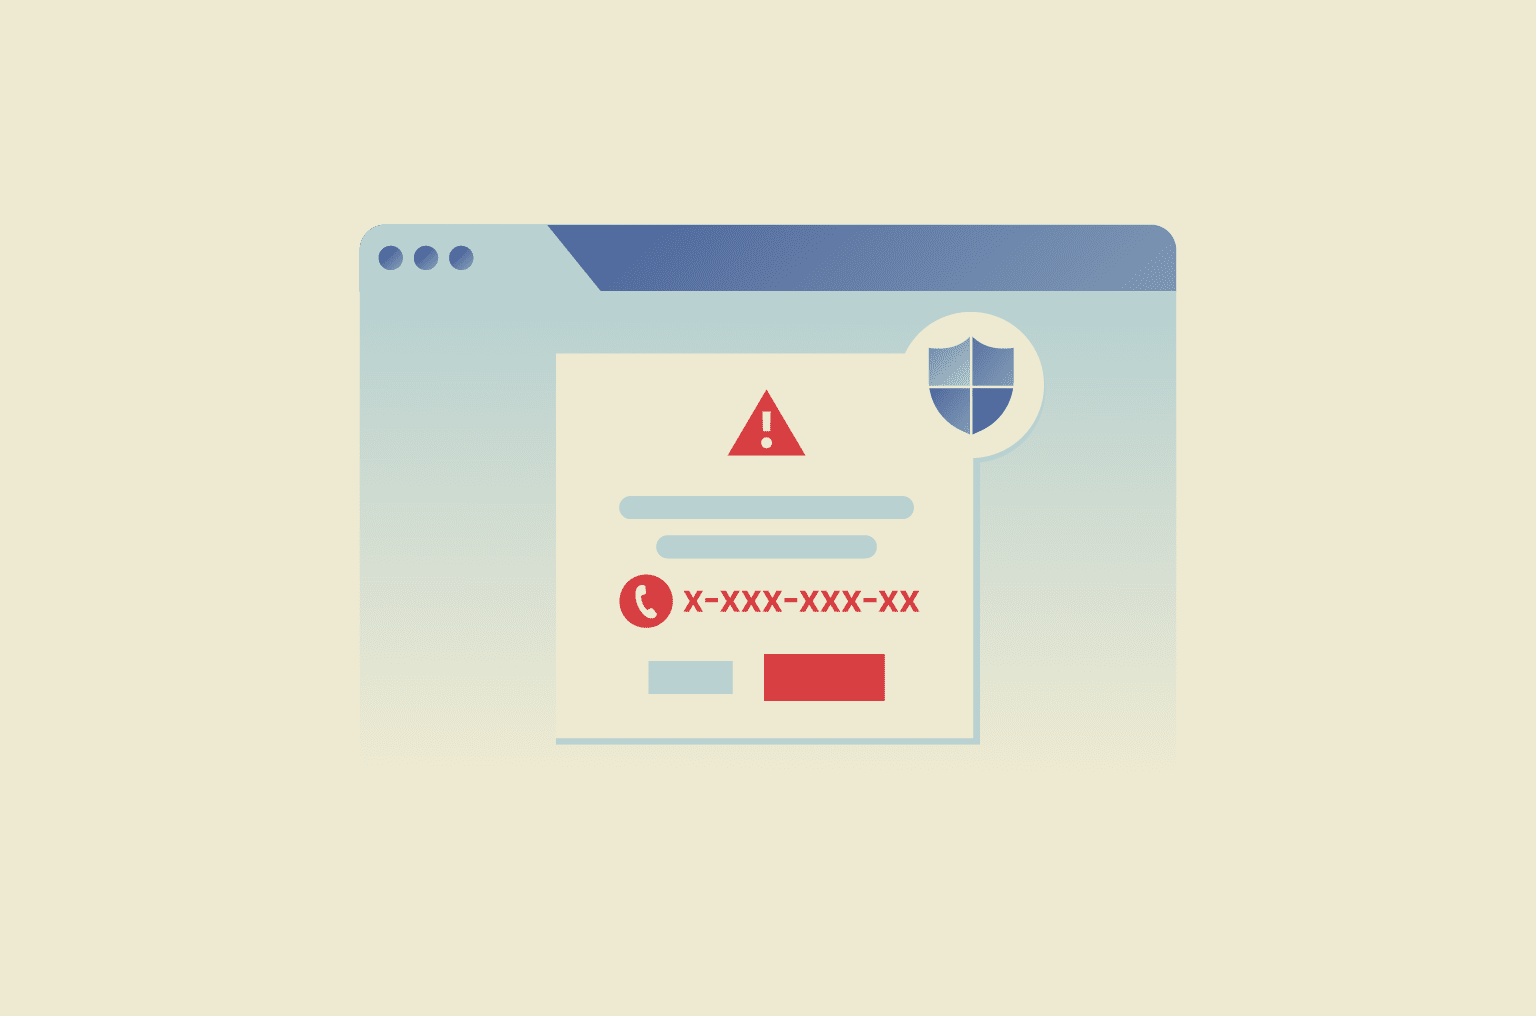
The Windows Defender Security Center scam is a type of tech support fraud. Scammers display fake security alerts in your browser that impersonate Microsoft’s antivirus software (Windows Security).
These alerts claim your device is infected with malware, compromised, or blocked. The message usually urges you to act immediately, often by calling a phone number for Microsoft support or paying for urgent protection.
A key rule to remember: Real Microsoft Defender alerts never include phone numbers, payment requests, or demands for immediate action.
How the scam works
Most Windows Defender scams trigger a malicious pop-up while you’re browsing the web. To force you into a state of panic, scammers use a combination of “scareware” tactics:
- Audio alerts: Looping sirens or a robotic voice reading the warning over your speakers.
- Browser hijacking: The script may force your browser into full-screen mode (making it appear as though your computer is locked) and block you from clicking “X” to close the tab.
- Fake progress bars: An animation that pretends to “scan” your drive and “find” dozens of viruses in seconds.
The goal is to get you on the phone so they can manipulate you into:
- Granting remote access: They claim to need control to fix the issue, but once they have access, they may steal personal information, install malware, or lock you out of your system.
- Sharing sensitive information: Under the guise of verifying your Windows license or fixing the problem, they pressure you into revealing passwords, banking information, or your Social Security number.
- Paying for fake services: They ask for credit card details and may claim the payment failed, then request another card to collect multiple card numbers and maximize their profit.
Why these alerts appear
You didn’t necessarily do anything wrong to see these. Fake Windows Defender alerts usually appear because of:
- Malvertising: Malicious ads on otherwise legitimate sites that redirect your browser.
- Notification hijacking: You may have accidentally clicked “Allow” on a website prompt, allowing that site to push “virus alerts” to your desktop.
- Potentially unwanted programs (PUPs): PUPs are bundled apps that sneak in with free downloads. They can cause pop-ups, redirects, and slow performance.
How to tell real Windows Defender alerts from fake ones
Knowing how Microsoft Defender actually works makes these scams much easier to spot. Real alerts appear through official Windows interfaces and guide you through security actions without pressure.
| Legitimate Windows Defender alerts | Fake Windows Defender alerts |
| Appear within the Windows Security app or the system tray. | Appear inside your web browser, often as full-page warnings or persistent pop-ups. |
| Don’t include phone numbers for tech support. | Include phone numbers, demanding you call “Support” immediately. |
| Use calm, professional language with clear instructions. | Use high-pressure, fear-inducing language and sirens. |
| Provide clear action buttons that lead to the Windows Security interface. | Buttons often lead to malicious links or “locked” screens. |
| Can be checked in the Protection History section of the Windows app. | Often contain typos or odd capitalization (for example, Trojan_Spyware). |
| Force your browser into full-screen mode or interfere with closing the browser tab or window. |
How to remove the Windows Defender scam from your computer
If you encounter a fake Windows Defender security alert, act quickly but calmly. Follow these steps in order.
1. Break the browser lock
Don’t interact with the pop-up. Avoid clicking Close, OK, or the X button.
- Exit full-screen mode: Scammers often hide the browser address bar to make it look like your computer is locked. Pressing F11 (or Esc) on your keyboard exits full-screen mode, showing you are just on a website.
- Force-close the browser: Press Ctrl + Shift + Esc to open Task Manager. Select your browser (Chrome, Edge, or Firefox) and click End Task.
- Alt + F4: A quick shortcut to close the active window if your mouse is being unresponsive.
2. Reset your browser settings: Step-by-step guide by browser
If the pop-up keeps returning, resetting the browser can remove unwanted settings, extensions, or scripts that may be triggering the Windows Defender scam.
For Google Chrome
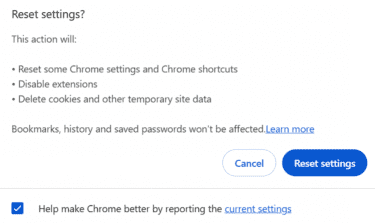
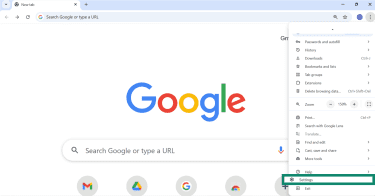
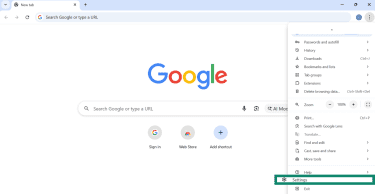
- Open Chrome, click the three-dot menu, and go to Settings.

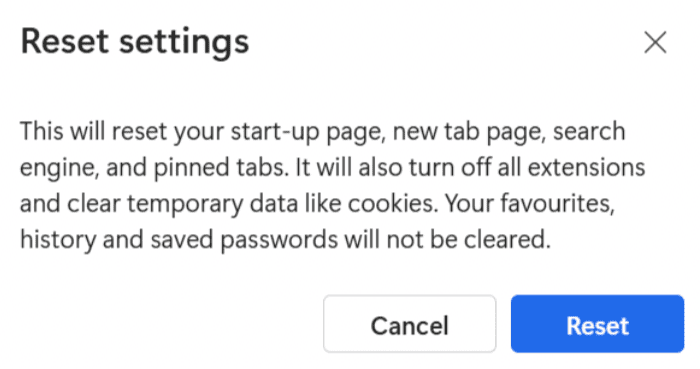
- Navigate to Reset settings > Restore settings to their original defaults.
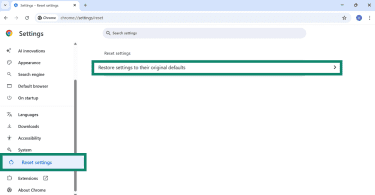
- Click Reset settings to confirm.
For Mozilla Firefox
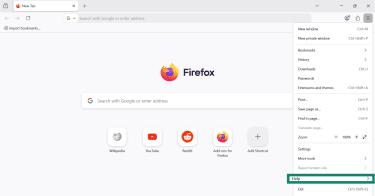
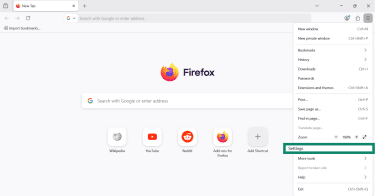
- Open Firefox, click the three-line menu, and go to Help.
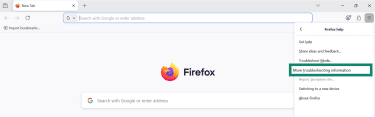
- Select More troubleshooting information.
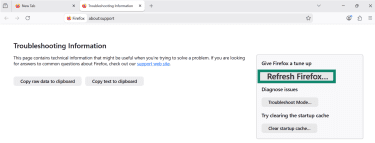
- Click Refresh Firefox and confirm.
For Microsoft Edge
- Open Edge, click the three-dot menu, and go to Settings.

- Navigate to Reset settings > Restore settings to their default values.
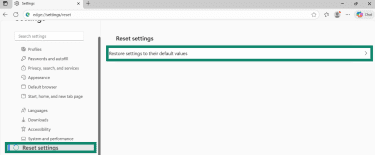
- Click Reset to confirm.
3. Clear browser cache and permissions
Clearing your browser data removes cached files and cookies that may store the malicious code.
For Google Chrome
- Open Chrome, click the three-dot menu, and go to Settings.
- Navigate to Privacy and security > Delete browsing data.

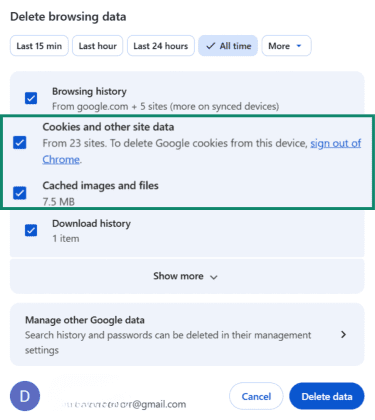
- Select All time for the time range.
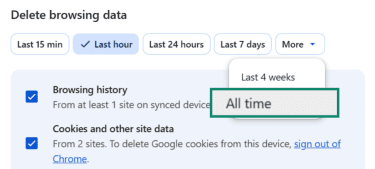
- Check Cookies and other site data and Cached images and files and click Delete data.
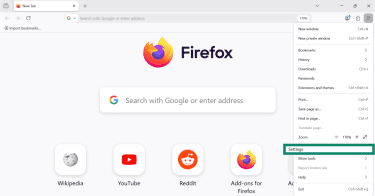
For Mozilla Firefox
- Open Firefox, click the three-line menu, and go to Settings.
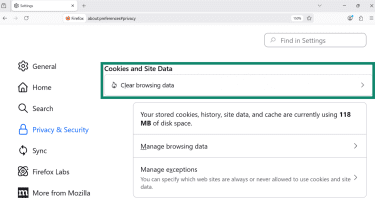
- Go to Privacy & Security. Under Cookies and Site Data, click Clear browsing data.
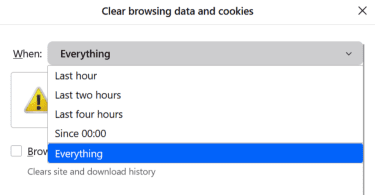
- Select Everything in the dropdown menu.
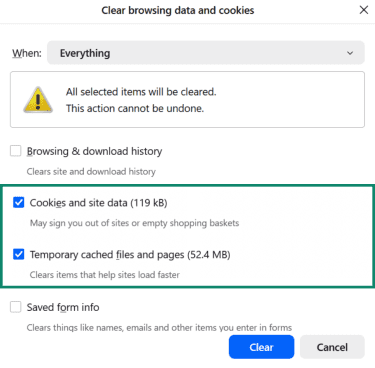
- Ensure both Cookies and site data and Temporary cached files and pages are checked. Click Clear.
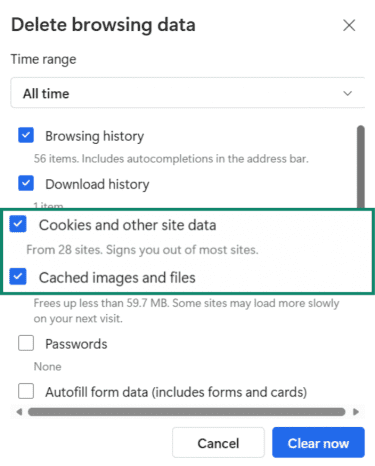
For Microsoft Edge
- Open Edge, click the three-dot menu, and go to Settings.
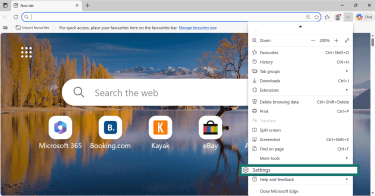
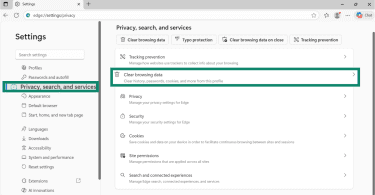
- Navigate to Privacy, search, and services > Clear browsing data.
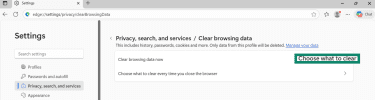
- Click the Choose what to clear button.
- Select All time in the time range dropdown menu.
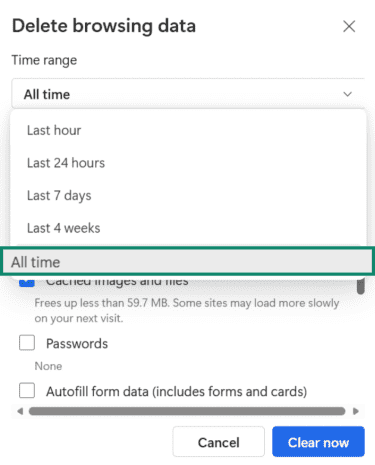
- Check Cookies and other site data and Cached images and files and click Clear now.
4. Check for suspicious browser extensions
Unwanted extensions can generate fake alerts. Remove any you do not recognize.
For Google Chrome
- Open Chrome, click the three-dot menu, and go to Settings.
- Click on Extensions.
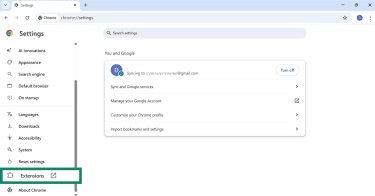
- For any suspicious extension, click Remove.

For Mozilla Firefox
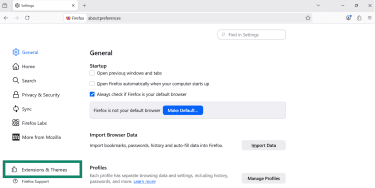
- Open Firefox, click the three-line menu, and go to Settings.
- Click on Extensions & Themes.
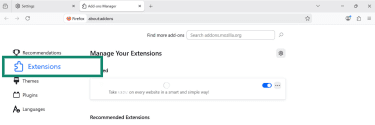
- Select Extensions.
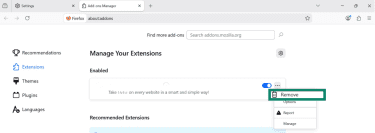
- Click the three-dot menu next to any unfamiliar add-on and choose Remove.
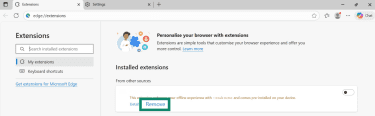
For Microsoft Edge
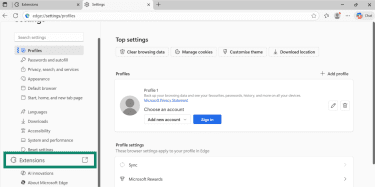
- Open Edge, click the three-dot menu, and go to Settings.

- Go to Extensions.
- For any suspicious extension, click Remove.
5. Check for website notification permissions
Many scams abuse browser notifications instead of malware. Removing notification access from unknown sites often stops repeat alerts.
For Google Chrome
- Open Chrome, click the three-dot menu, and go to Settings.

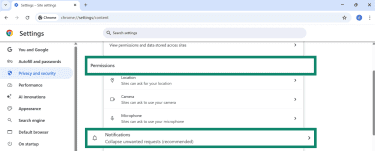
- Navigate to Privacy and security > Site settings.
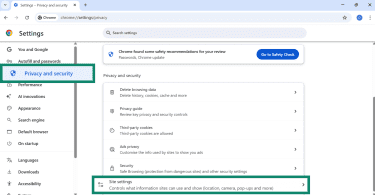
- Under Permissions, click on Notifications.
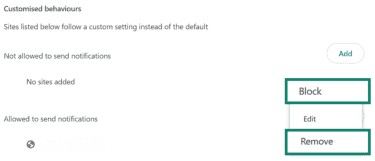
- Scroll down to Customised behaviours and look for any unknown websites under Allowed to send notifications.
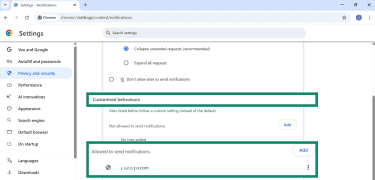
- Click the three-dot menu next to the site and select Remove or Block.
For Mozilla Firefox
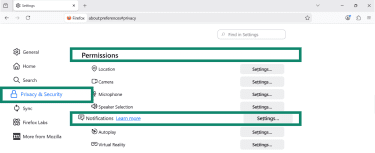
- Open Firefox, click the three-line menu, and go to Settings.

- Go to Privacy & Security. Scroll to Permissions and click Settings next to Notifications.
- Select unknown websites and click Remove Web Site.
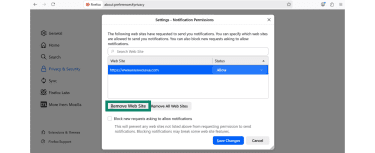
- Click Save Changes.
For Microsoft Edge
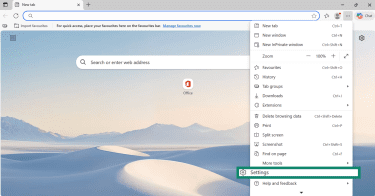
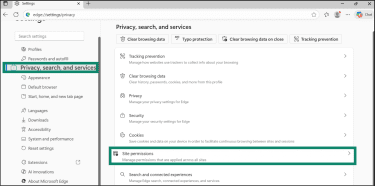
- Open Edge, click the three-dot menu, and go to Settings.
- Navigate to Privacy, search, and services > Site permissions.
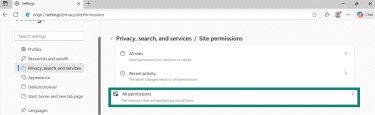
- Click All permissions.
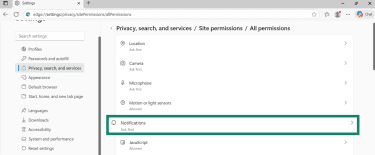
- Then select Notifications.
- In the Customised behaviours section, look for any unknown websites under Allowed to send notifications.
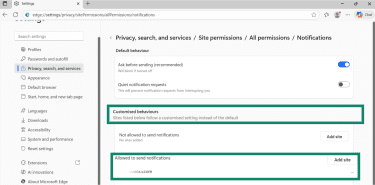
- Click the three-dot menu next to the site and select Remove or Block.

6. Check for PUPs
The most effective way to remove PUPs is through an antivirus scan. However, you can also remove them manually by uninstalling the affected software. Here are the steps to follow.
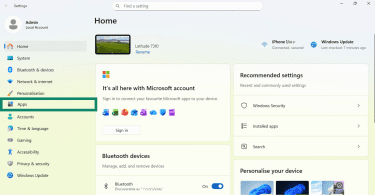
- Press Windows + I and navigate to Apps.
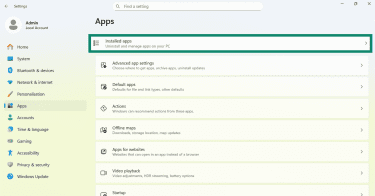
- Click on Installed apps.
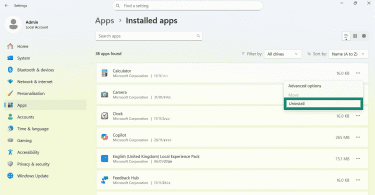
- Look through the list and Uninstall anything you do not recognize or remember installing.
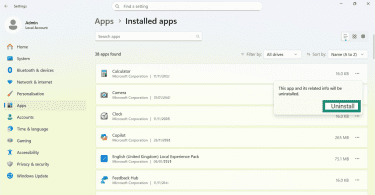
- Click Uninstall again to confirm.
7. Run a full antivirus scan
Another effective step is to run a complete malware scan to check for any associated malware or unwanted programs.
- Open the Settings app on your Windows device by pressing Windows + I.
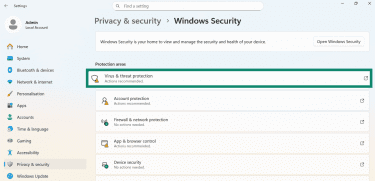
- Navigate to Privacy & security > Windows Security.
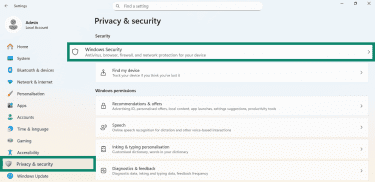
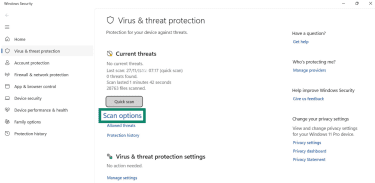
- Click on Virus & threat protection.
- Select Scan options.
- Choose Full scan or Microsoft Defender Antivirus (offline scan) and click Scan now to check every file and program on your device.
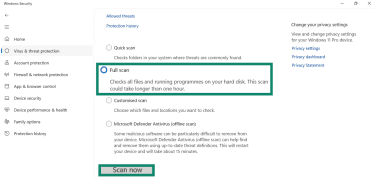
The offline scan is particularly effective because it runs in a trusted recovery environment before Windows fully loads, catching malware that hides during a normal session.
After the full scan finishes, review the results in the Protection history section of Windows Security. If malware is detected, follow the prompts to remove or quarantine it.
When to contact Microsoft support
If you’ve tried all the steps above and the alert persists, there may be deeper system issues that built-in tools can’t remove. Microsoft Support can help assess whether your device is secure and guide you through advanced cleanup steps.
To make sure you’re visiting the legitimate Microsoft support site, type support.microsoft.com yourself directly into the browser. Don’t click on any links. When you contact them, clearly describe the issue and the steps you’ve taken.
Post-scam recovery checklist
If you clicked a fake Windows Defender alert, called a scam number, or let someone access your computer, act fast. Quick response reduces the risk of data theft, financial loss, and repeat attacks.
Immediate containment
Start by immediately disconnecting your computer from the internet. If the attacker directed you to install remote access tools, uninstall them immediately and restart your computer. Check Task Manager and end any unfamiliar or suspicious processes.
Secure your identity
Change all important passwords as soon as possible, such as for your email, Microsoft account, banking logins, and any accounts that store personal data. Create strong, unique passwords and avoid reusing old ones. Enable two-factor authentication (2FA) wherever possible.
Next, review your browser's autofill data and saved payment information. Remove saved addresses, phone numbers, and credit cards if you shared them during the scam. If you use a password manager, update its master password before logging back in.
Protect your finances
Contact your bank or credit card provider immediately if you shared payment details or made a purchase. Ask them to monitor your account, reverse charges if possible, and issue new cards. Acting early can limit losses and prevent unauthorized transactions.
Restore your system and report the scam
Run a full system scan using reputable antivirus software. Open Windows Security, choose Virus & threat protection, select Scan options, then run an offline scan. This scan checks your system before Windows fully loads and helps detect hidden malware.
Report the scam to Microsoft using their tech support scam reporting tool. Reporting helps protect other users from the same scam. Keep records of what happened in case you need them later.
How to avoid tech support and pop-up scams
Tech support and pop-up scams, like the Windows Defender scam and the Apple security alert scam, rely on urgency, fear, and confusion. The best defense is knowing how these scams work and building habits that reduce your exposure in the first place.
1. Never trust pop-ups that demand immediate action
Legitimate companies don’t use browser pop-ups to report infections, lock devices, or demand urgent responses. If a message claims your device is infected, tells you to call a number immediately, or warns you that your data will be deleted or your account suspended, it’s almost certainly a scam.
If you see one of these alerts, close your browser immediately instead of interacting with it, and never call the phone number.
2. Never respond to unsolicited contact
Microsoft does not send unsolicited email messages or make unsolicited phone calls asking for personal or financial information. This applies to most reputable companies.
If you receive unexpected contact:
- Don’t call numbers in emails.
- Don’t click links in suspicious emails or texts.
- Don’t download attachments from unknown senders.
- Hang up on unsolicited tech support calls.
To verify a company’s legitimacy, type its official URL into your browser and contact them through their published support channels.
3. Download software safely
Only download apps and updates from trusted app stores and official company websites. Free tools, cracked software, and “urgent update” prompts from third-party sites often bundle adware or scareware with legitimate software.
When installing free software, choose Custom or Advanced installation instead of Quick or Recommended. You can then uncheck bundled software that you don’t recognize.
4. Keep your system and apps up to date
Regular updates patch known security flaws that scammers exploit. Enable automatic updates for:
- Operating systems
- Web browsers
- Antivirus and security software
- All installed applications
Outdated software is one of the easiest ways for scammers to deliver malicious ads and redirects.
5. Use reliable security tools
A good antivirus solution helps block malicious downloads and known scam sites. Browser security features and built-in protections like Microsoft Defender provide a strong baseline.
However, no single tool stops everything. Layered protection works best.
6. Protect your online privacy with a VPN
A virtual private network (VPN) encrypts your internet traffic and masks your IP address, making it harder for advertisers, trackers, and malicious actors to monitor your online activity.
Some VPNs offer advanced protection features that can also block known scam domains, malicious ads, and trackers before pages load, reducing your exposure to pop-up scams like the fake Windows Defender security alert.
FAQ: Common questions about the Windows Defender Security Center scam
Is the Windows Defender Security Center warning real?
No. Any unsolicited Windows Defender alert that appears in your web browser is fake and part of a tech support scam. Real Microsoft Defender alerts appear in the Windows Security app, never as browser pop‑ups, and never include phone numbers.
How can I tell if a Microsoft alert is fake?
If it appears in your browser and includes a phone number, it’s a fake. Real Microsoft alerts appear in the Windows Security app with clear, calm instructions; no phone numbers, no urgent demands.
What should I do if I clicked the scam alert?
Close your browser immediately without interacting further, clear your browser data following the steps above, and run a full antivirus scan.
How do I remove fake virus alerts from my browser?
First, you have to remove the source of the scam. Close the browser, remove unknown extensions, clear the cache and cookies, remove suspicious website permissions, and run a malware scan.
How can I make sure my Windows Defender is working properly?
Press Windows + I to open Settings. Navigate to Privacy & security > Windows Security > Virus & threat protection. Then run a scan. Click Check for updates under Virus & threat protection updates. If Defender is active and updates are current, it’s working properly.
What are common fake antivirus scam signs?
Fake scams often use urgent, threatening language, appear in browsers, include phone numbers or payment requests, play audio warnings or sirens, prevent you from closing your browser, redirect you to unknown sites, or claim to detect dozens of threats instantly.
Should I report the scam, and how?
Yes. Reporting helps stop scammers and protects others. You can report scams to Microsoft (microsoft.com/reportascam), the Federal Trade Commission (FTC) if you’re in the U.S. (reportfraud.ftc.gov), your browser (most browsers have options to report unsafe sites), or local law enforcement if you’ve lost money or shared sensitive information.
Take the first step to protect yourself online. Try ExpressVPN risk-free.
Get ExpressVPN