This tutorial will show you how to set up your dedicated IP address on the ExpressVPN app for Windows. If you still need to get one, learn how to buy a dedicated IP.
In order to set up dedicated IP on the ExpressVPN app for Windows, you need the following:
- An active ExpressVPN subscription
- A dedicated IP subscription
- The ExpressVPN app installed on your Windows PC (running Windows 10 or above)
Once you have all these, follow the instructions below to set up your dedicated IP on Windows:
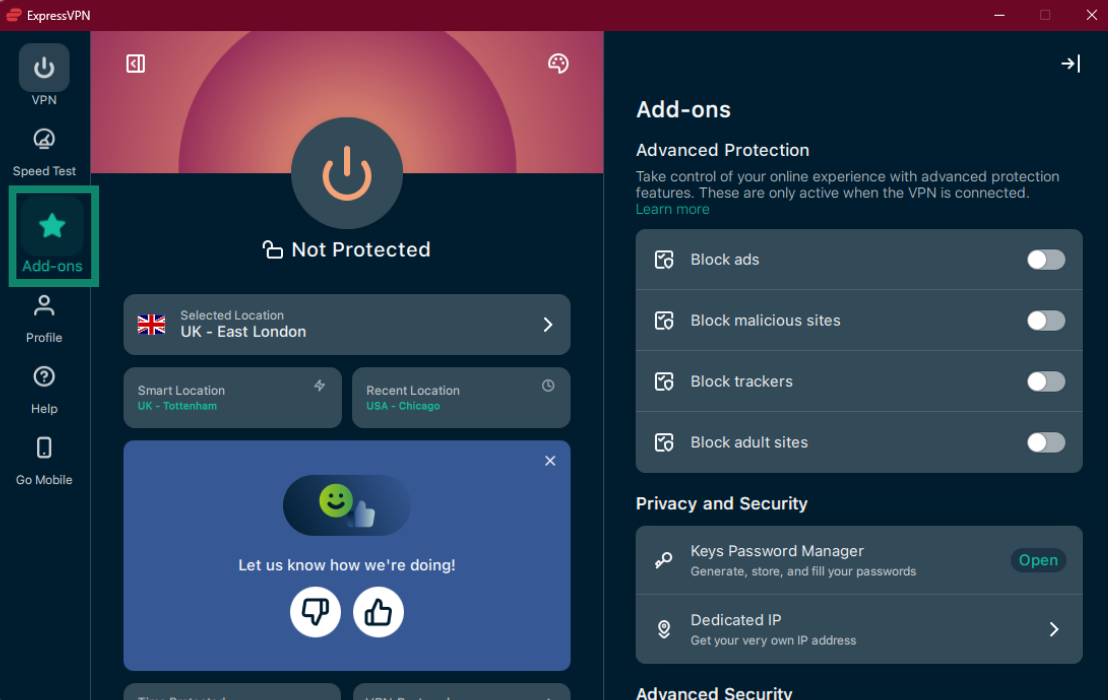
- Open the ExpressVPN app for Windows and click Add-ons.


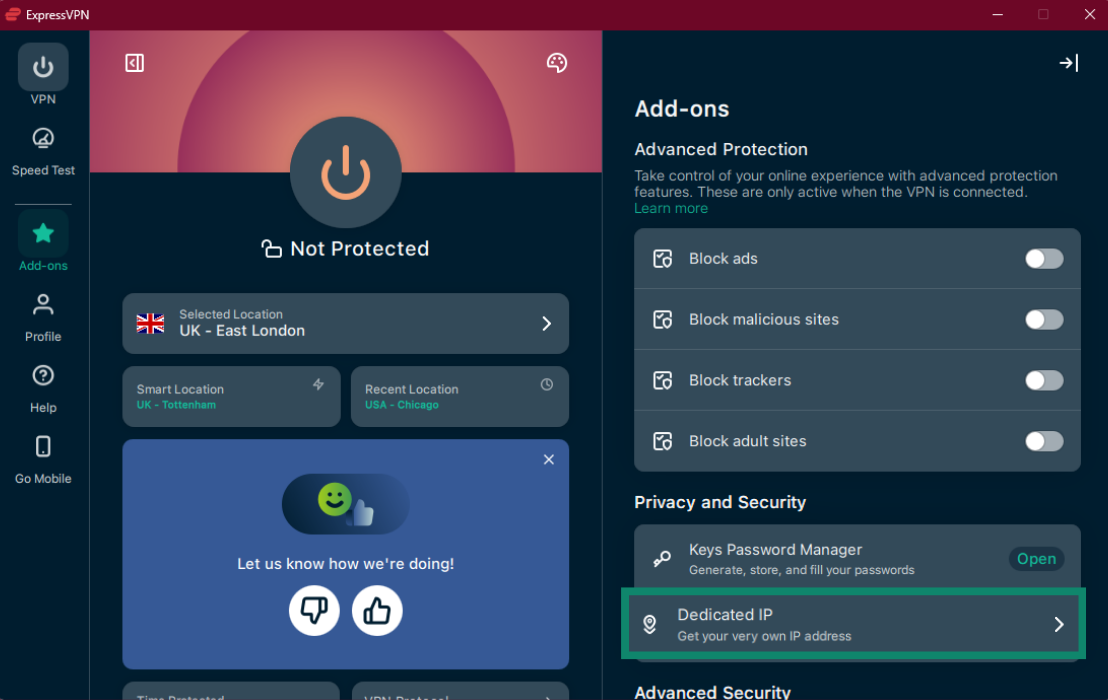
- Under Privacy and Security, click Dedicated IP.

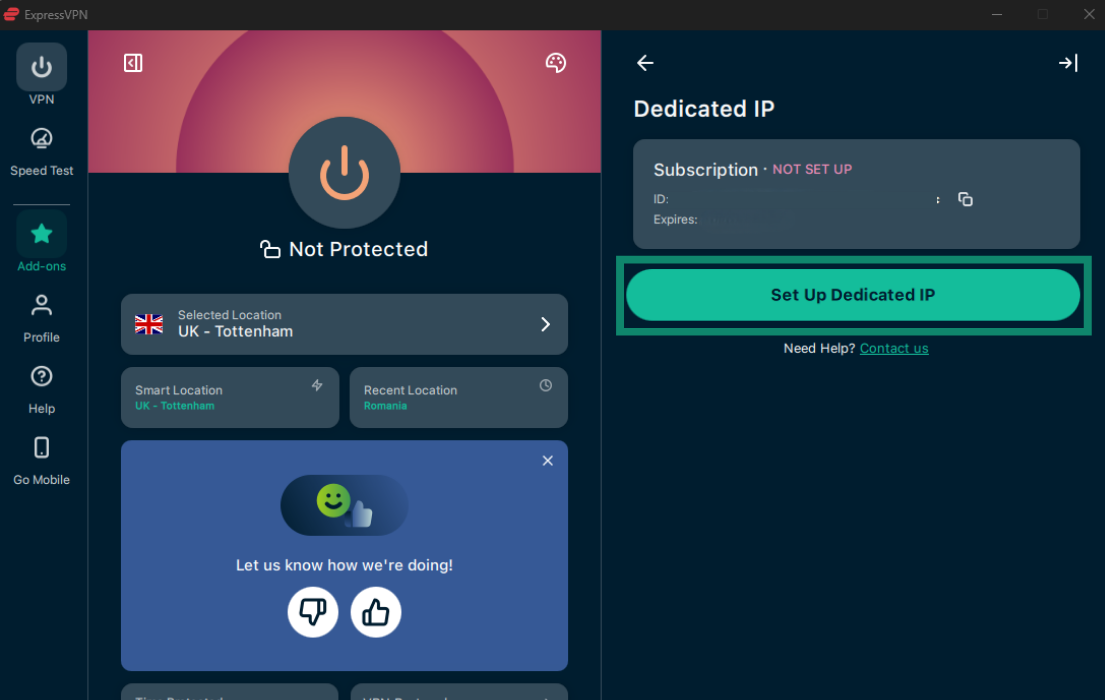
- Under Dedicated IP, click Set Up Dedicated IP.


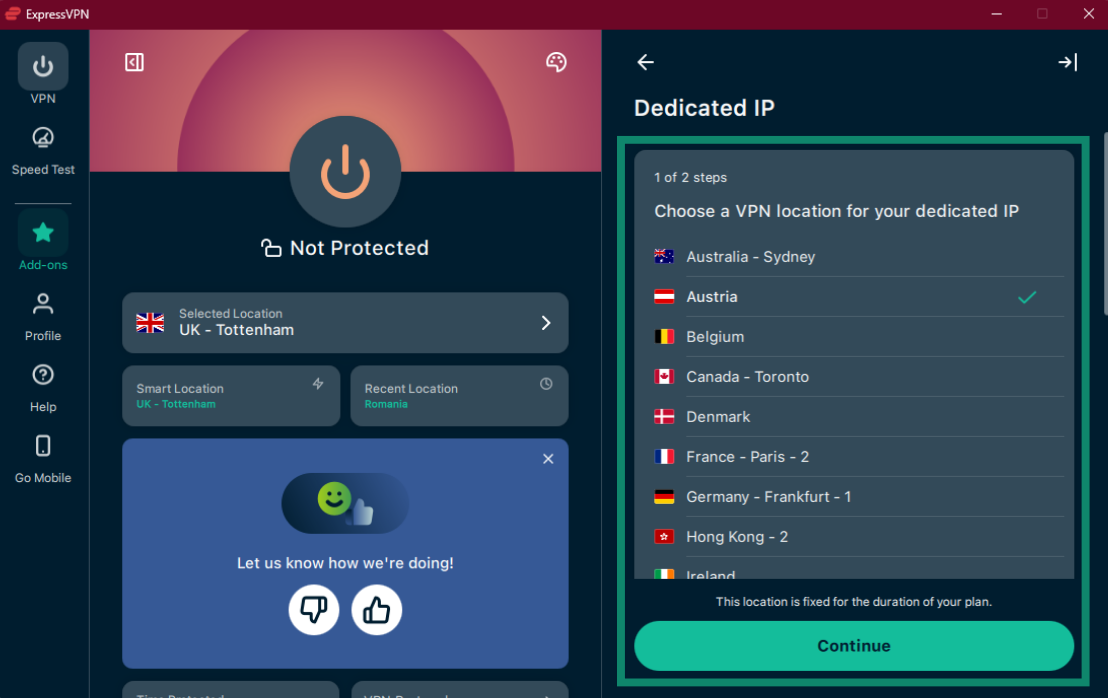
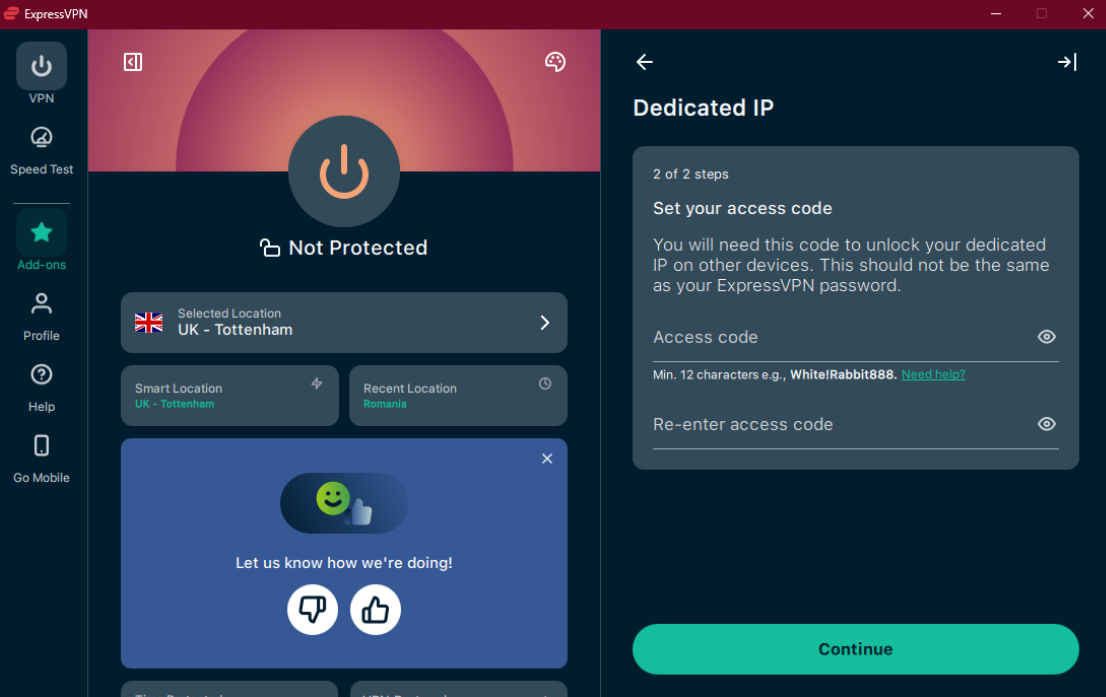
- Select a VPN location for your dedicated IP, then click Continue.

 Note: The location you choose is fixed for the duration of your add-on. You cannot change it after setup.
 - Set your access code, re-enter it to confirm, then click Continue.
 Note: This code is the only way to access your dedicated IP on other devices, so we recommend setting a strong, unique code and keeping it somewhere safe. It must be at least 12 characters long. If you lose your access code, ExpressVPN can’t retrieve it—even with your authorization—and you will lose access to your dedicated IP.
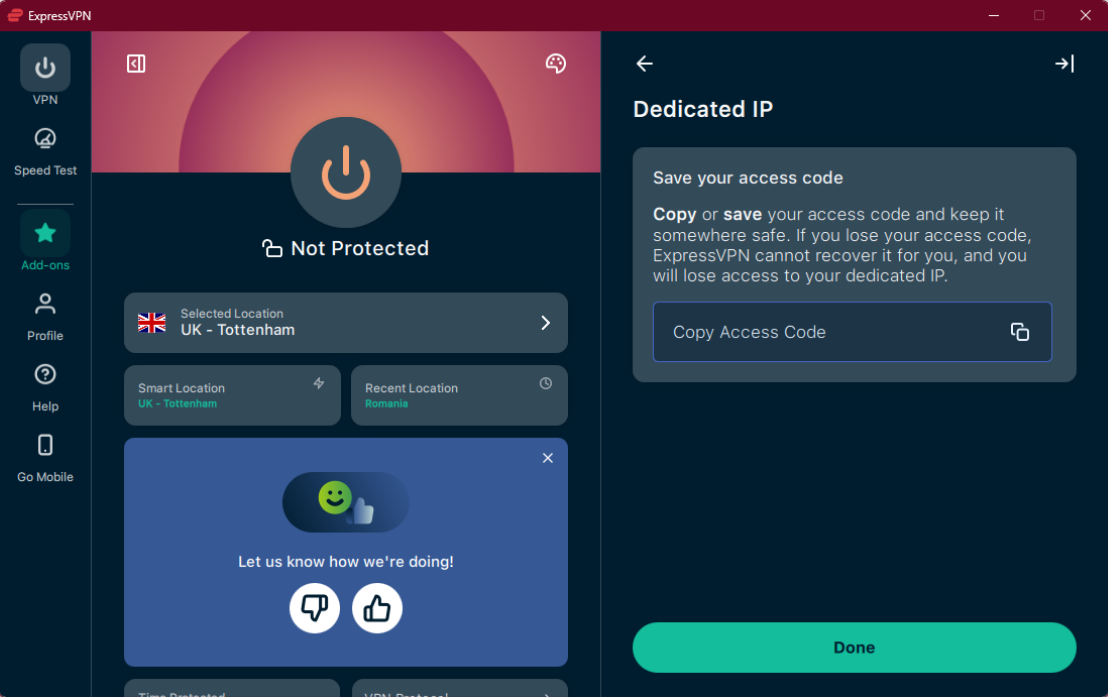
 - Click Copy Access Code to copy and save your code, then press Done.


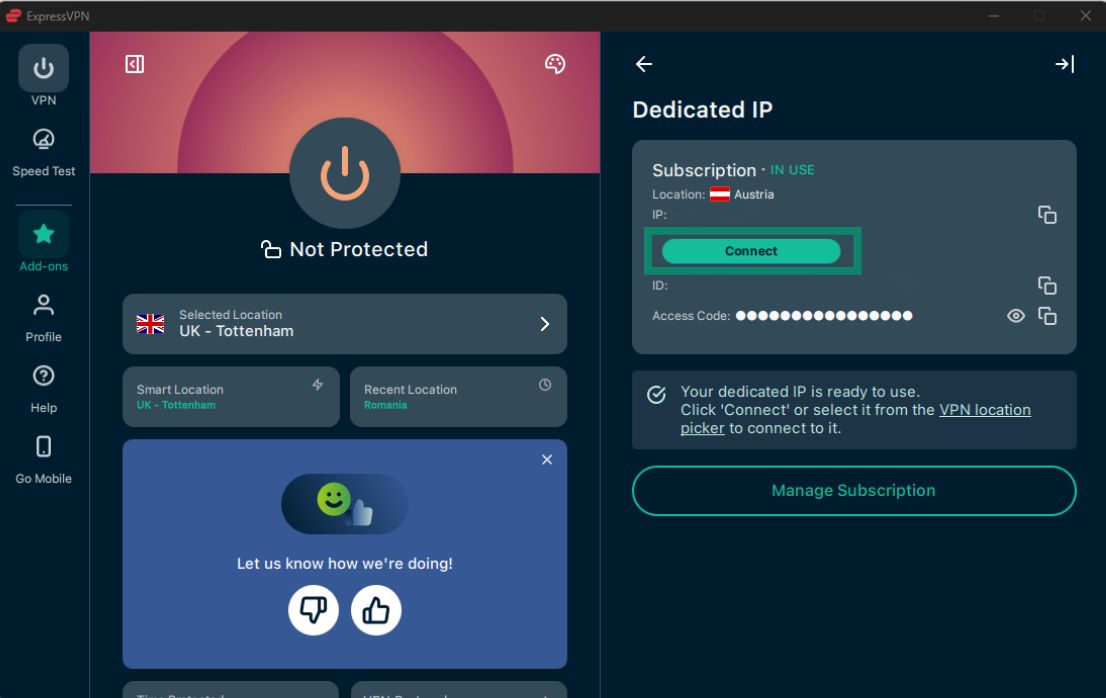
- Click Connect to start using your dedicated IP.

Need help? Contact the ExpressVPN Support Team for immediate assistance.
Want to find out more about ExpressVPN’s dedicated IP add-on? Refer to our frequently asked questions.