Aby korzystać z naszych aplikacji i konfiguracji, najpierw zarejestruj się w celu utworzenia konta ExpressVPN.
Uwaga: Potrzebujesz oprogramowania DD-WRT, które może obsługiwać najnowsze konfiguracje VPN i ma co najmniej 8 MB pamięci flash.
Ten przewodnik pokaże Ci, jak skonfigurować ExpressVPN na routerze DD-WRT przy użyciu protokołu OpenVPN.
Nie wszystkie lokalizacje ExpressVPN mogą być dostępne dla ręcznie skonfigurowanych połączeń.
Jeśli chcesz usunąć ten komunikat, otwórz plik .ovpn za pomocą edytora tekstu i:
- usuń linię zawierającą keysize
lub - dodaj symbol # przed keysize (#keysize 256).
Możesz też zignorować ten komunikat bez żadnych negatywnych skutków.
Aby skonfigurować ExpressVPN na routerze DD-WRT, najpierw pobierz pliki konfiguracyjne OpenVPN ze strony ustawień konta ExpressVPN. Umożliwi to nawiązanie połączenia z serwerami ExpressVPN. Postępuj zgodnie z poniższymi instrukcjami, aby skonfigurować router z OpenVPN.
Przejdź do…
1. Znajdź swoje dane uwierzytelniające ExpressVPN
2. Skonfiguruj swój router
3. Skonfiguruj klucze i certyfikaty ExpressVPN
4. Sprawdź status swojego połączenia
1. Znajdź swoje dane uwierzytelniające ExpressVPN
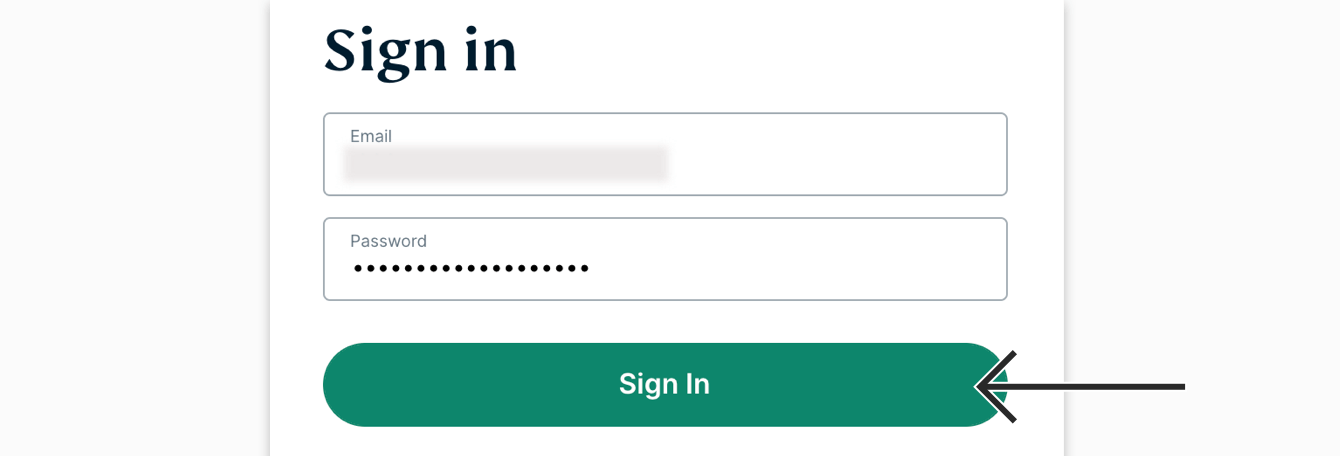
Przejdź do strony konfiguracyjnej ExpressVPN. Jeśli zostanie wyświetlony komunikat, wprowadź dane logowania ExpressVPN i kliknij Zaloguj się.
Wprowadź kod weryfikacyjny, który został wysłany na Twój e-mail.
Open VPN będzie już wybrany, więc po prawej stronie zobaczysz swoją nazwę użytkownika, hasło oraz listę plików konfiguracyjnych OpenVPN.
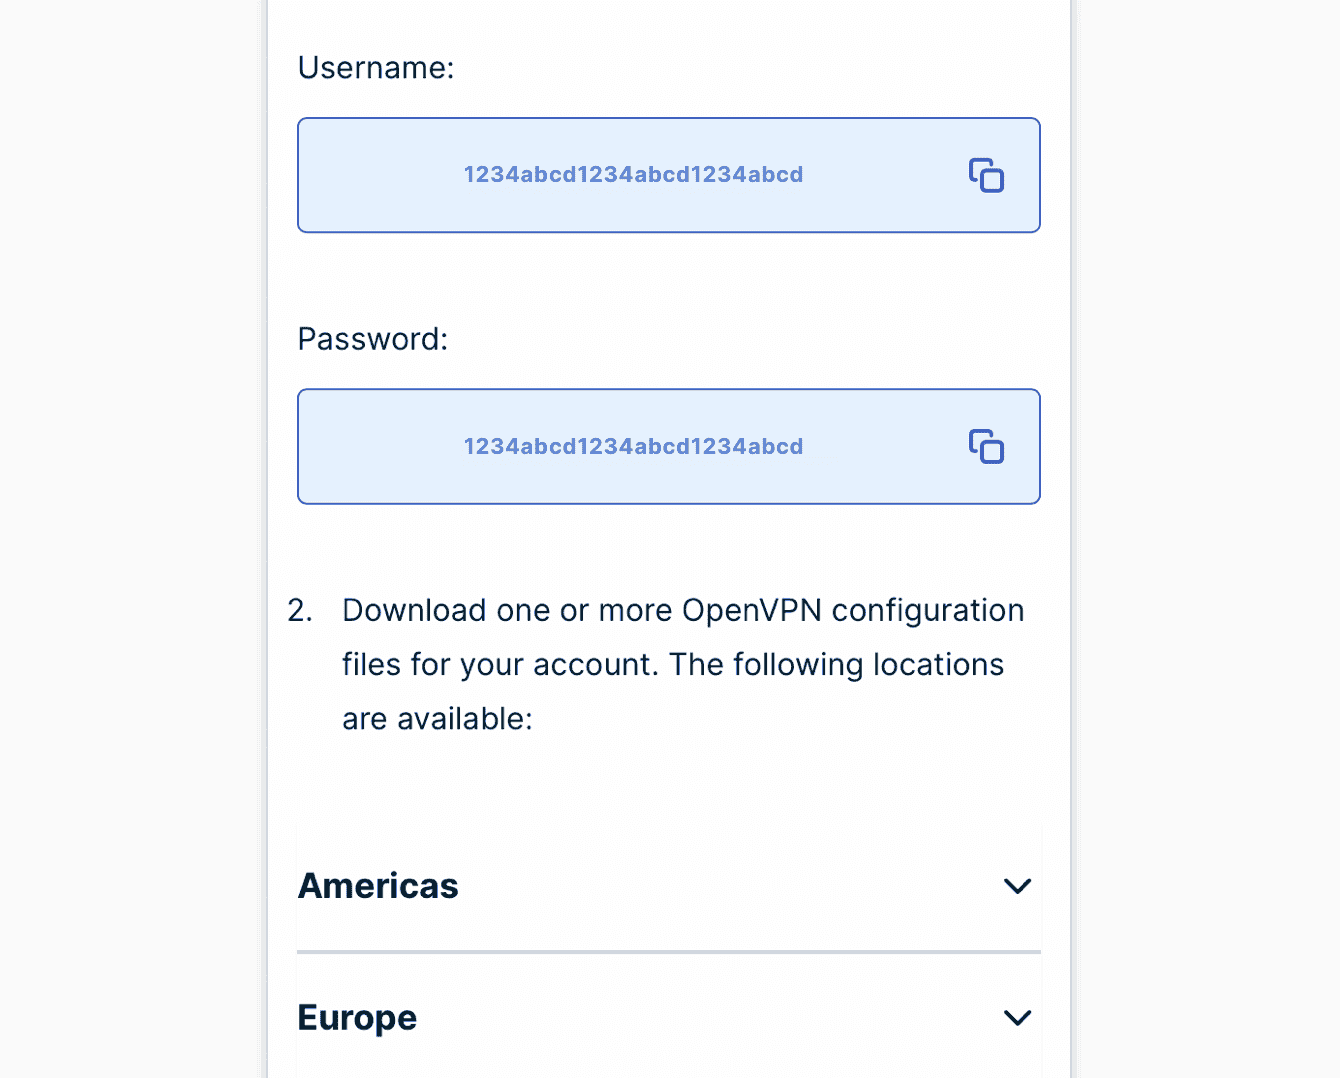
Kliknij wybraną lokalizację (lokalizacje), aby pobrać plik(i) .ovpn.
Nie zamykaj tego okna przeglądarki. Informacje te będą potrzebne do późniejszej konfiguracji.
Potrzebujesz pomocy? Skontaktuj się z zespołem pomocy technicznej ExpressVPN, aby uzyskać natychmiastowe wsparcie.
2. Skonfiguruj swój router
W pasku adresu przeglądarki wpisz adres IP panelu administracyjnego routera. Domyślnie jest to 192.168.0.1. (Jeśli adres IP routera został w przeszłości zmieniony i nie pamiętasz go, możesz go znaleźć w ustawieniach urządzenia).
Zaloguj się, podając nazwę użytkownika i hasło routera. (Domyślnie jest to admin w obu przypadkach).
Na górze strony kliknij kartę Services, a następnie kartę VPN.
W sekcji OpenVPN Client włącz opcję Start OpenVPN Client. Spowoduje to wyświetlenie panelu konfiguracji OpenVPN.
Kolejne kroki mogą się różnić w zależności od wersji oprogramowania DD-WRT. Odnieś się do sekcji odpowiedniej dla Twojej wersji DD-WRT.
Wersje DD-WRT z opcją User Pass Authentication
Wersje DD-WRT bez opcji User Pass Authentication
Dla wersji DD-WRT z opcją User Pass Authentication
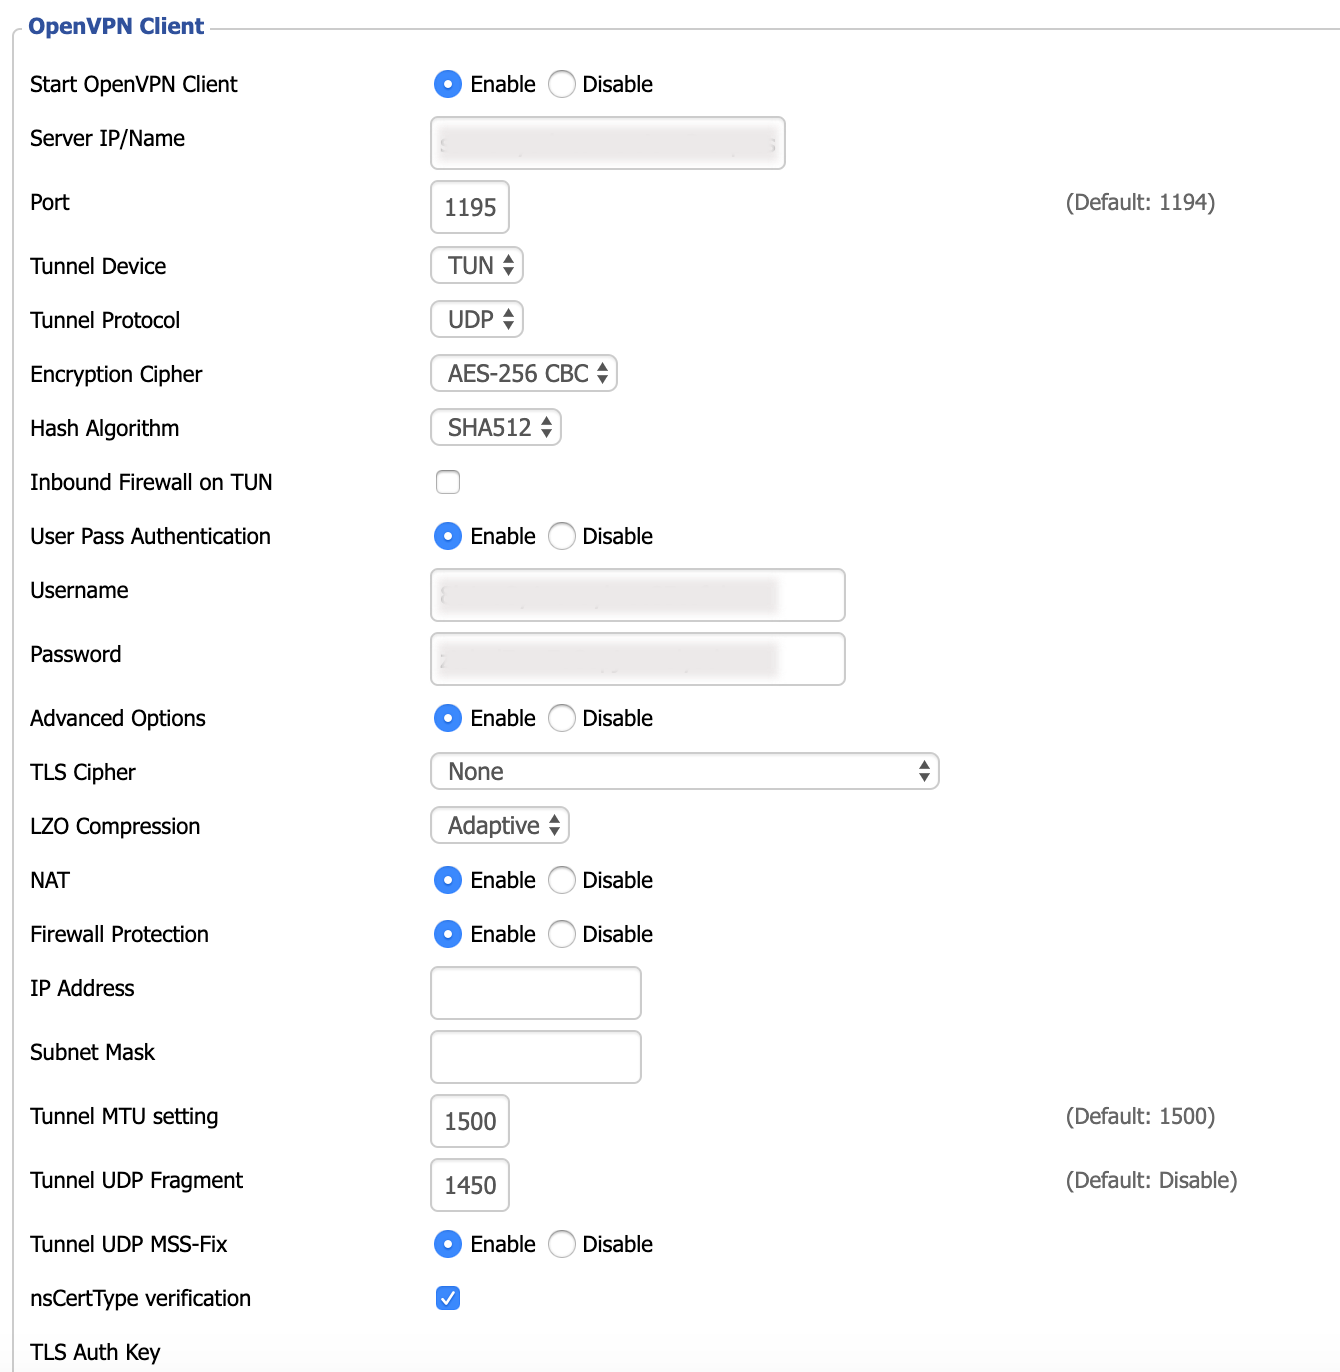
Jeśli Twoje oprogramowanie DD-WRT zawiera opcję User Pass Authentication, Twój ekran powinien wyglądać tak, jak interfejs przedstawiony w poniższych krokach. Wprowadź następujące informacje:
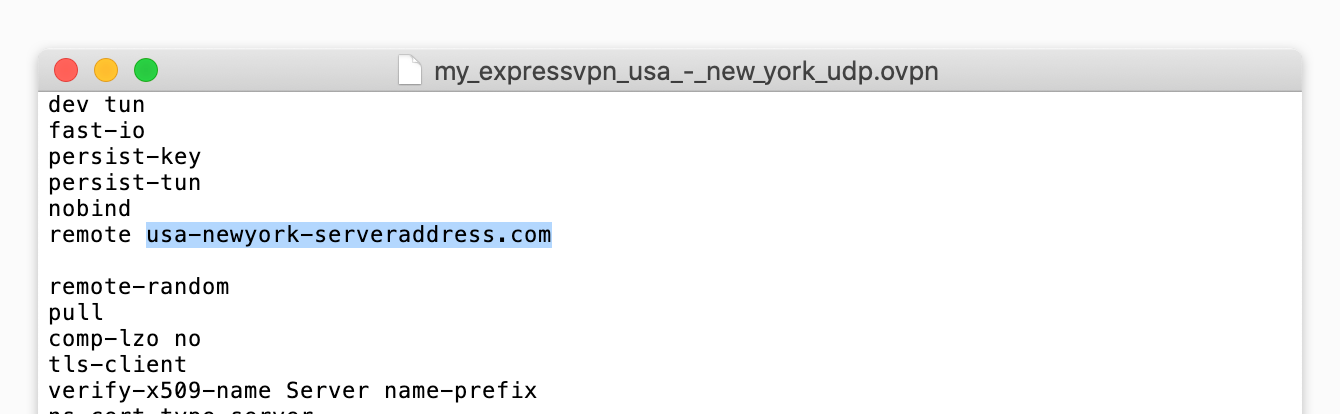
- Server IP/name: Aby uzyskać adres IP/nazwę serwera, kliknij prawym przyciskiem myszy plik konfiguracyjny .ovpn i otwórz go w dowolnym edytorze tekstu. Zobaczysz adres serwera podany między słowem „remote” a czterocyfrowym numerem portu. Skopiuj i wklej adres serwera do tego pola.


- Port: wprowadź numer po adresie IP/nazwie serwera w pliku .ovpn.
- Tunnel Device: wybierz TUN.
- Tunnel Protocol: wybierz UDP.
- Encription Cipher: wybierz AES-256 CBC.
- Hash Algorithm: wybierz SHA512.
- User Pass Authentication: wybierz Enable.
- User Name: wprowadź nazwę użytkownika z wcześniejszego kroku.
- Password: wprowadź hasło z wcześniejszego kroku.
- Advanced Options: wybierz Enable.
- TLS Cipher: wybierz None.
- L2O Compression: wybierz Adaptive.
- NAT: wybierz Enable.
- Tunnel UDP Fragment: wpisz 1450.
- Tunnel UDP MSS-Fix: wybierz Enable.
- nsCertType verification: zaznacz pole.
Następnie postępuj zgodnie z tymi instrukcjami, aby skonfigurować klucze i certyfikaty ExpressVPN.
Dla wersji DD-WRT bez opcji User Pass Authentication
Jeśli Twoje oprogramowanie DD-WRT nie zawiera opcji User Pass Authentication, wykonaj poniższe kroki:
Odszukaj pole tekstowe Additional Config i wprowadź następujące polecenie:
auth-user-pass /tmp/auth.txt
Następnie wprowadź następujące informacje:
- Server IP/Name: Aby uzyskać adres IP/nazwę serwera, kliknij prawym przyciskiem myszy plik konfiguracyjny .ovpn i otwórz go w dowolnym edytorze tekstu. Zobaczysz adres serwera podany między słowem „remote” a czterocyfrowym numerem portu. Skopiuj i wklej adres serwera do tego pola.
- Port: wprowadź numer po adresie IP/nazwie serwera w pliku .ovpn.
- Tunnel Device: wybierz TUN.
- Tunnel Protocol: wybierz UDP.
- Encryption Cipher: wybierz AES-256 CBC.
- Hash Algorithm: wybierz SHA512.
- User Pass Authentication: wybierz Enable.
- Username: wprowadź nazwę użytkownika z wcześniejszego kroku.
- Password: wprowadź hasło z wcześniejszego kroku.
- Advanced Options: wybierz Enable.
- TLS Cipher: wybierz None.
- L2O Compression: wybierz Adaptive.
- NAT: wybierz Enable.
- Tunnel UDP Fragment: wpisz 1450.
- Tunnel UDP MSS-Fix: wybierz Enable.
- nsCertType verification: zaznacz pole.
Następnie postępuj zgodnie z tymi instrukcjami, aby skonfigurować klucze i certyfikaty ExpressVPN.
Potrzebujesz pomocy? Skontaktuj się z zespołem pomocy technicznej ExpressVPN, aby uzyskać natychmiastowe wsparcie.
3. Skonfiguruj klucze i certyfikaty ExpressVPN
W polu Additional Config wprowadź następujący tekst:
persist-key
 persist-tun
 fragment 1300
 mssfix 1450
 keysize 256
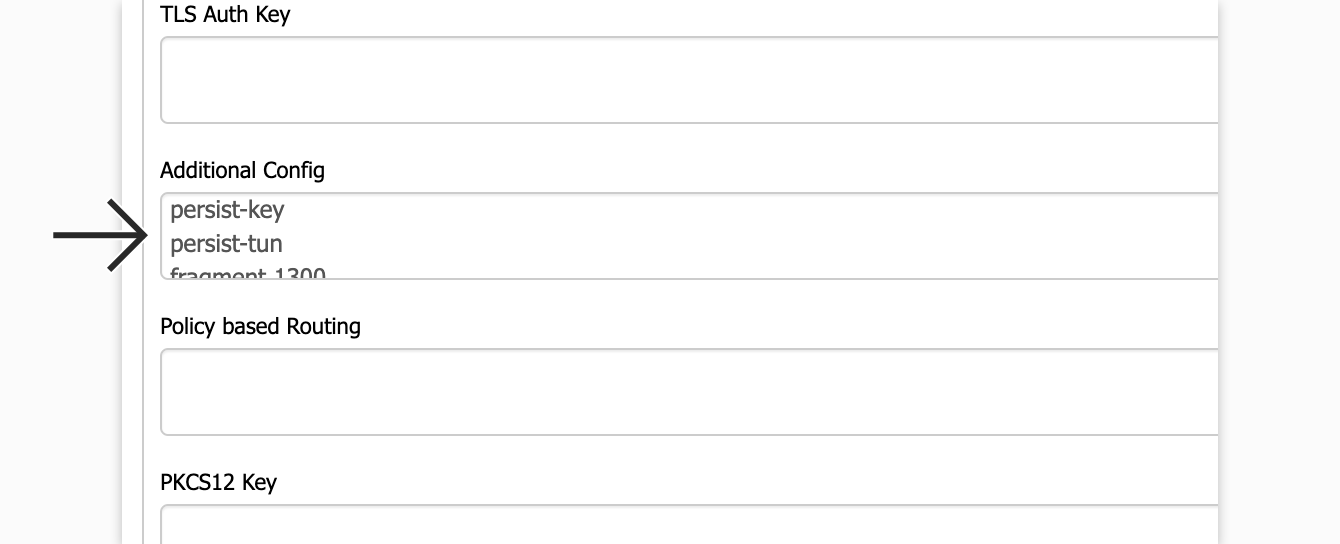
W polu TLS Auth Key skopiuj tekst między tagami <tls-auth> a </tls-auth> w pliku .ovpn i wklej go w tym polu.
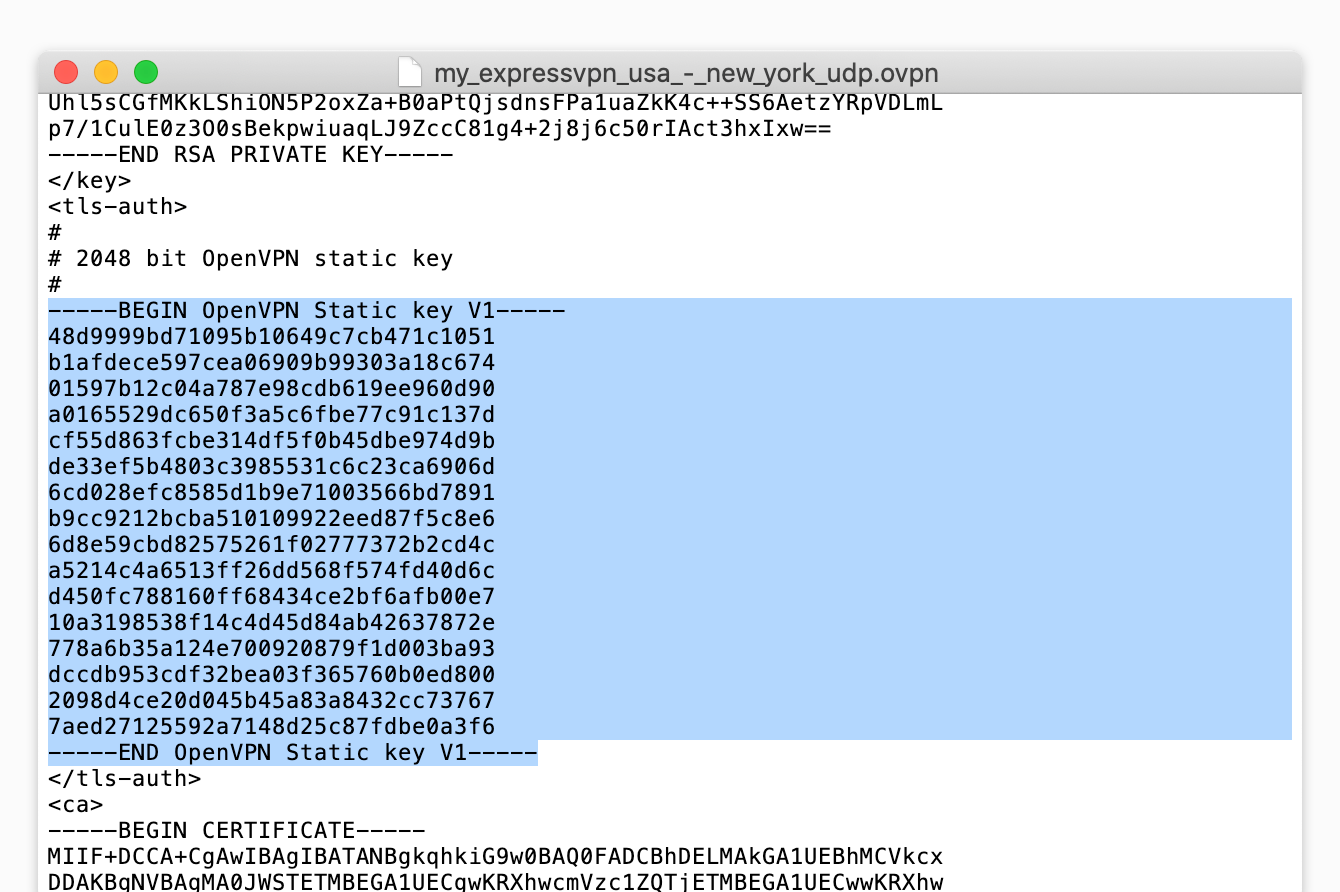
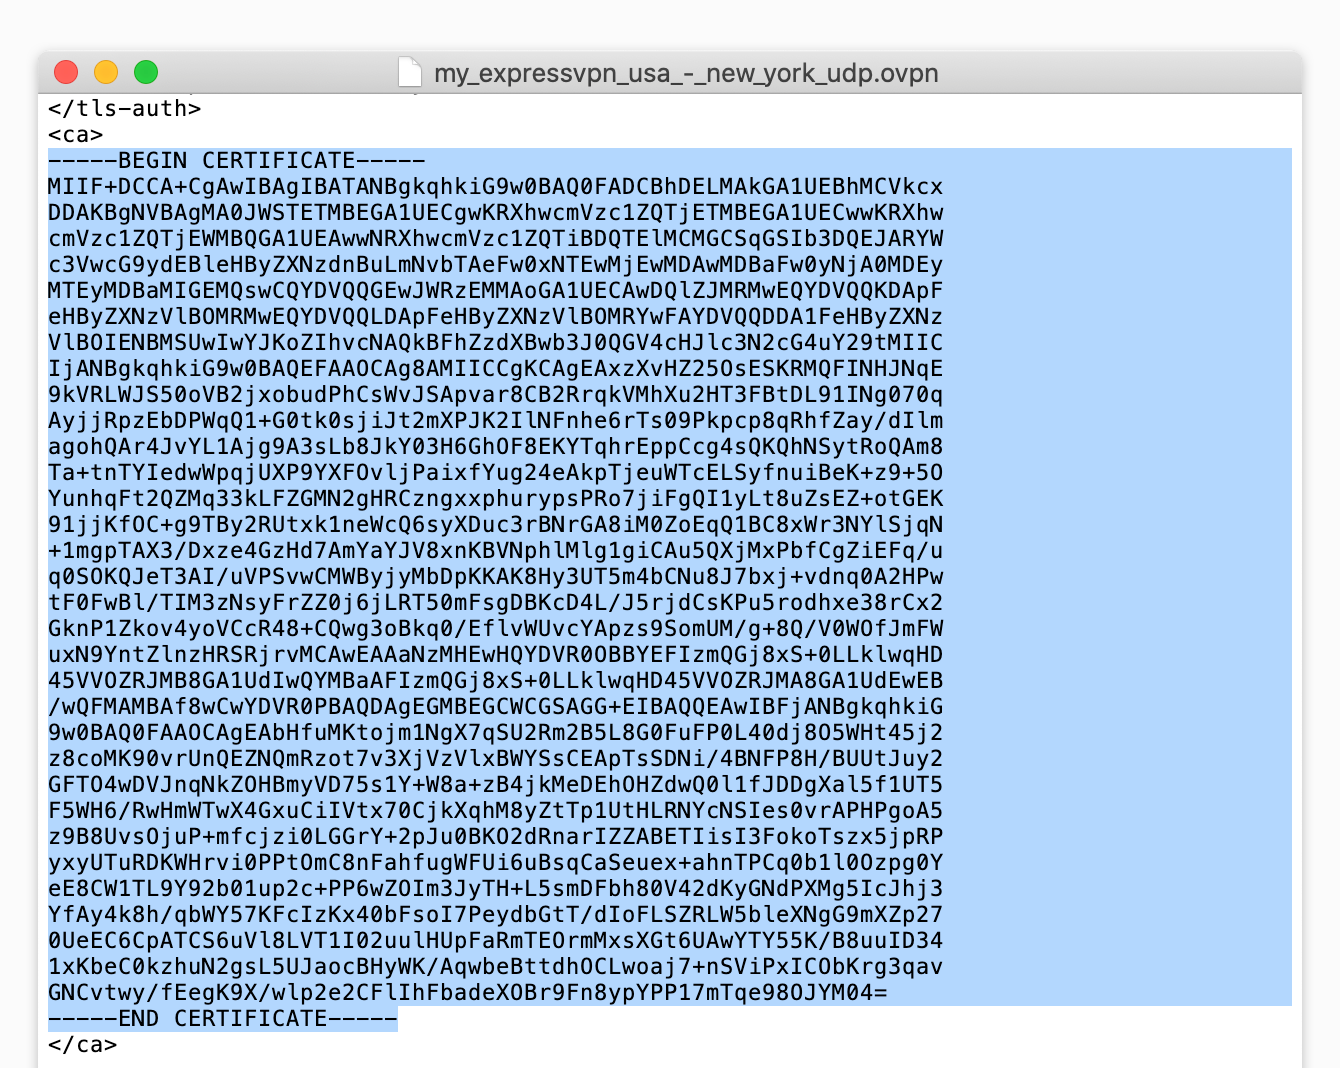
W polu CA Cert skopiuj tekst między tagami <ca> a </ca> w pliku .ovpn i wklej go w tym polu.
W polu Public Client Cert skopiuj tekst między tagami <cert> a </cert> w pliku .ovpn i wklej go w tym polu.
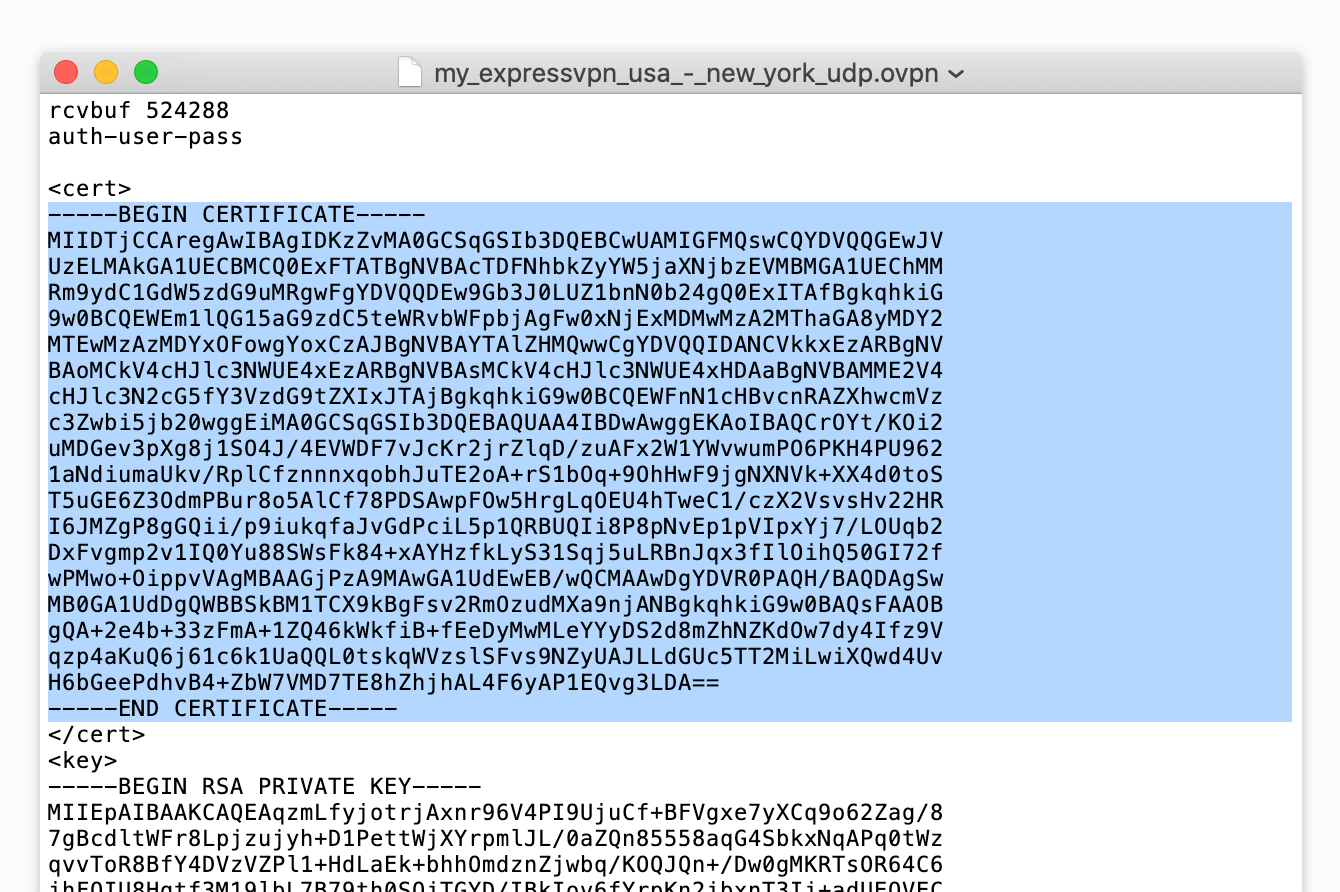
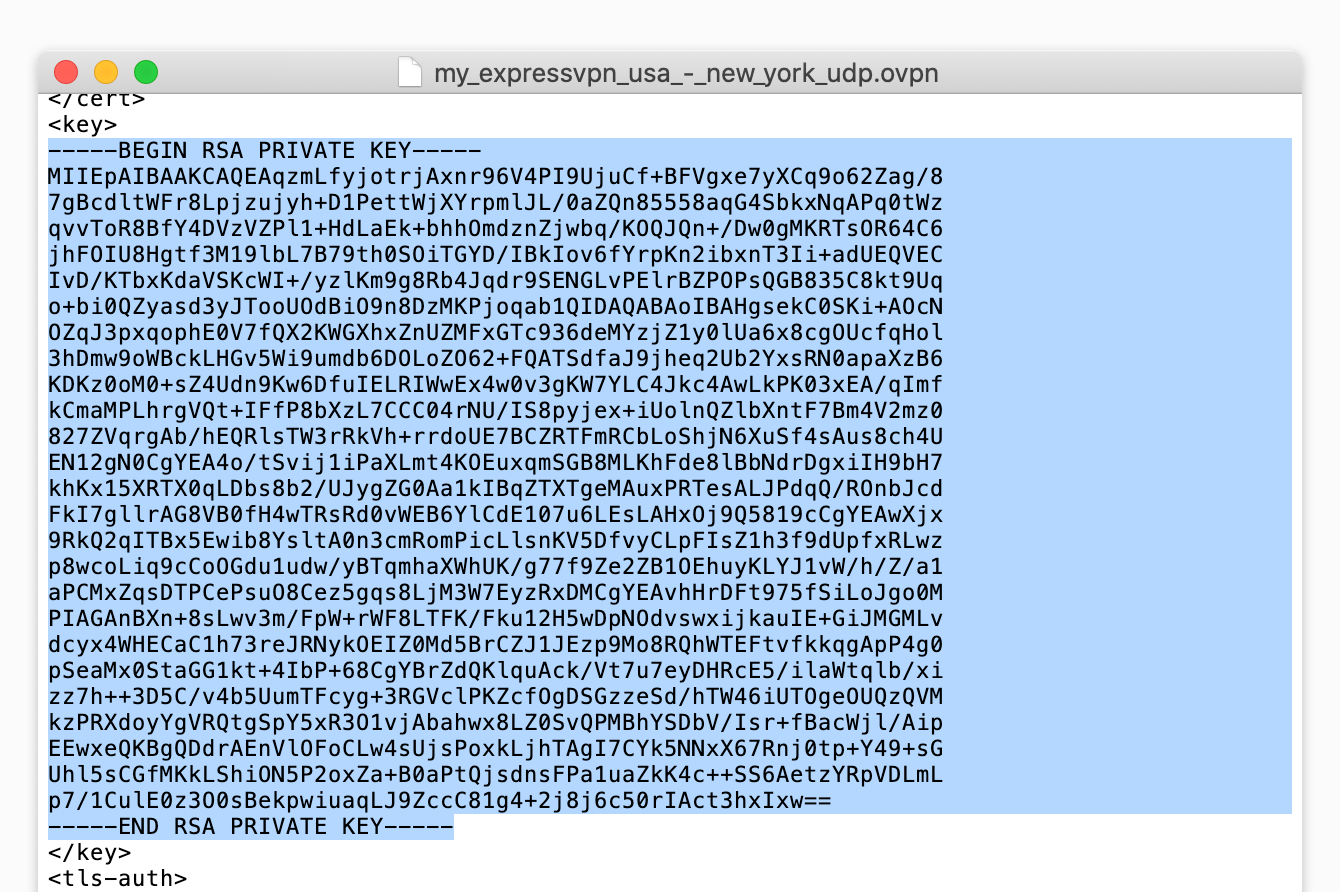
W polu Private Client Key skopiuj tekst między tagami <key> a </key> w pliku .ovpn i wklej go w tym polu.
Kliknij Save, a następnie Apply settings, aby nawiązać połączenie z VPN.
Jeśli używasz DD-WRT bez opcji User Pass Authentication, przejdź do Administration > Commands i wprowadź następujące polecenia:
echo USERNAMEHERE > /tmp/auth.txt
 echo PASSWORDHERE >> /tmp/auth.txt
Następnie kliknij Save Startup.
Przejdź do Administration > Management i kliknij Reboot Router.
Potrzebujesz pomocy? Skontaktuj się z zespołem pomocy technicznej ExpressVPN, aby uzyskać natychmiastowe wsparcie.
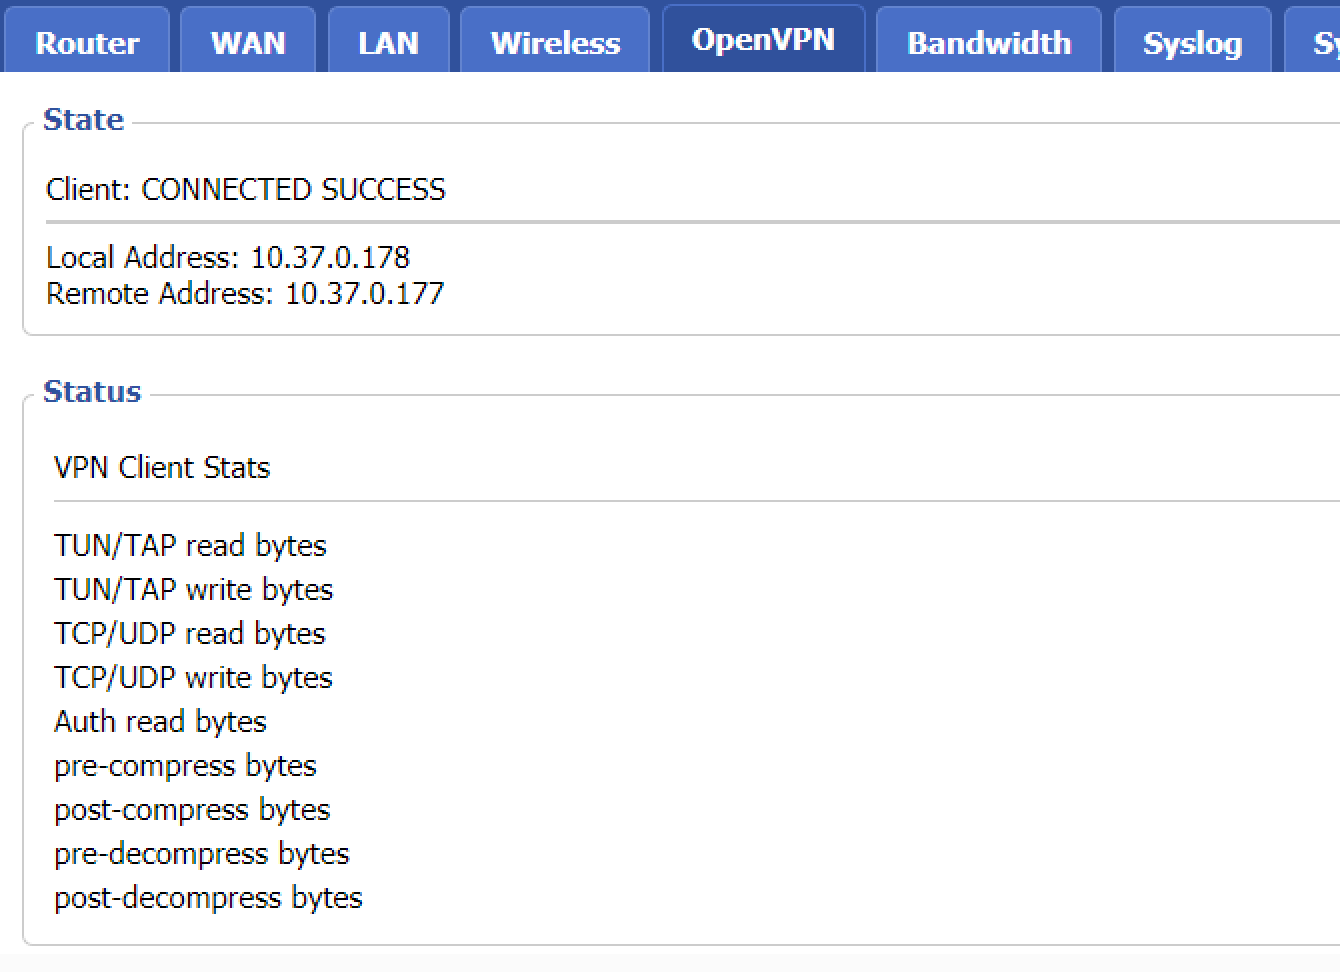
4. Sprawdź status swojego połączenia
Przejdź do Status > OpenVPN. Jeśli nawiązanie połączenia VPN powiedzie się, zobaczysz komunikat „CONNECTED SUCCESS” oraz następujące informacje:
Jeśli nie możesz połączyć się z VPN, być może w routerze ustawiono nieprawidłowy czas i datę. To uniemożliwia routerowi prawidłowe połączenie z serwerem VPN. Aby rozwiązać ten problem, spróbuj zresetować czas systemowy routera i ponownie połącz się z siecią VPN.
Potrzebujesz pomocy? Skontaktuj się z zespołem pomocy technicznej ExpressVPN, aby uzyskać natychmiastowe wsparcie.