Servers are just computers without screens and keyboards, but they can be relatively cheap to buy, compared with the costs of renting a Virtual Private Server (VPS) in the cloud.
Storage can quickly become expensive in a cloud instance, but hard drives with over 1TB capacity cost less than 50 USD.
With that in mind, let’s look at how to build a home server so you can cut down on expensive online storage space. We’ll go over some software you can install on your home server, specifically software for the "sovereign individual," and things that we might not want to run on somebody else’s computer for security concerns.
A step-by-step guide to installing a home server
1. Start with a simple computer with an inexpensive or integrated graphics processor (in case you want to show some statistics or graphics on a monitor later).
2. Hook the computer to a screen and keyboard (just for the installation process—that way you won’t need to learn how to install Ubuntu via the network).
3. Install Ubuntu with the minimum requirements and enable ssh and open a port in the built-in firewall. It’s quite important that you disable password-based login via ssh, and it is not recommended to make the open port accessible to the general internet. Instead, keep your home server behind a physical firewall like a router, and only forward the ports that you want to be accessible for everyone.
[expand title="Ubuntu installation steps in detail"]
- Prepare your server by connecting monitor, keyboard, mouse, and ethernet cable
- Prepare a Ubuntu Live USB
- Insert the Live USB into the server
- Start the server and enter the BIOS settings
- Boot from the Live USB and install Ubuntu on your server (all data will be wiped)
- After installation, enable shh with the following commands:
sudo apt update
sudo apt install ssh
sudo ufw allow 22 - You can now disconnect your monitor, keyboard, and mouse and use your regular computer
- To find out your server’s internal IP address, navigate to your router and see the list of connected devices
- You can log in to your server with the command ssh ubuntu@192.168.0.2
Replace "ubuntu" with your username and the IP address with your server’s IP address - Once logged in, you can add your computer’s ssh key to the server and disable login with username and password for your security
- You’re now ready to install programs on your computer! Best is to start with getting the latest updates:
sudo apt update
sudo apt upgrade
[/expand]
4. Once ssh is enabled, you can log in to your home server from your laptop, as long as you are on the same network.
Things to do with your own home server
The following suggestions are relatively easy if you are comfortable with a command line. You will be required to edit configuration files, but not to do any programming.
Looking for a more detailed guide? Check out how to set up a home server and use it as a Bitcoin node
Host your own Tor .onion service
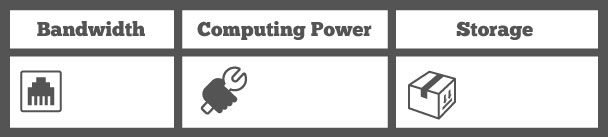
How much computing power you consume will, of course, depend on what you are hosting, and your bandwidth requirements depend on how many people visit your site. But for a simple personal website, your needs won’t be very high. All you need is the code for your website, a web server (like nginx or apache), and the Tor software.
Host a chat service
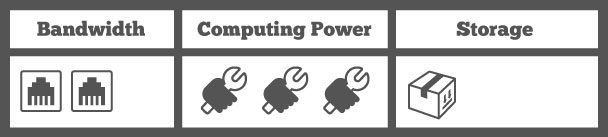
A chat service like ejabberd is easy to install, but can be tedious to configure. Sadly, there are also fewer people using Jabber/XMPP as people migrate to centralized mobile platforms, despite the excellent encryption feature of OTR.
Run a Tor node
Installing and configuring a Tor node is among the simplest things you can do and is an excellent service to privacy. Be careful though, if the location of your hidden service really needs to be secret, don’t run a relay and a hidden service at the same time.
If you’re on a residential connection, you might also not want to run an exit node, as this could make it appear as if other people use your internet connection for nefarious things. If you are in a country where you can be held liable for what others do on your IP, just set up a relay instead.
Run a Bitcoin node
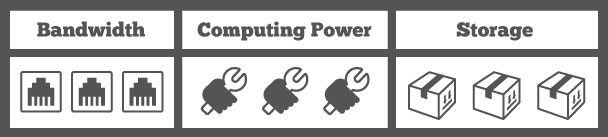
Your small home server will likely need a storage extension to run Bitcoin, which has reached 330GB and will grow at about 40-80GB per year.
Running a Bitcoin node is an excellent idea if you’re trying to verify the integrity of the network for yourself, for example, if you receive Bitcoin payments regularly, or if you invest in it. Otherwise, running a full node can just be your small contribution to the decentralization of tomorrow’s financial infrastructure.
Run a lightning node
Unlike running a Tor or Bitcoin node, a Lightning node is mainly for you. You can use it for more and more things already, and the promise of instant, low-cost Bitcoin transactions is undoubtedly intriguing. To run a lightning node, you will also need to run a Bitcoin node, though you can cut down on its bandwidth requirements by not relaying blocks or transactions.
Run your own servers to decentralize the web
The internet is becoming more and more centralized as applications and data get pushed into the cloud. With just a dozen large cloud providers around the world, they are more able than ever to spy on us and even deny us access to our email, data, or communications.
By putting our data back in our homes, we can slowly take back our rights from those in control of our privacy.
FAQ: About Ubuntu home server
Can I use Ubuntu Desktop as a home server?
Is Ubuntu Server free for personal use?
Is Ubuntu Server good for a server?
How much RAM does Ubuntu Server use?
Take the first step to protect yourself online. Try ExpressVPN risk-free.
Get ExpressVPN

Comments
I won't to set up a marketing server