Du må registrere deg for en ExpressVPN-konto for å bruke appene og konfigurasjonene våre.
Denne veiledningen vil vise deg hvordan du setter opp ExpressVPN på din Tomato-ruter ved hjelp av OpenVPN-protokollen.
Ikke alle ExpressVPN-lokasjoner er tilgjengelige for manuelt konfigurerte tilkoblinger.
Tomato er en tilpasset firmware som tilbyr avanserte nettverksfunksjoner og støtte for OpenVPN-protokollen. Trinnene nedenfor ble testet på AdvancedTomato Versjon 3.5-140. Se en liste over AdvancedTomato-støttede rutere.
Før du fortsetter, må du sørge for at du har satt opp Tomato-firmware på ruteren din.
Hopp til…
1. Finn dine ExpressVPN-kontoinformasjoner
2. Konfigurer din Tomato-ruter
3. Koble til en VPN-serverlokasjon
Koble fra en VPN-serverlokasjon
1. Finn dine ExpressVPN-kontoinformasjoner
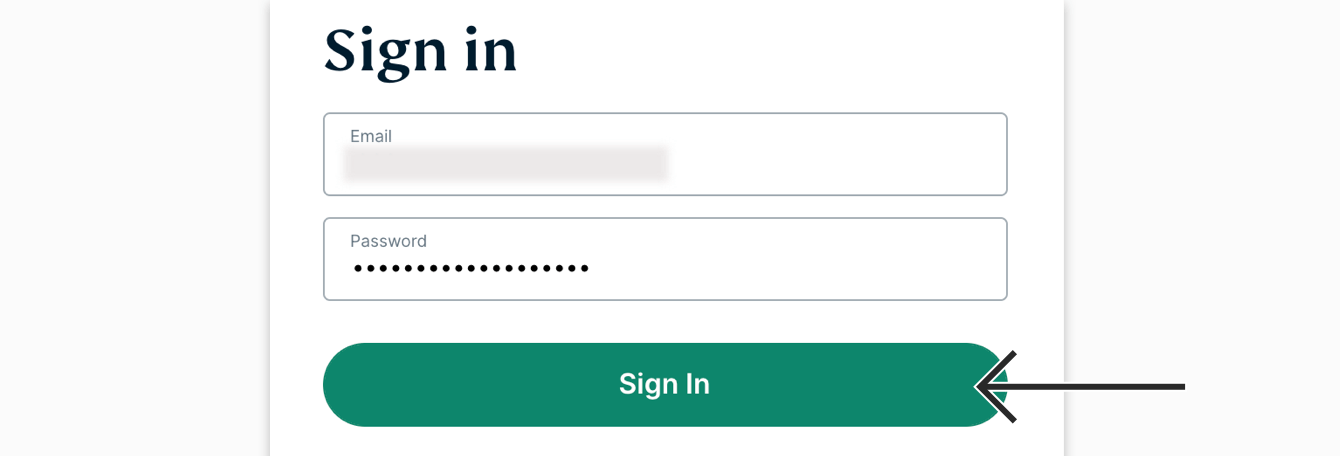
Gå til ExpressVPN oppsettside. Hvis du blir bedt om det, skriv inn dine ExpressVPN legitimasjon og velg Logg inn.
Angi bekreftelseskoden som er sendt til din e-post.
På høyre side vil du se ditt brukernavn, passord, og en liste over OpenVPN-konfigurasjonsfiler.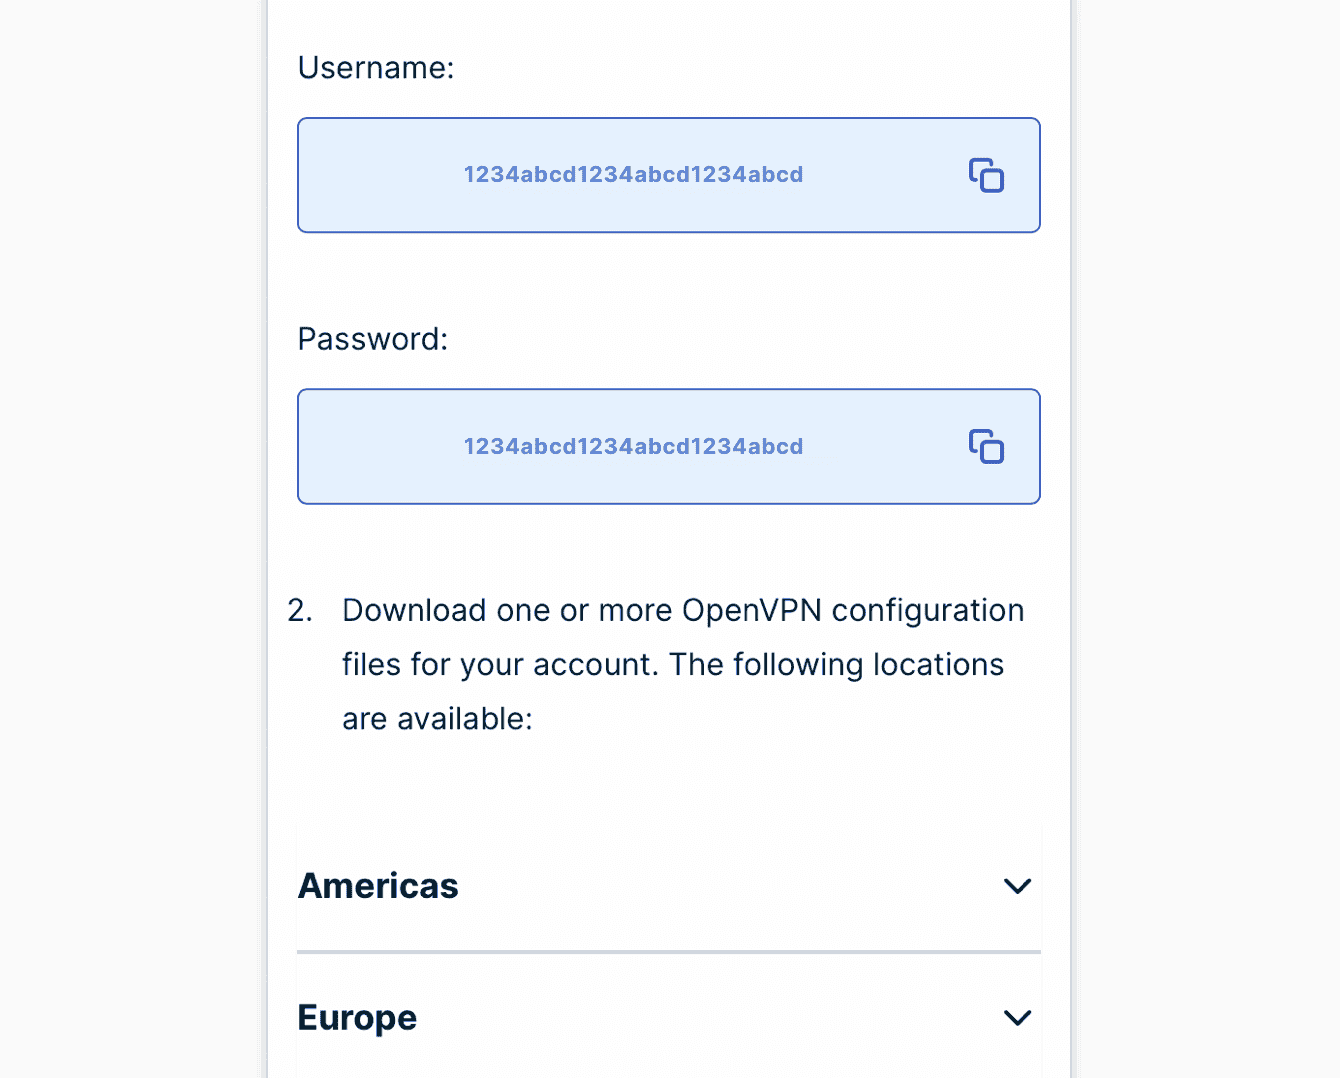
Velg lokasjonene du vil koble til. Dette vil laste ned de tilhørende .ovpn-filene til enheten din.
Hold dette nettleservinduet åpent. Du vil trenge denne informasjonen for oppsettet senere.
Trenger du hjelp? Kontakt ExpressVPN Support-teamet for umiddelbar hjelp.
2. Konfigurer din Tomato-ruter
I adressefeltet i nettleseren din, skriv inn ruterens IP-adresse.
Skriv inn brukernavn og passord. (Som standard er de root og admin.) Klikk Logg Inn.
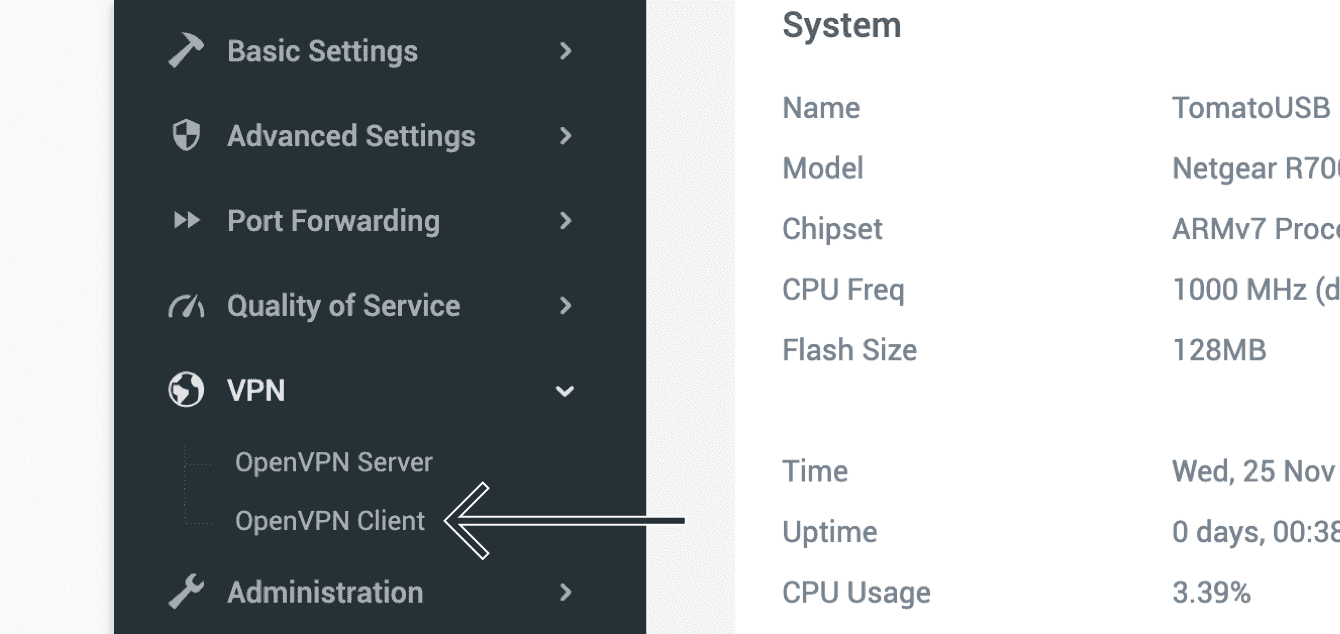
Når du er inne i admin-innstillingene, klikk på VPN > OpenVPN-klient i venstre sidefelt.
Under Grunnleggende-fanen, skriv inn følgende informasjon:
- Start med WAN: Merk av denne boksen.
- Grensesnittype: Velg TUN.
- Protokoll: Velg UDP.
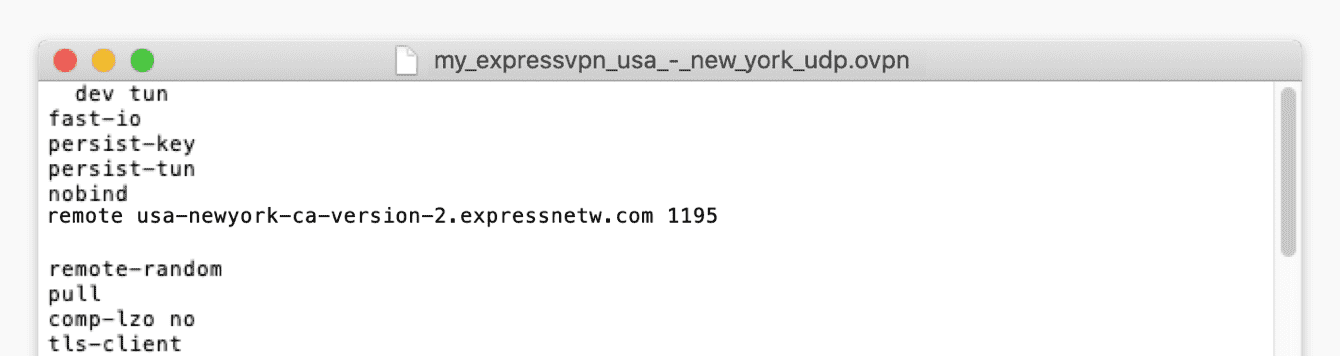
- Serveradresse/Port: For å få denne informasjonen, høyreklikk på .ovpn-konfigurasjonsfilen du lastet ned tidligere og åpne den med en hvilken som helst tekstredigerer. For det første feltet, skriv inn serveradressen mellom ordet “remote” og det 4-sifrede tallet i det første feltet. For det andre feltet, skriv inn det 4-sifrede tallet på slutten av denne linjen.


- Brannmur: Velg Automatisk.
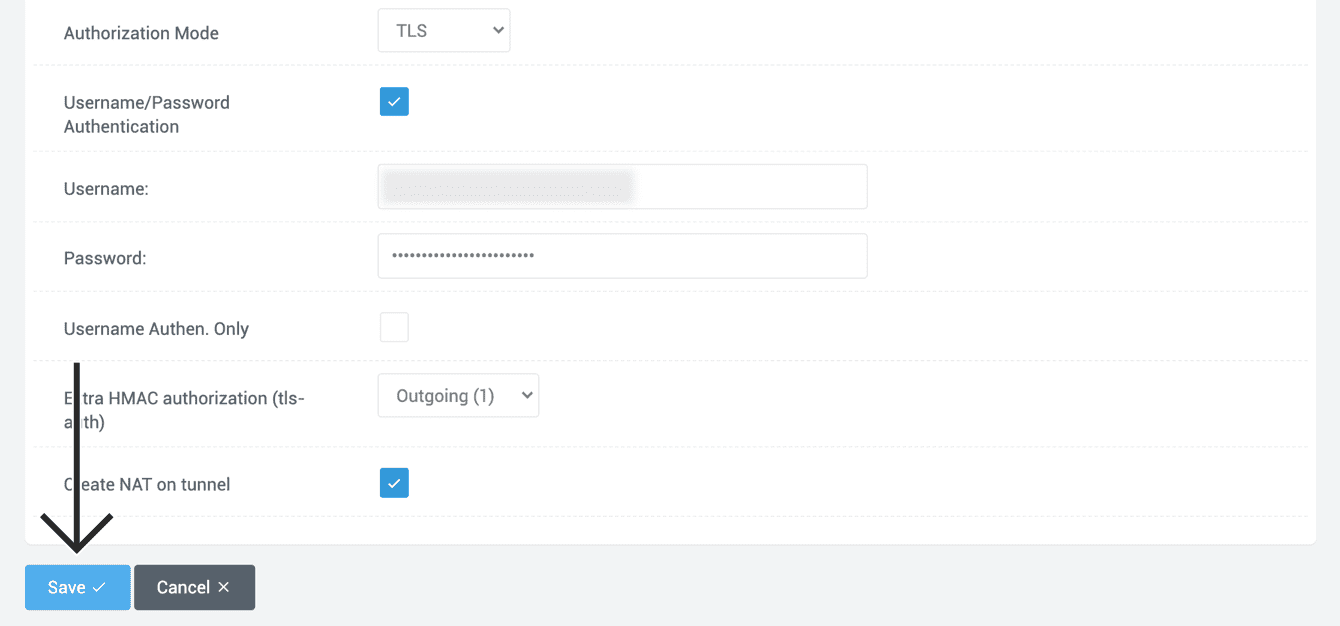
- Autorisasjonsmodus: Velg TLS.
- Brukernavn/Passord Autentisering: Merk av denne boksen.
- Brukernavn: Skriv inn OpenVPN-brukernavnet funnet tidligere.
- Passord: Skriv inn OpenVPN-passordet funnet tidligere.
- Brukernavn Autent. Kun: La stå umarkert.
- Ekstra HMAC-autorisasjon (tls-auth): Velg Utgående (1).
- Opprett NAT på tunnel: Merk av denne boksen.
Klikk Lagre.
Klikk på Avansert-fanen. Fyll inn følgende informasjon:
- Poll Intervall: La dette være som det er.
- Omdiriger Internett-trafikk: Merk av denne boksen.
- Godta DNS-konfigurasjon: Velg Eksklusiv.
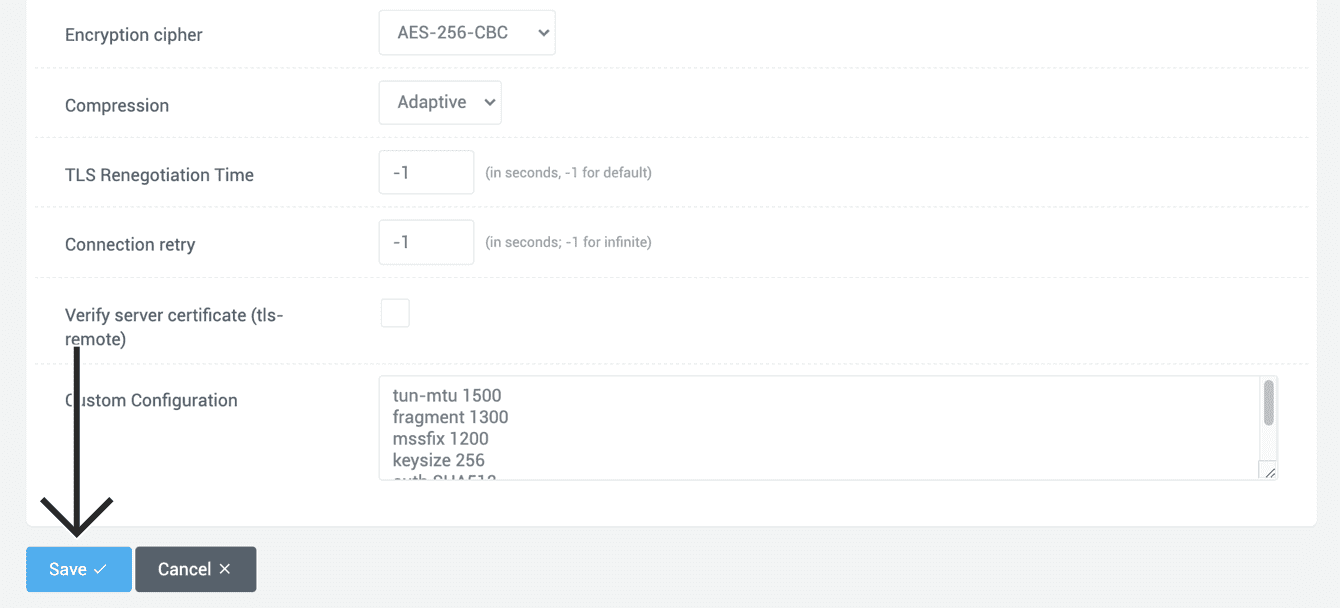
- Krypteringschiffer: Velg AES-256 CBC.
- Komprimering: Velg Adaptiv.
- TLS Forhandlingstid: Skriv inn -1.
- Tilkoblingsforsøk: Skriv inn -1.
- Verifiser serversertifikat (tls-remote): Fjern avmerkingen i denne boksen.
For Tilpasset konfigurasjon, finn og lim inn verdiene for følgende elementer i dette feltet i samme tekstredigerer som du åpnet tidligere:
- tun-mtu
- fragment
- mssfix
- keysize
- auth
- sndbuf
- rcvbuf
For eksempel, hvis du bruker .ovpn-konfigurasjonsfilen for USA – New York, lim inn:
tun-mtu 1500
 fragment 1300
 mssfix 1200
 keysize 256
 auth SHA512
 sndbuf 524288
 rcvbuf 524288
Klikk Lagre.
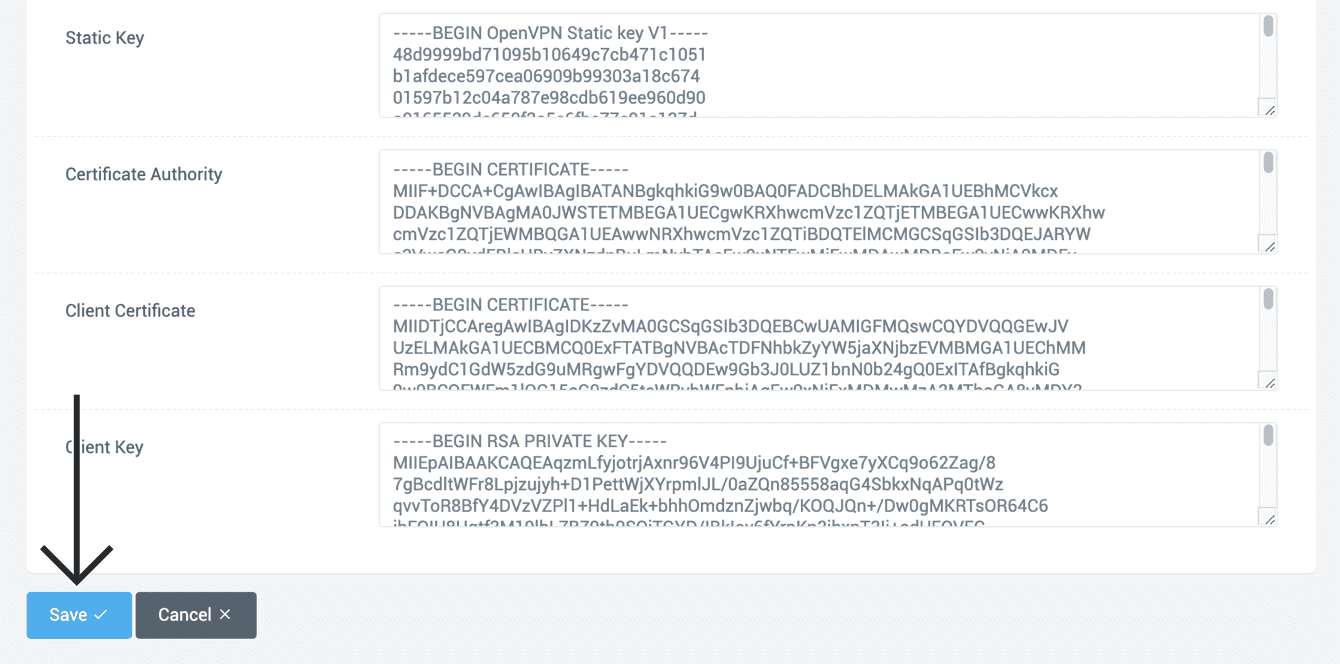
Øverst, klikk på Keys-fanen, kopier og lim inn teksten fra .ovpn-konfigurasjonsfilen i følgende felter:
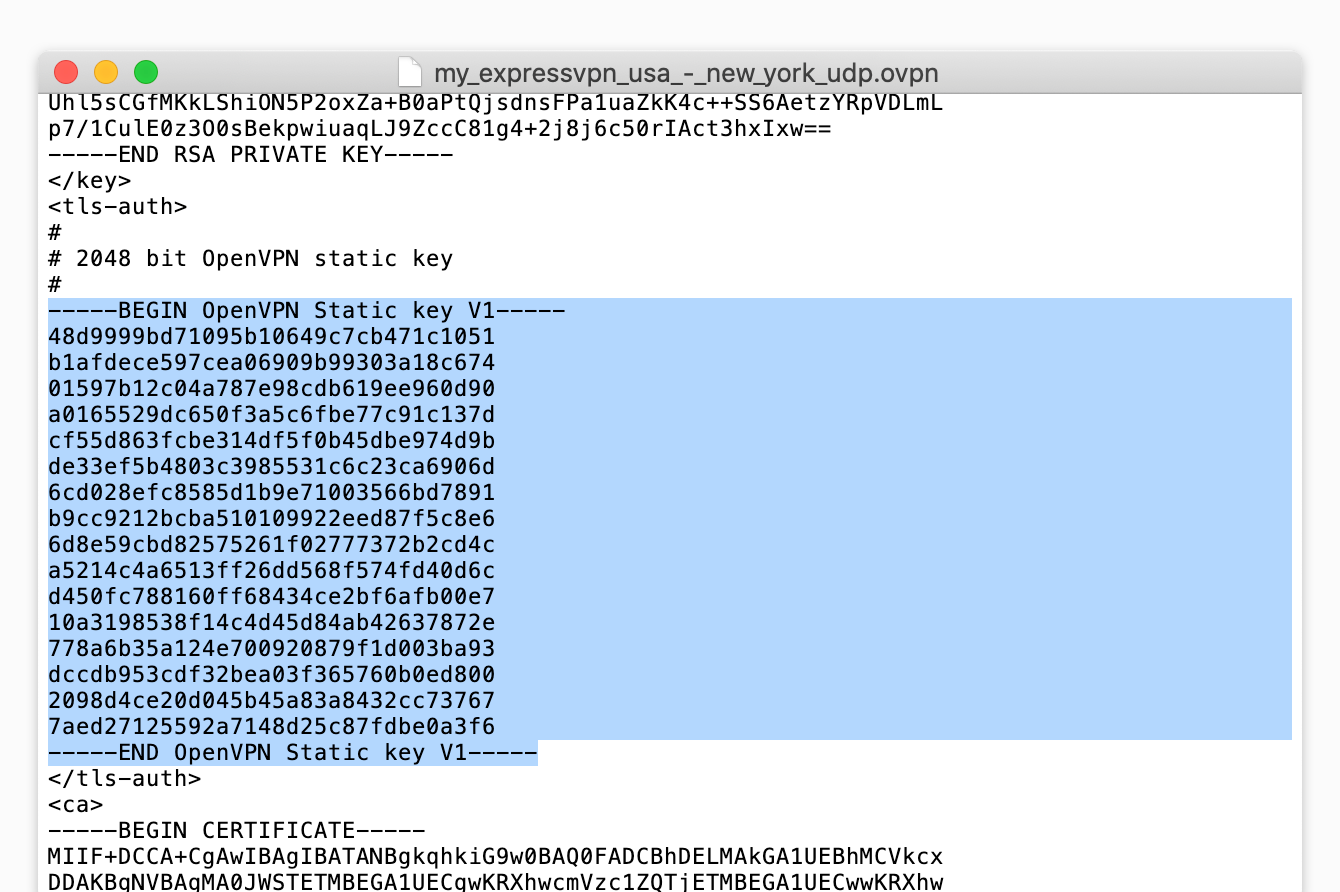
- Statisk Nøkkel: Kopier teksten mellom <tls-auth> og </tls-auth> taggene i .ovpn-filen og lim den inn i dette feltet.


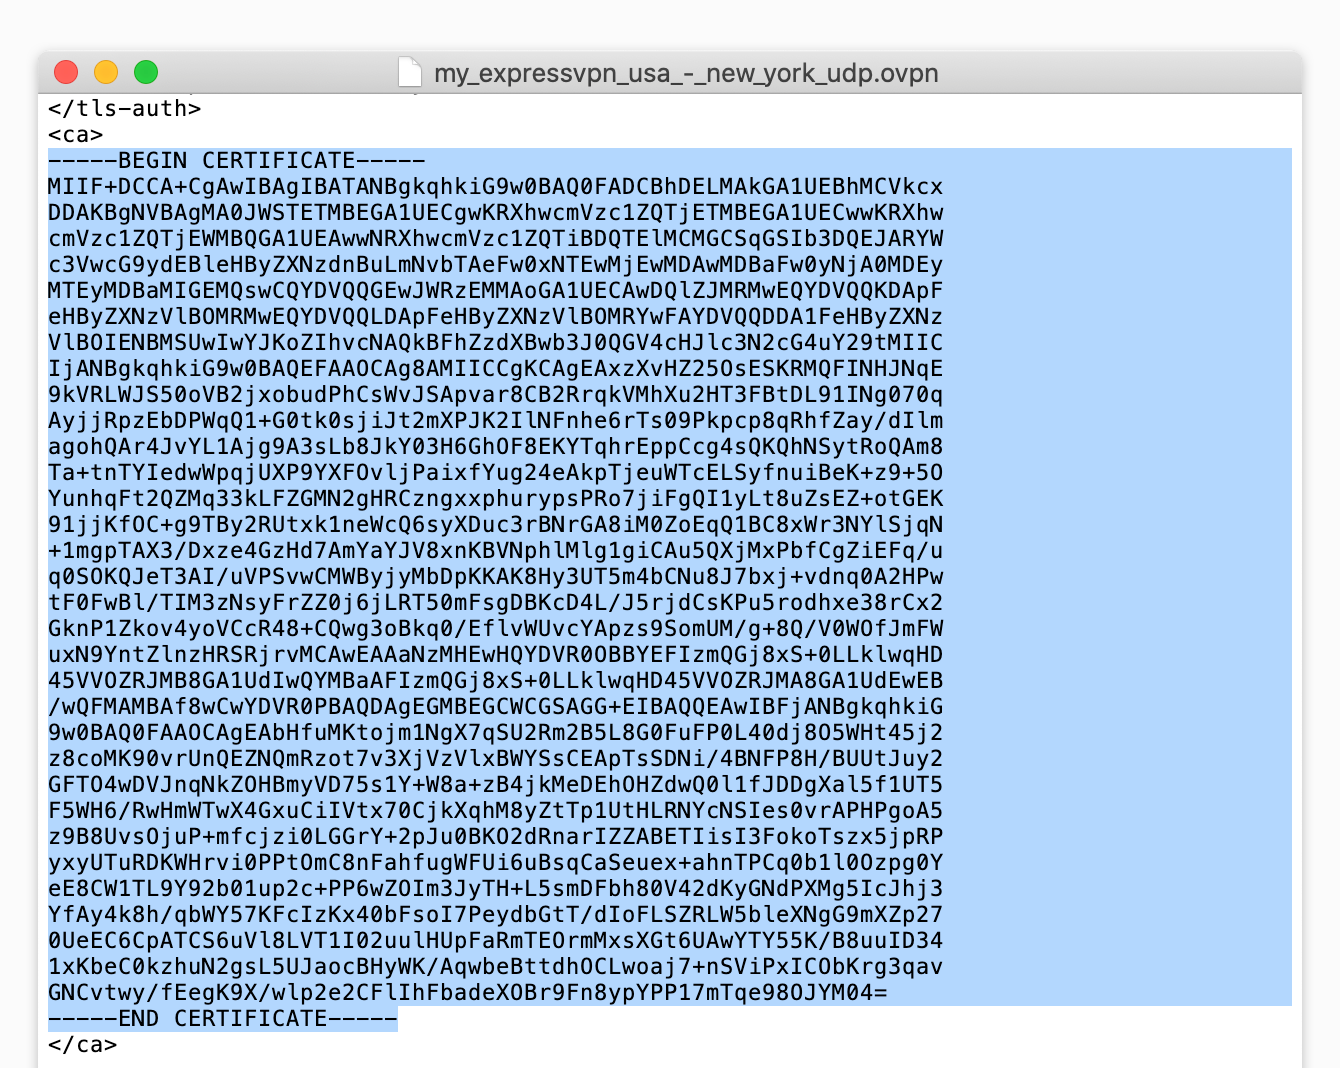
- Sertifikat Myndighet: Kopier teksten mellom <ca> og </ca> taggene i .ovpn-filen og lim den inn i dette feltet.


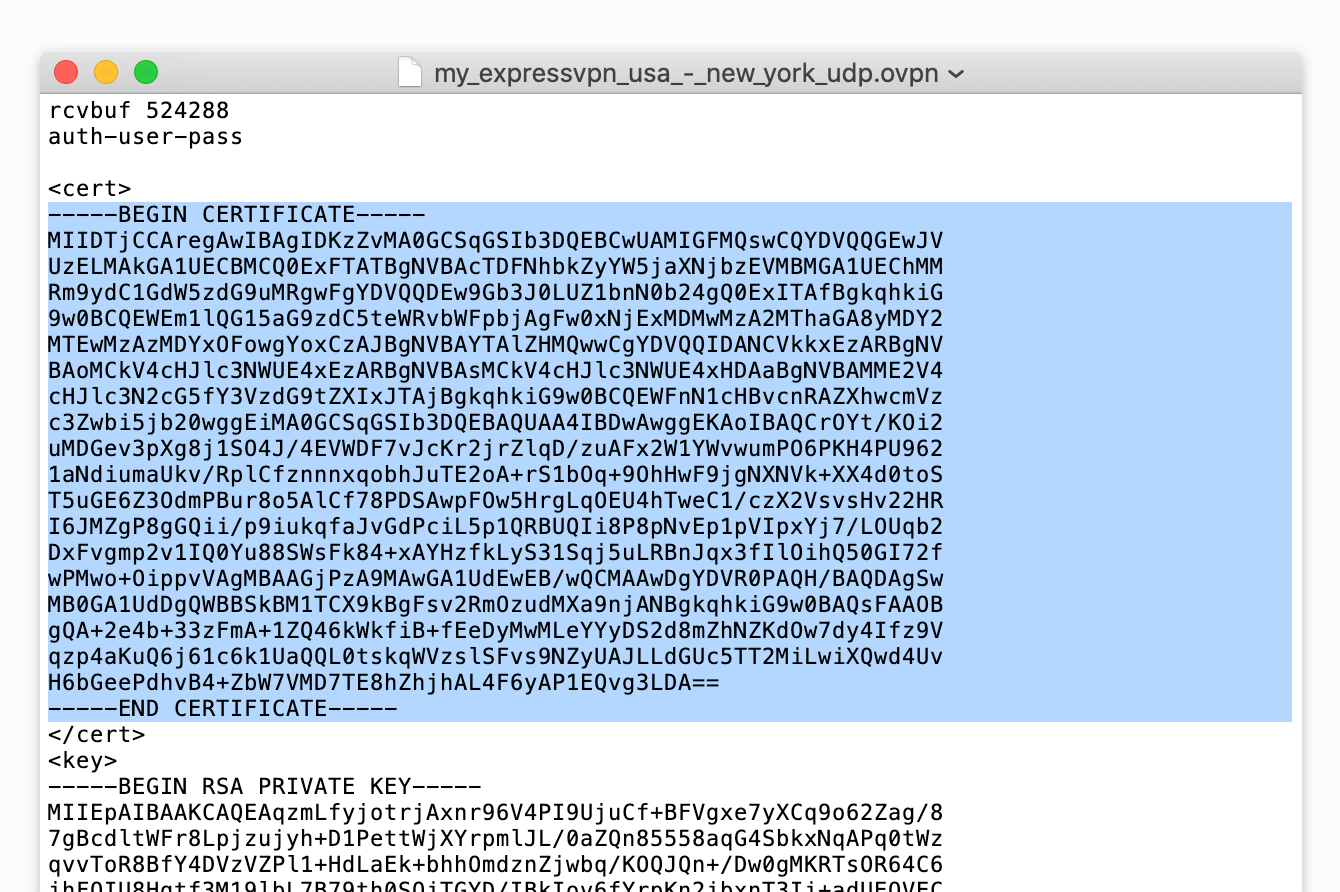
- Klient Sertifikat: Kopier teksten mellom <cert> og </cert> taggene i .ovpn-filen og lim den inn i dette feltet.

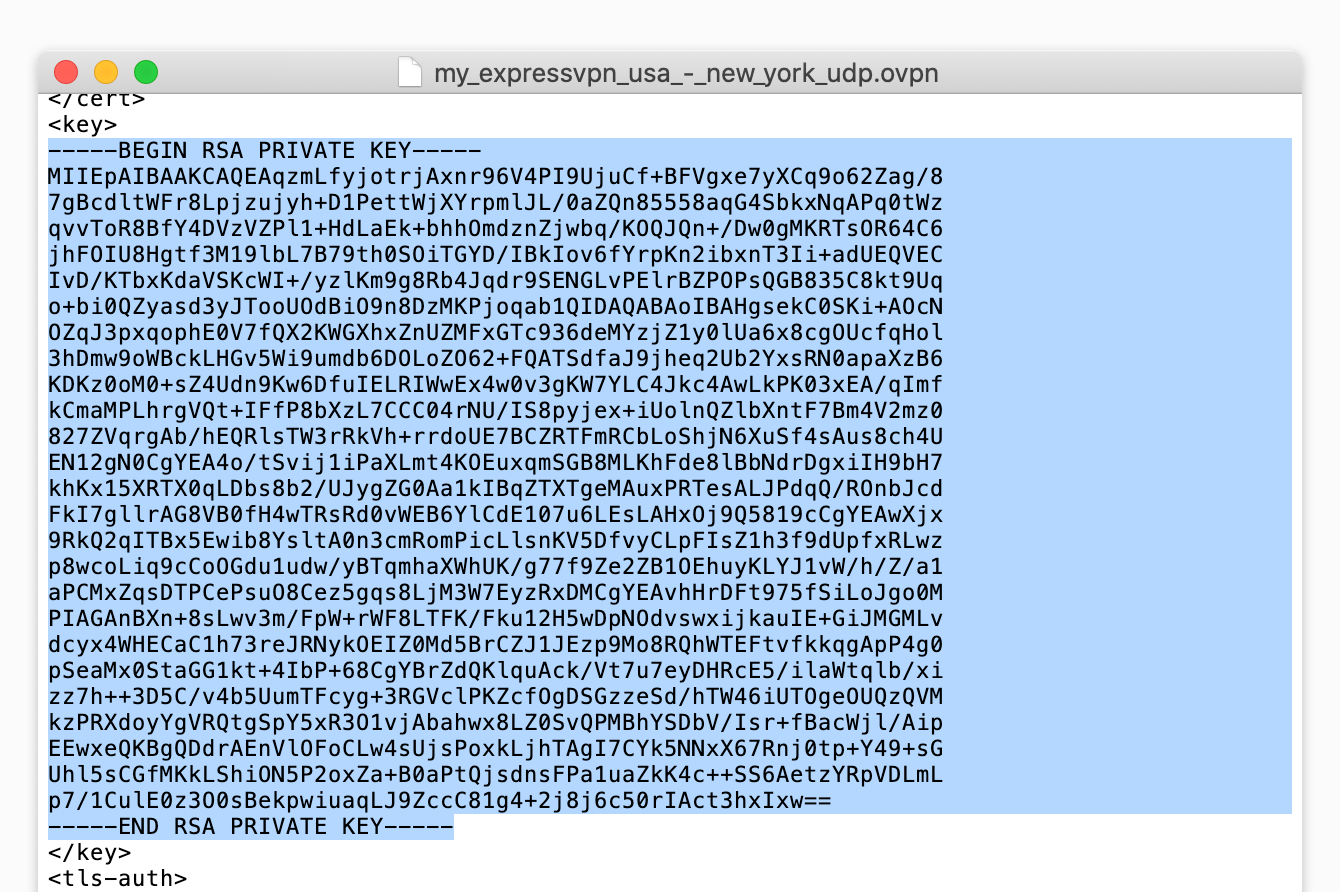
- Klient Nøkkel: Kopier teksten mellom <key> og </key> taggene i .ovpn-filen og lim den inn i dette feltet.

Klikk Lagre.
Trenger du hjelp? Klikk her for å kontakte ExpressVPN Support Team via live chat
3. Koble til en VPN-serverlokasjon
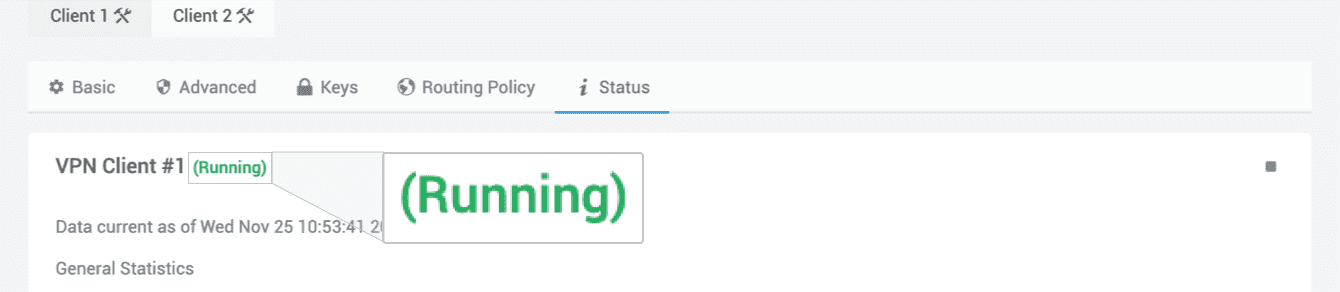
Øverst, klikk på Status-fanen. Klikk deretter på ►.
![]()
![]()
Når du er koblet til, vil du se ordet “Kjører.”
For å verifisere din tilkobling, kan du bruke ExpressVPNs IP-adressetester for å sjekke din IP-adresse. Hvis du er riktig tilkoblet, vil IP-adressen som vises korrelere med lokasjonen du er koblet til via VPN.
Trenger du hjelp? Klikk her for å kontakte ExpressVPN Support Team via live chat
Koble fra en VPN-serverlokasjon
For å koble fra, gå til VPN > OpenVPN Klient > Status. Klikk ■ . Du vil bli koblet fra VPN-en.
Trenger du hjelp? Klikk her for å kontakte ExpressVPN Support Team via live chat